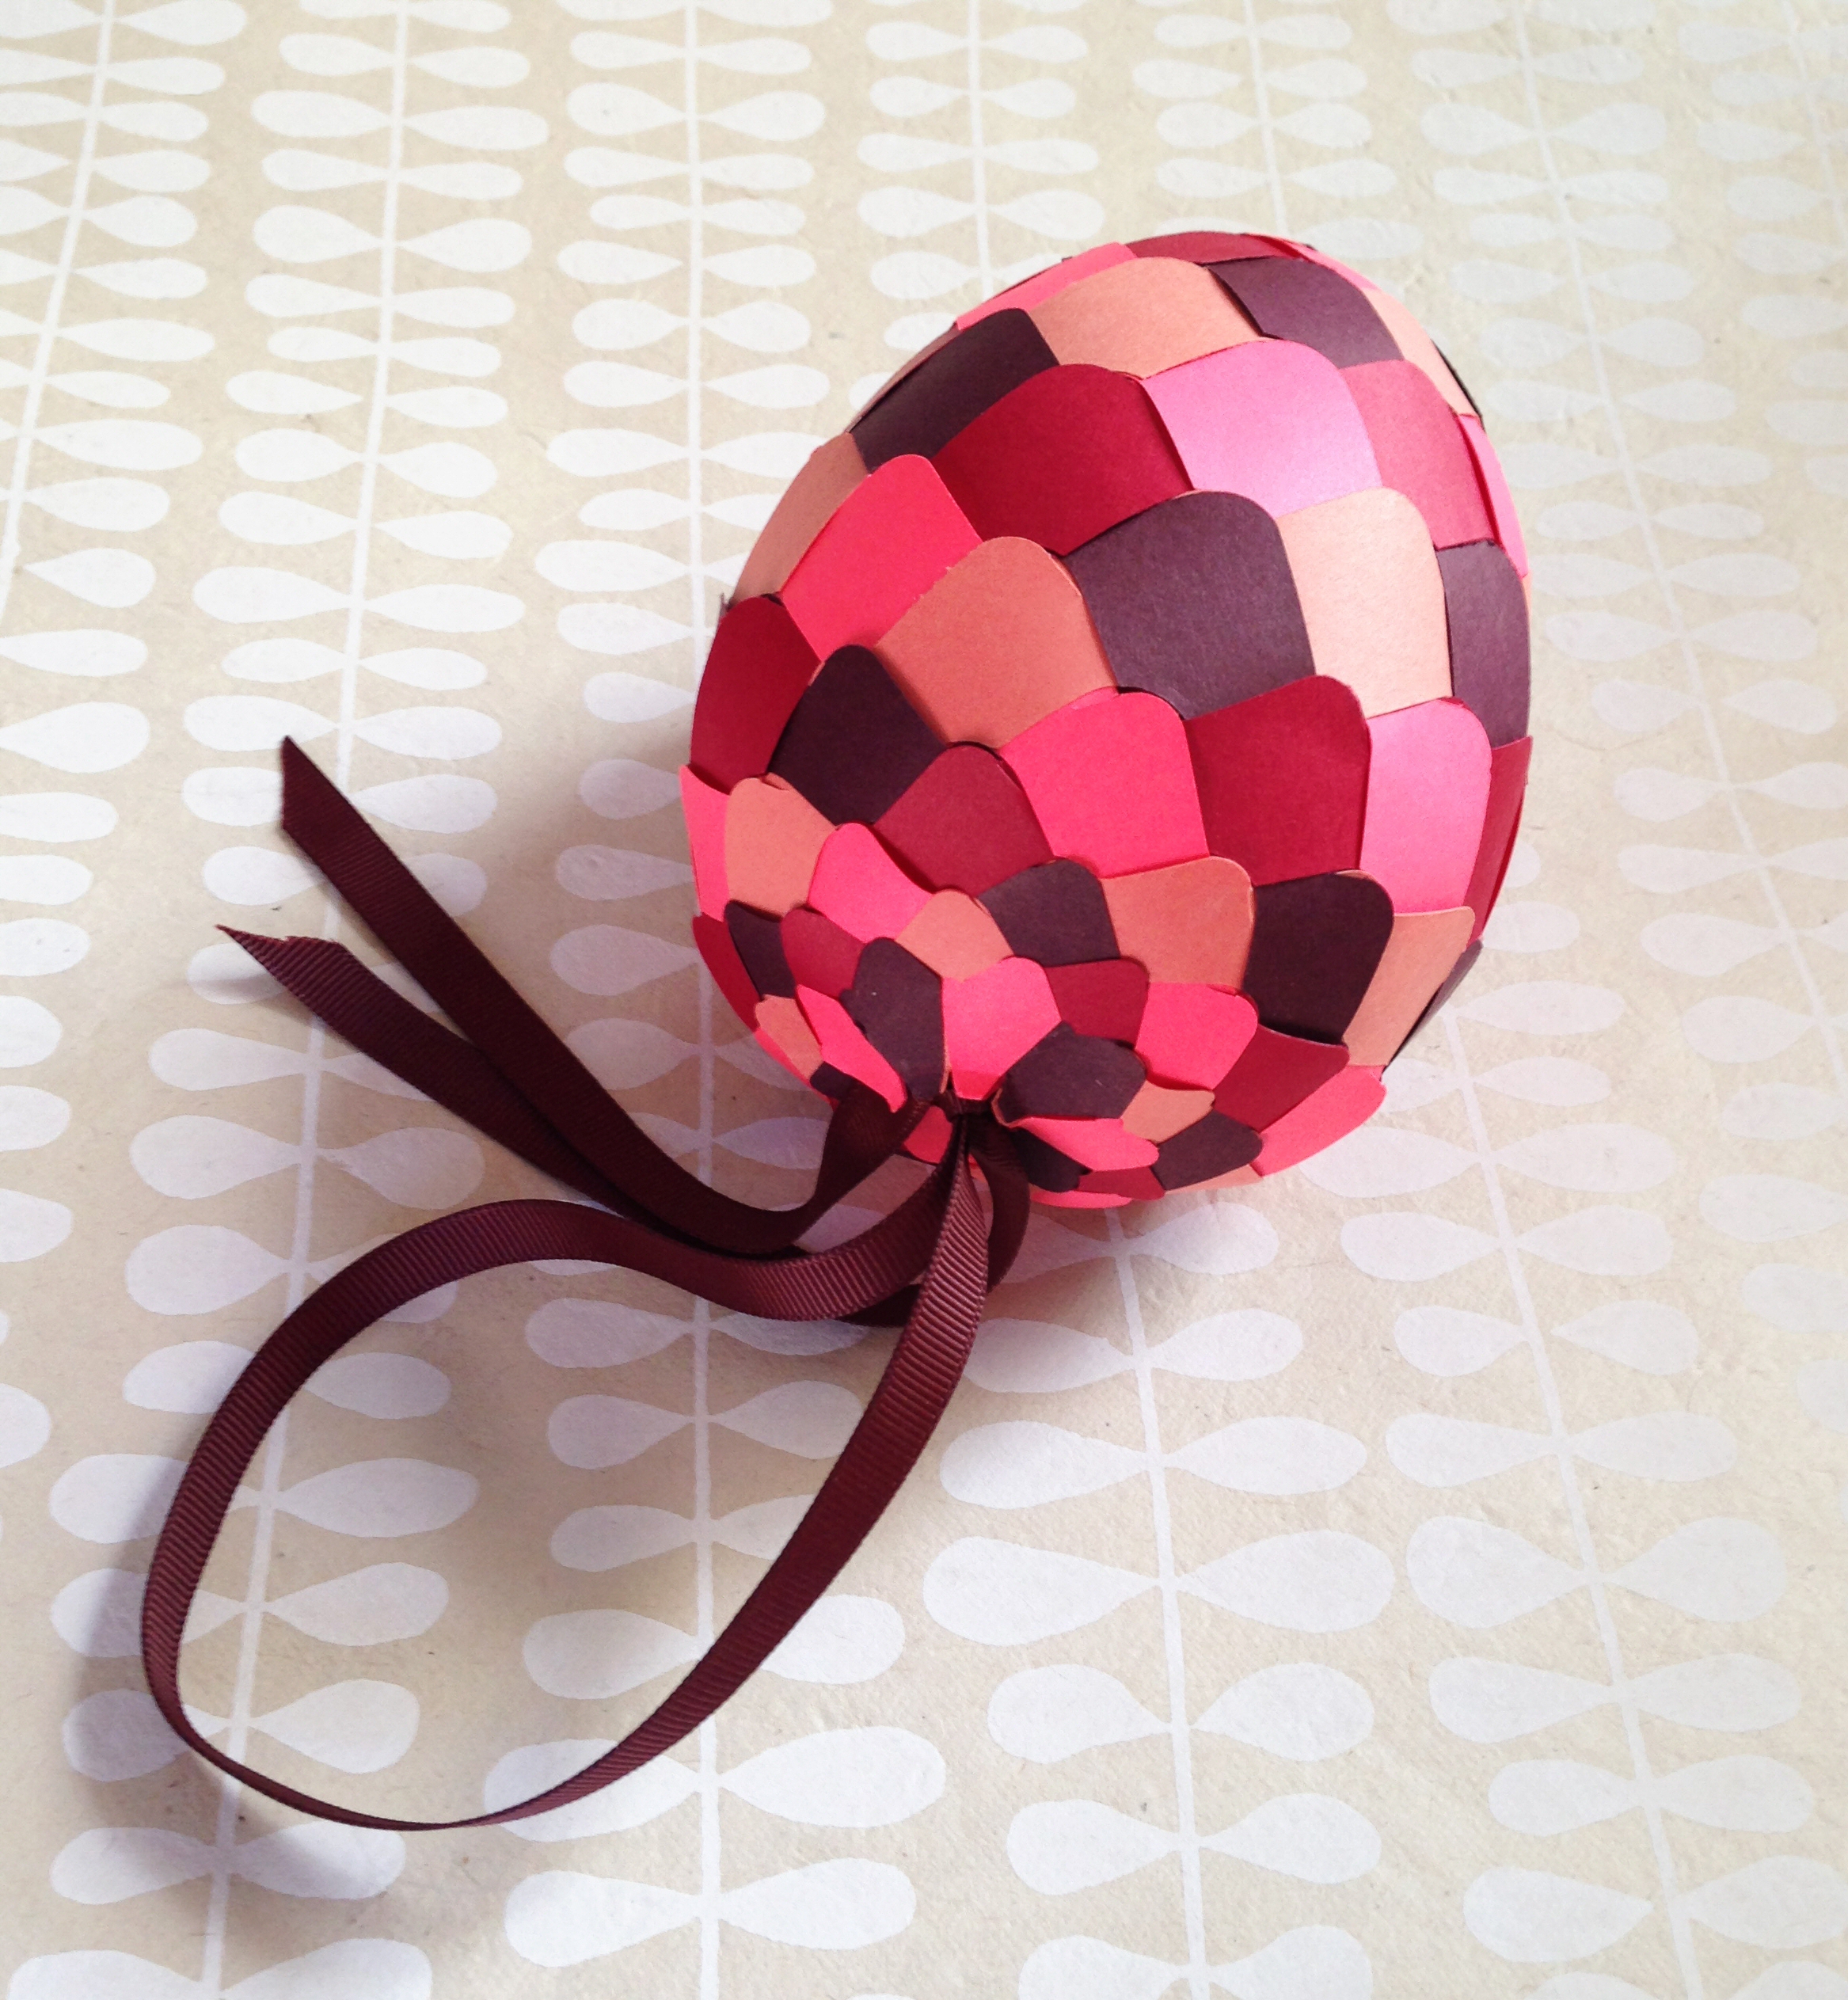
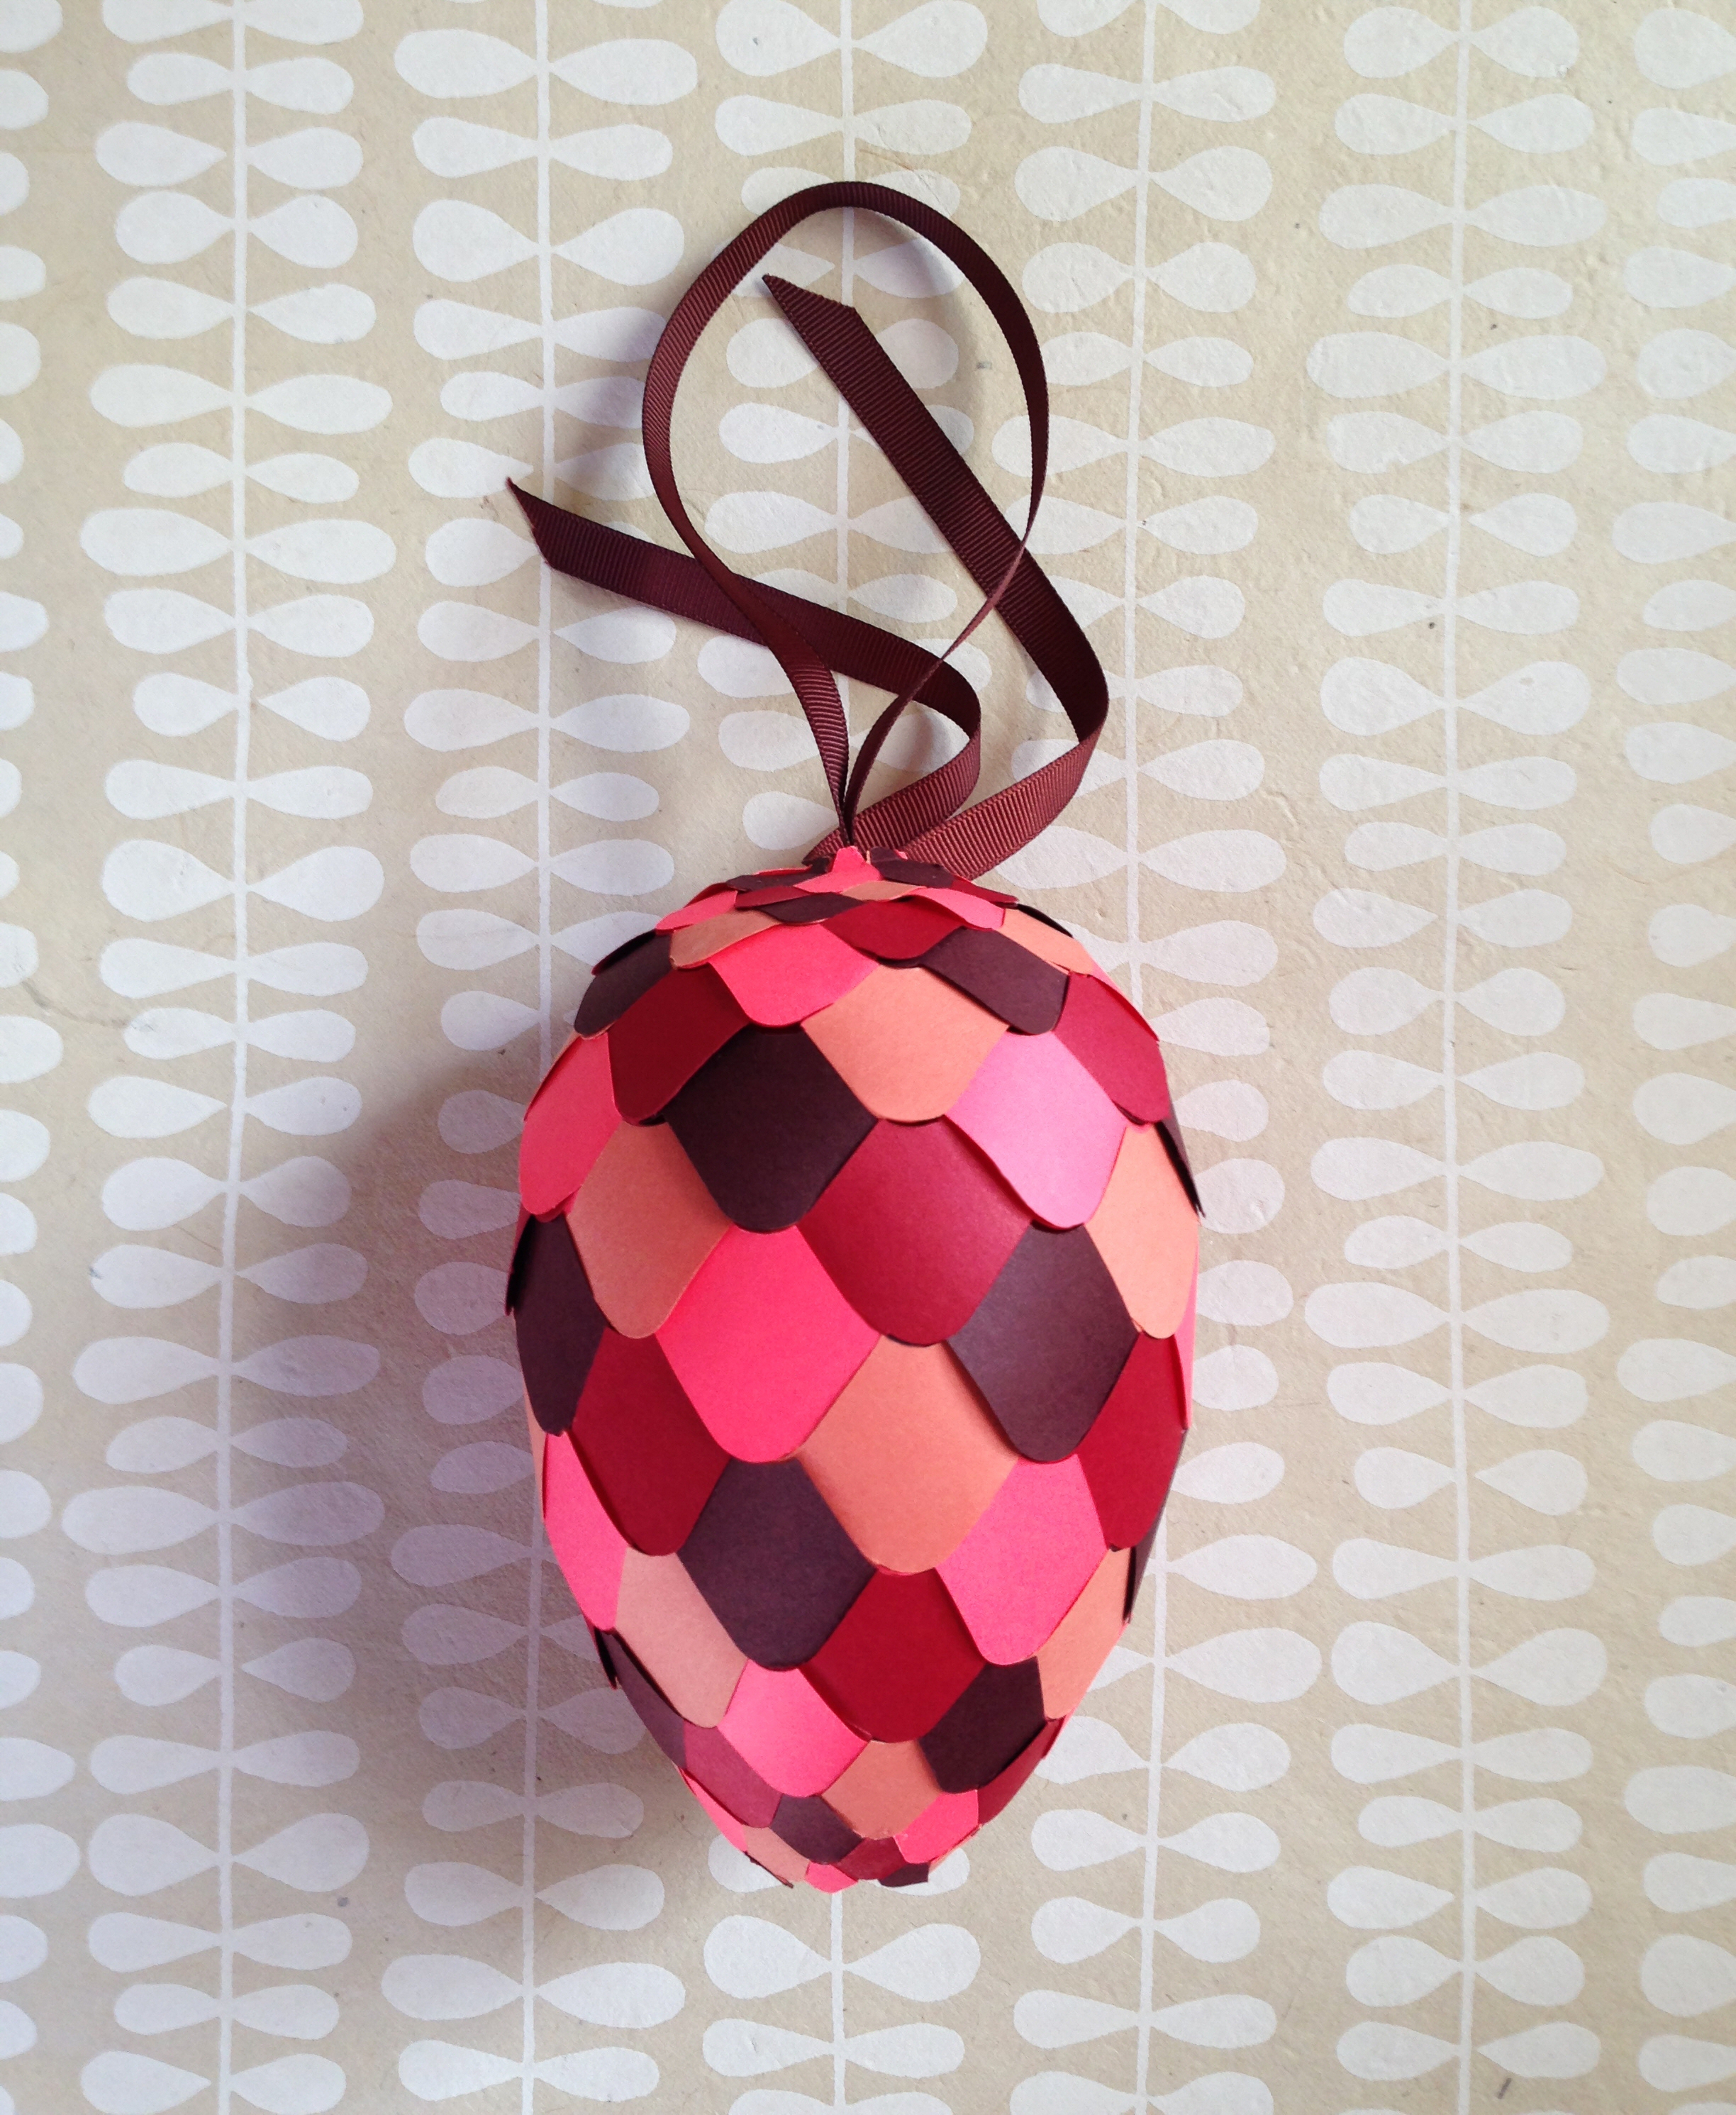
Anna made this Pinecone #01. It is much easier to weave than the spheres and eggs because the point is open.

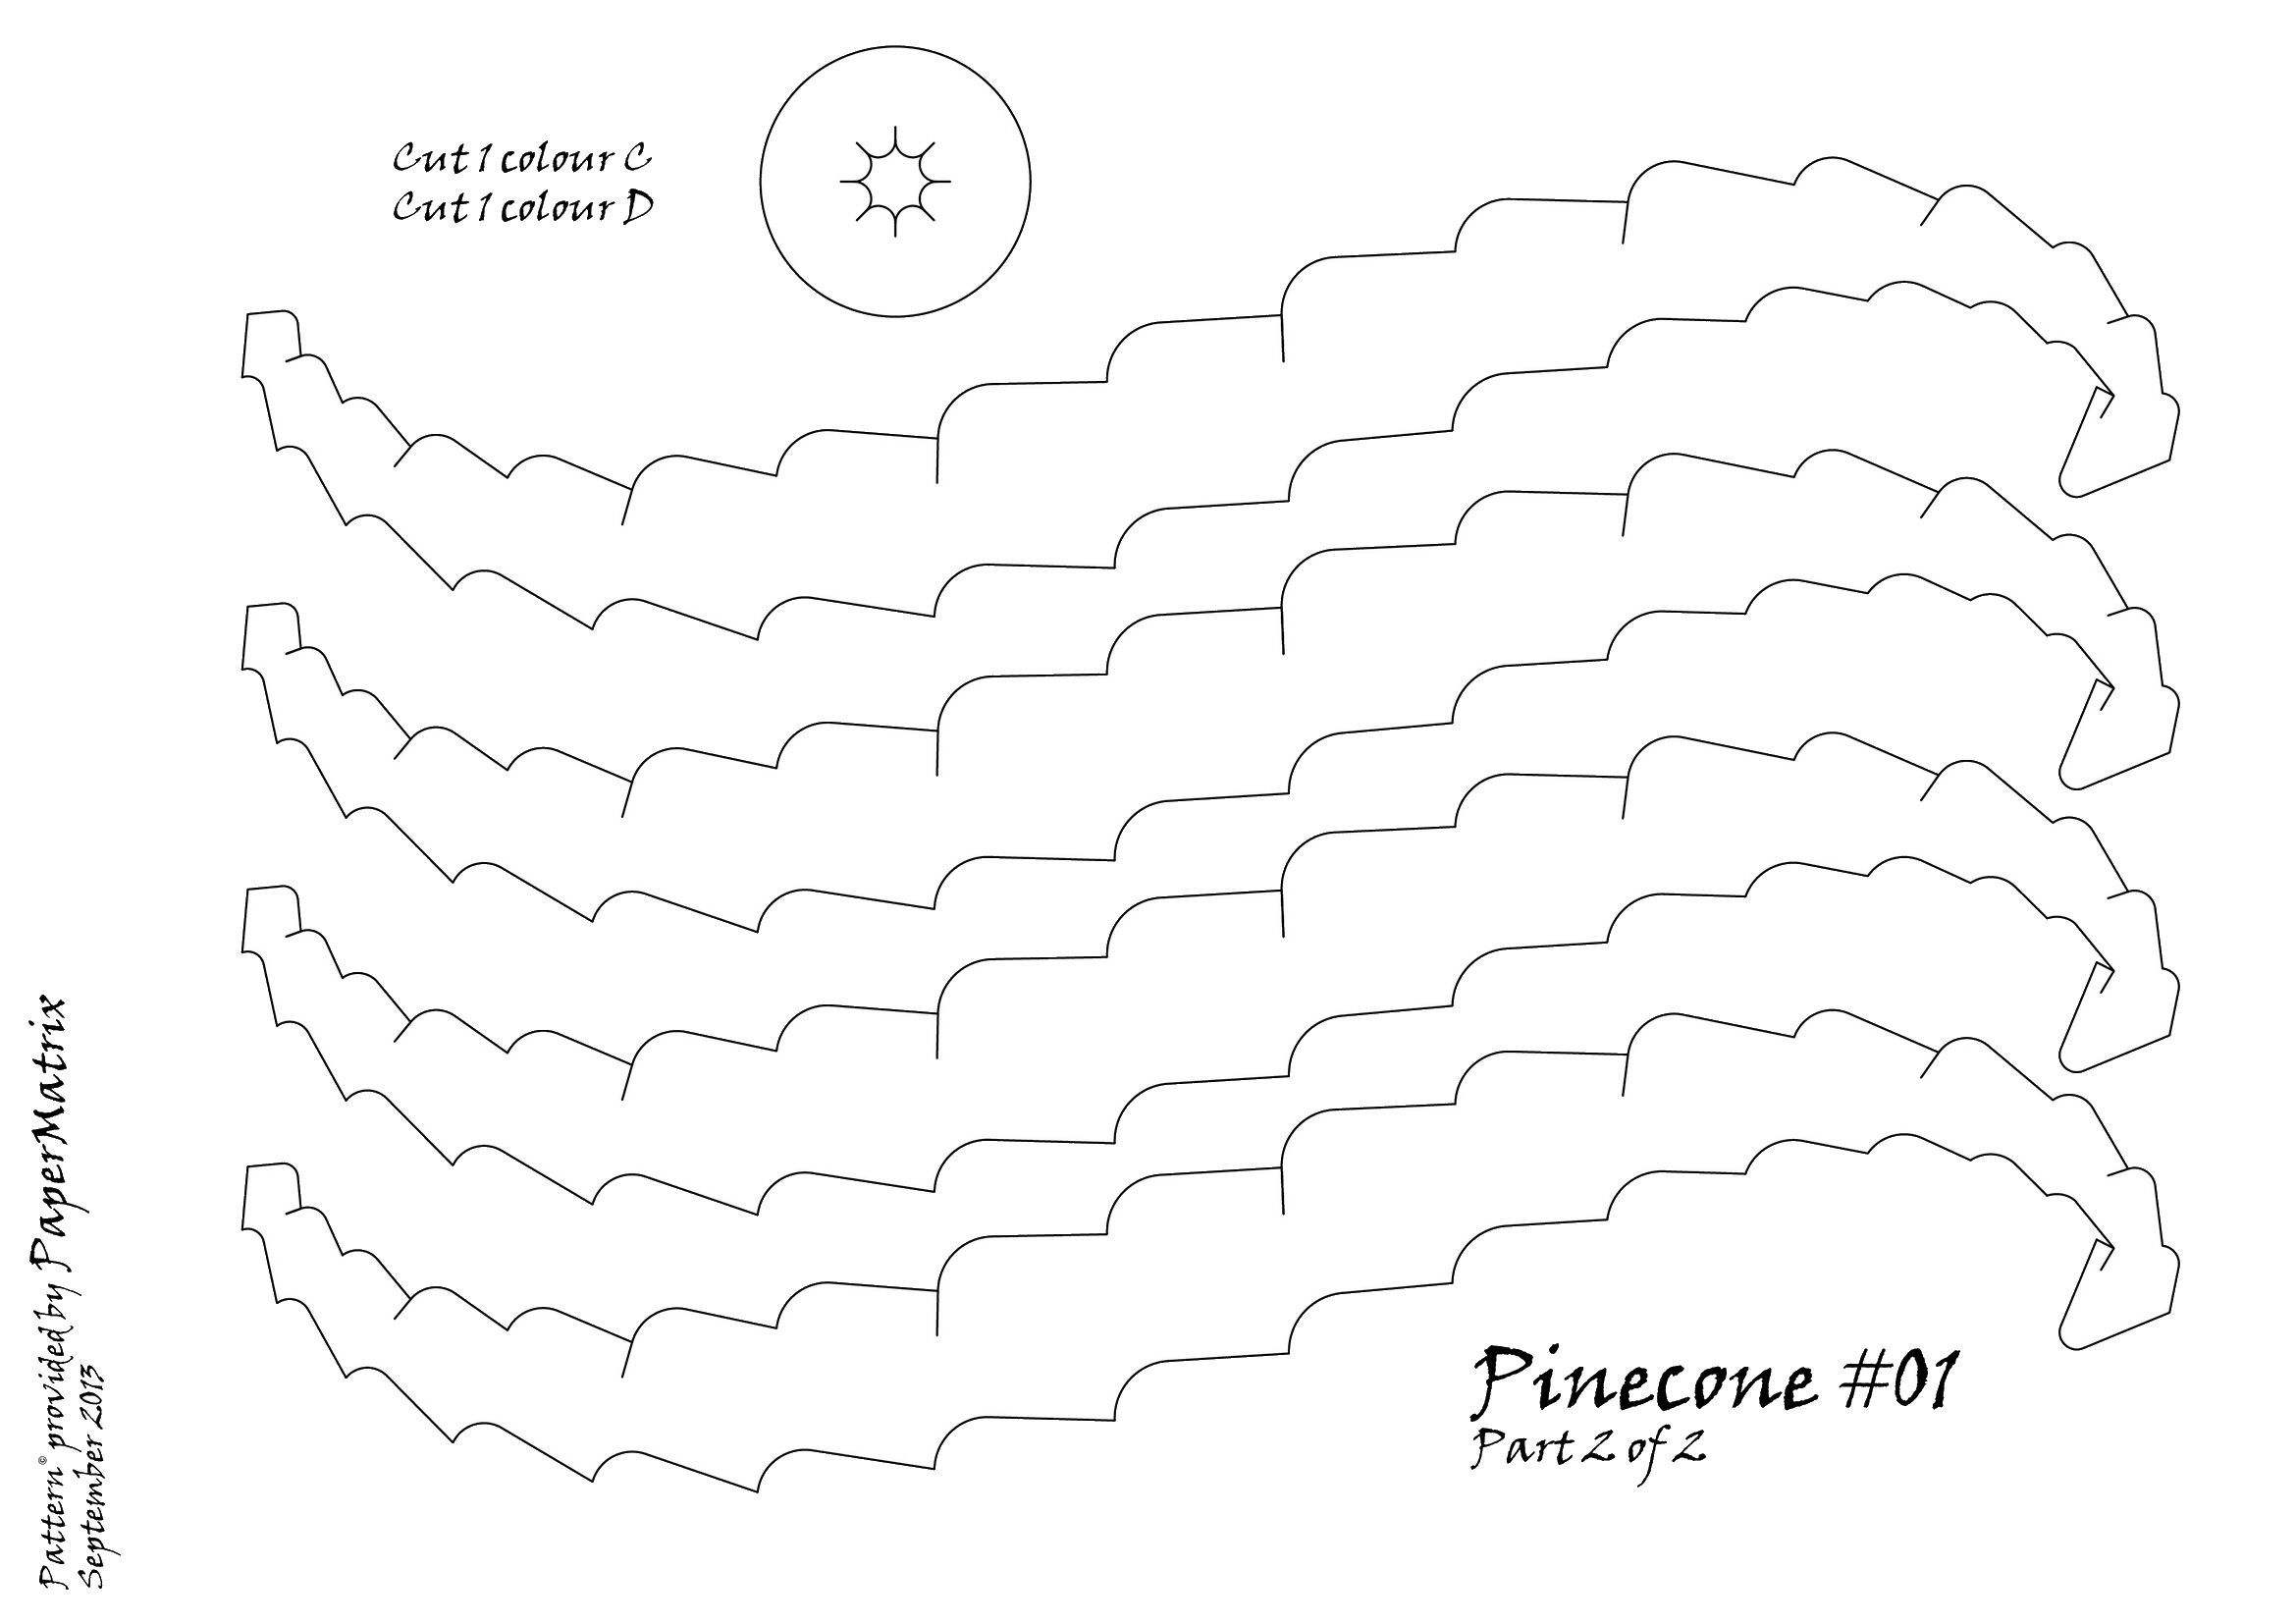
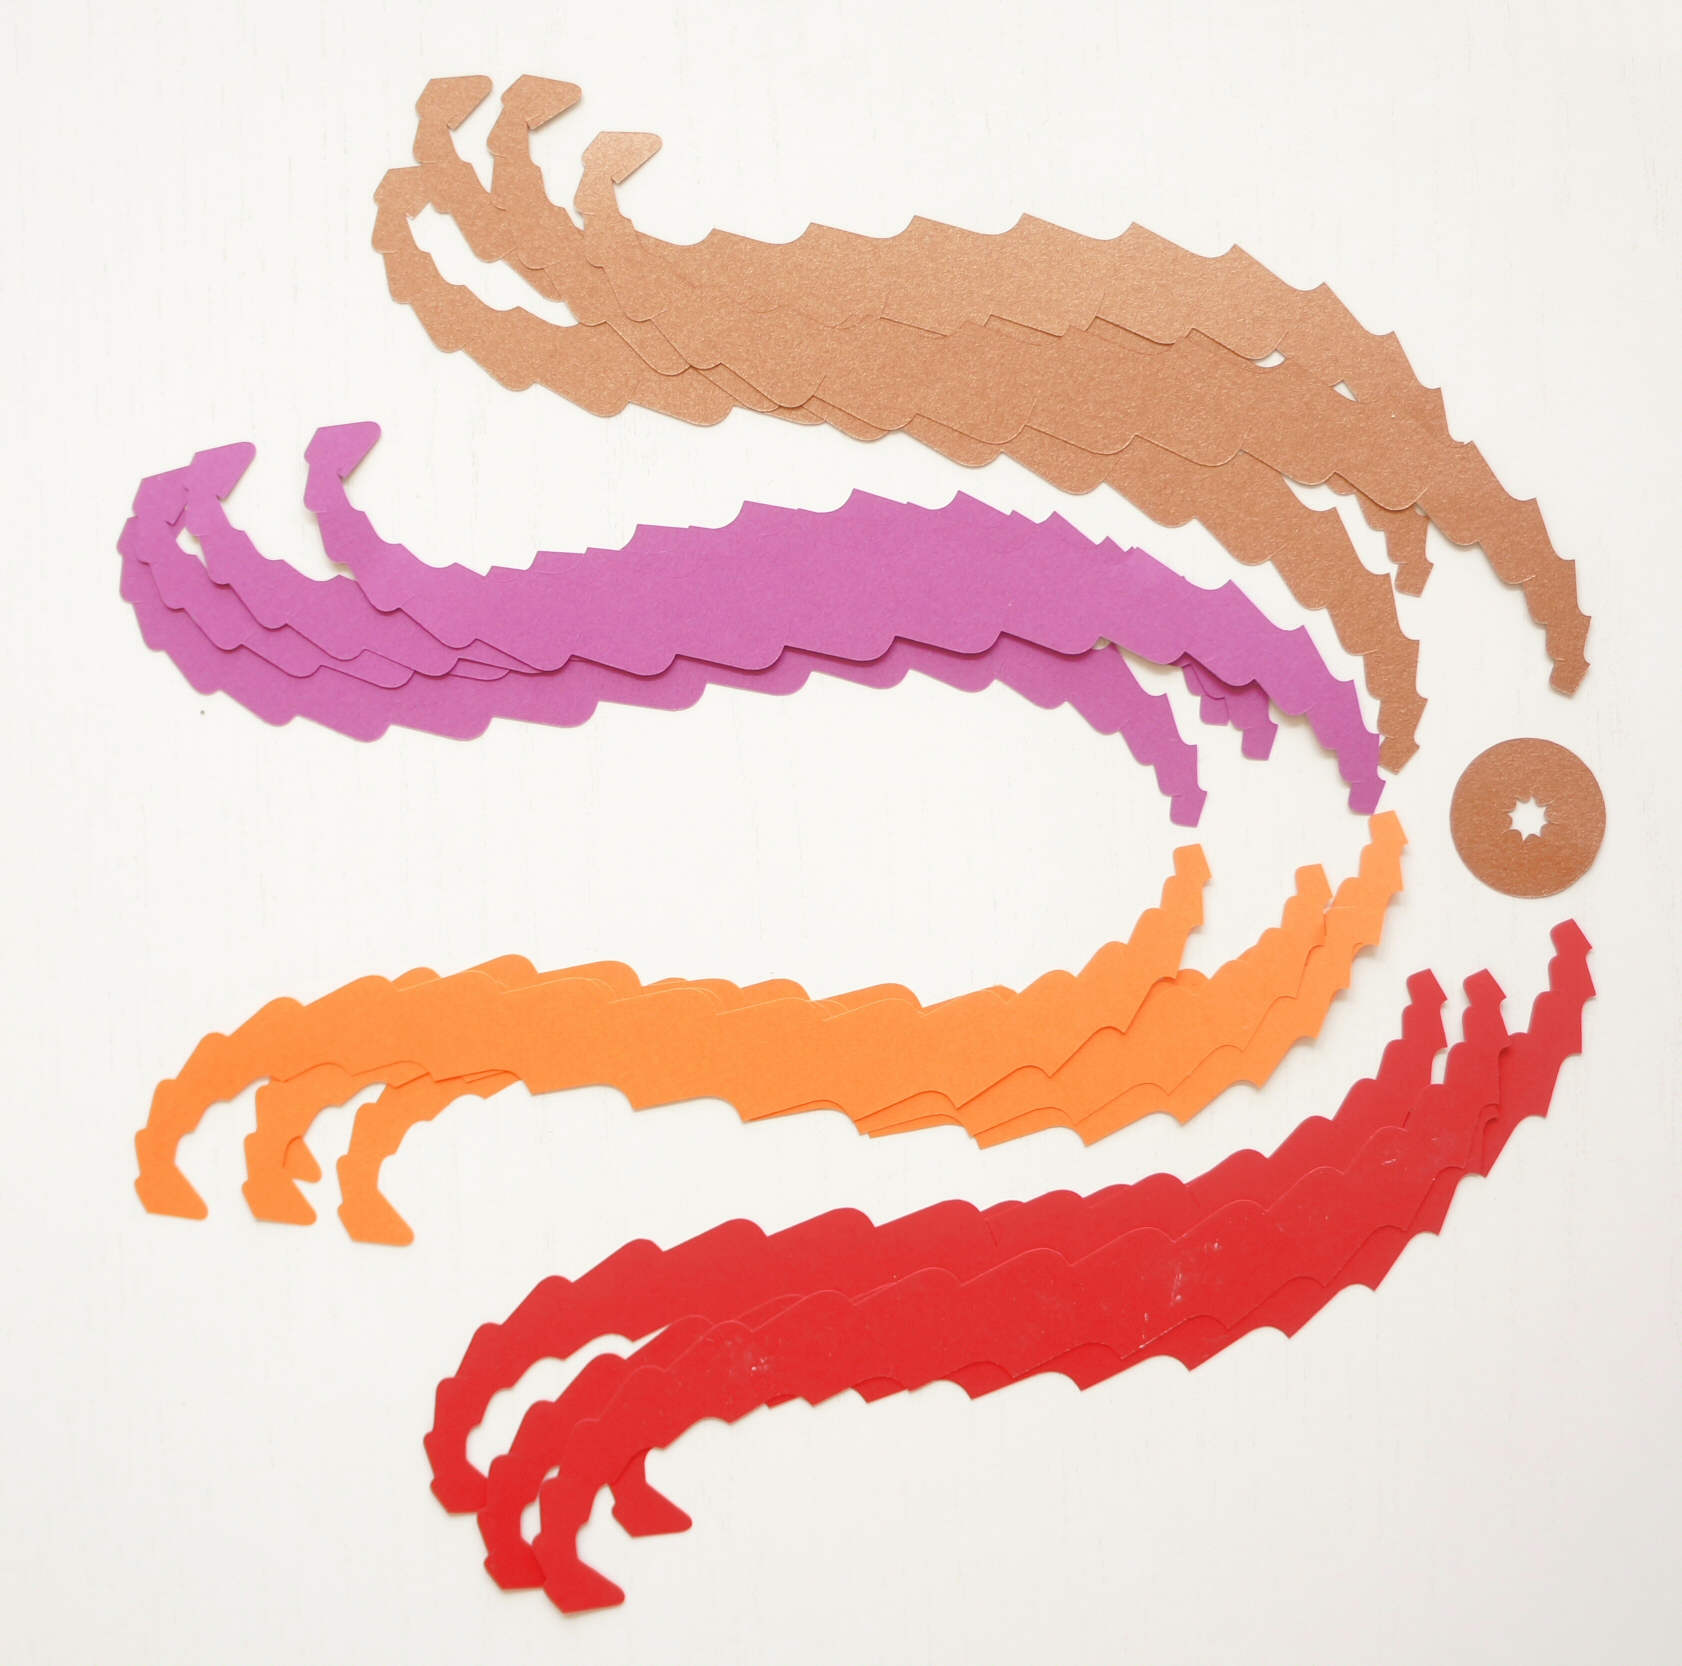
For the Pinecone #01 you need 2 x 8 arms in two or four different colours. The Pinecone made from the templates included is about 15 cm tall. Anna made it from paper weight 120 g/m2. You may rescale the sheets if you want a smaller cone.
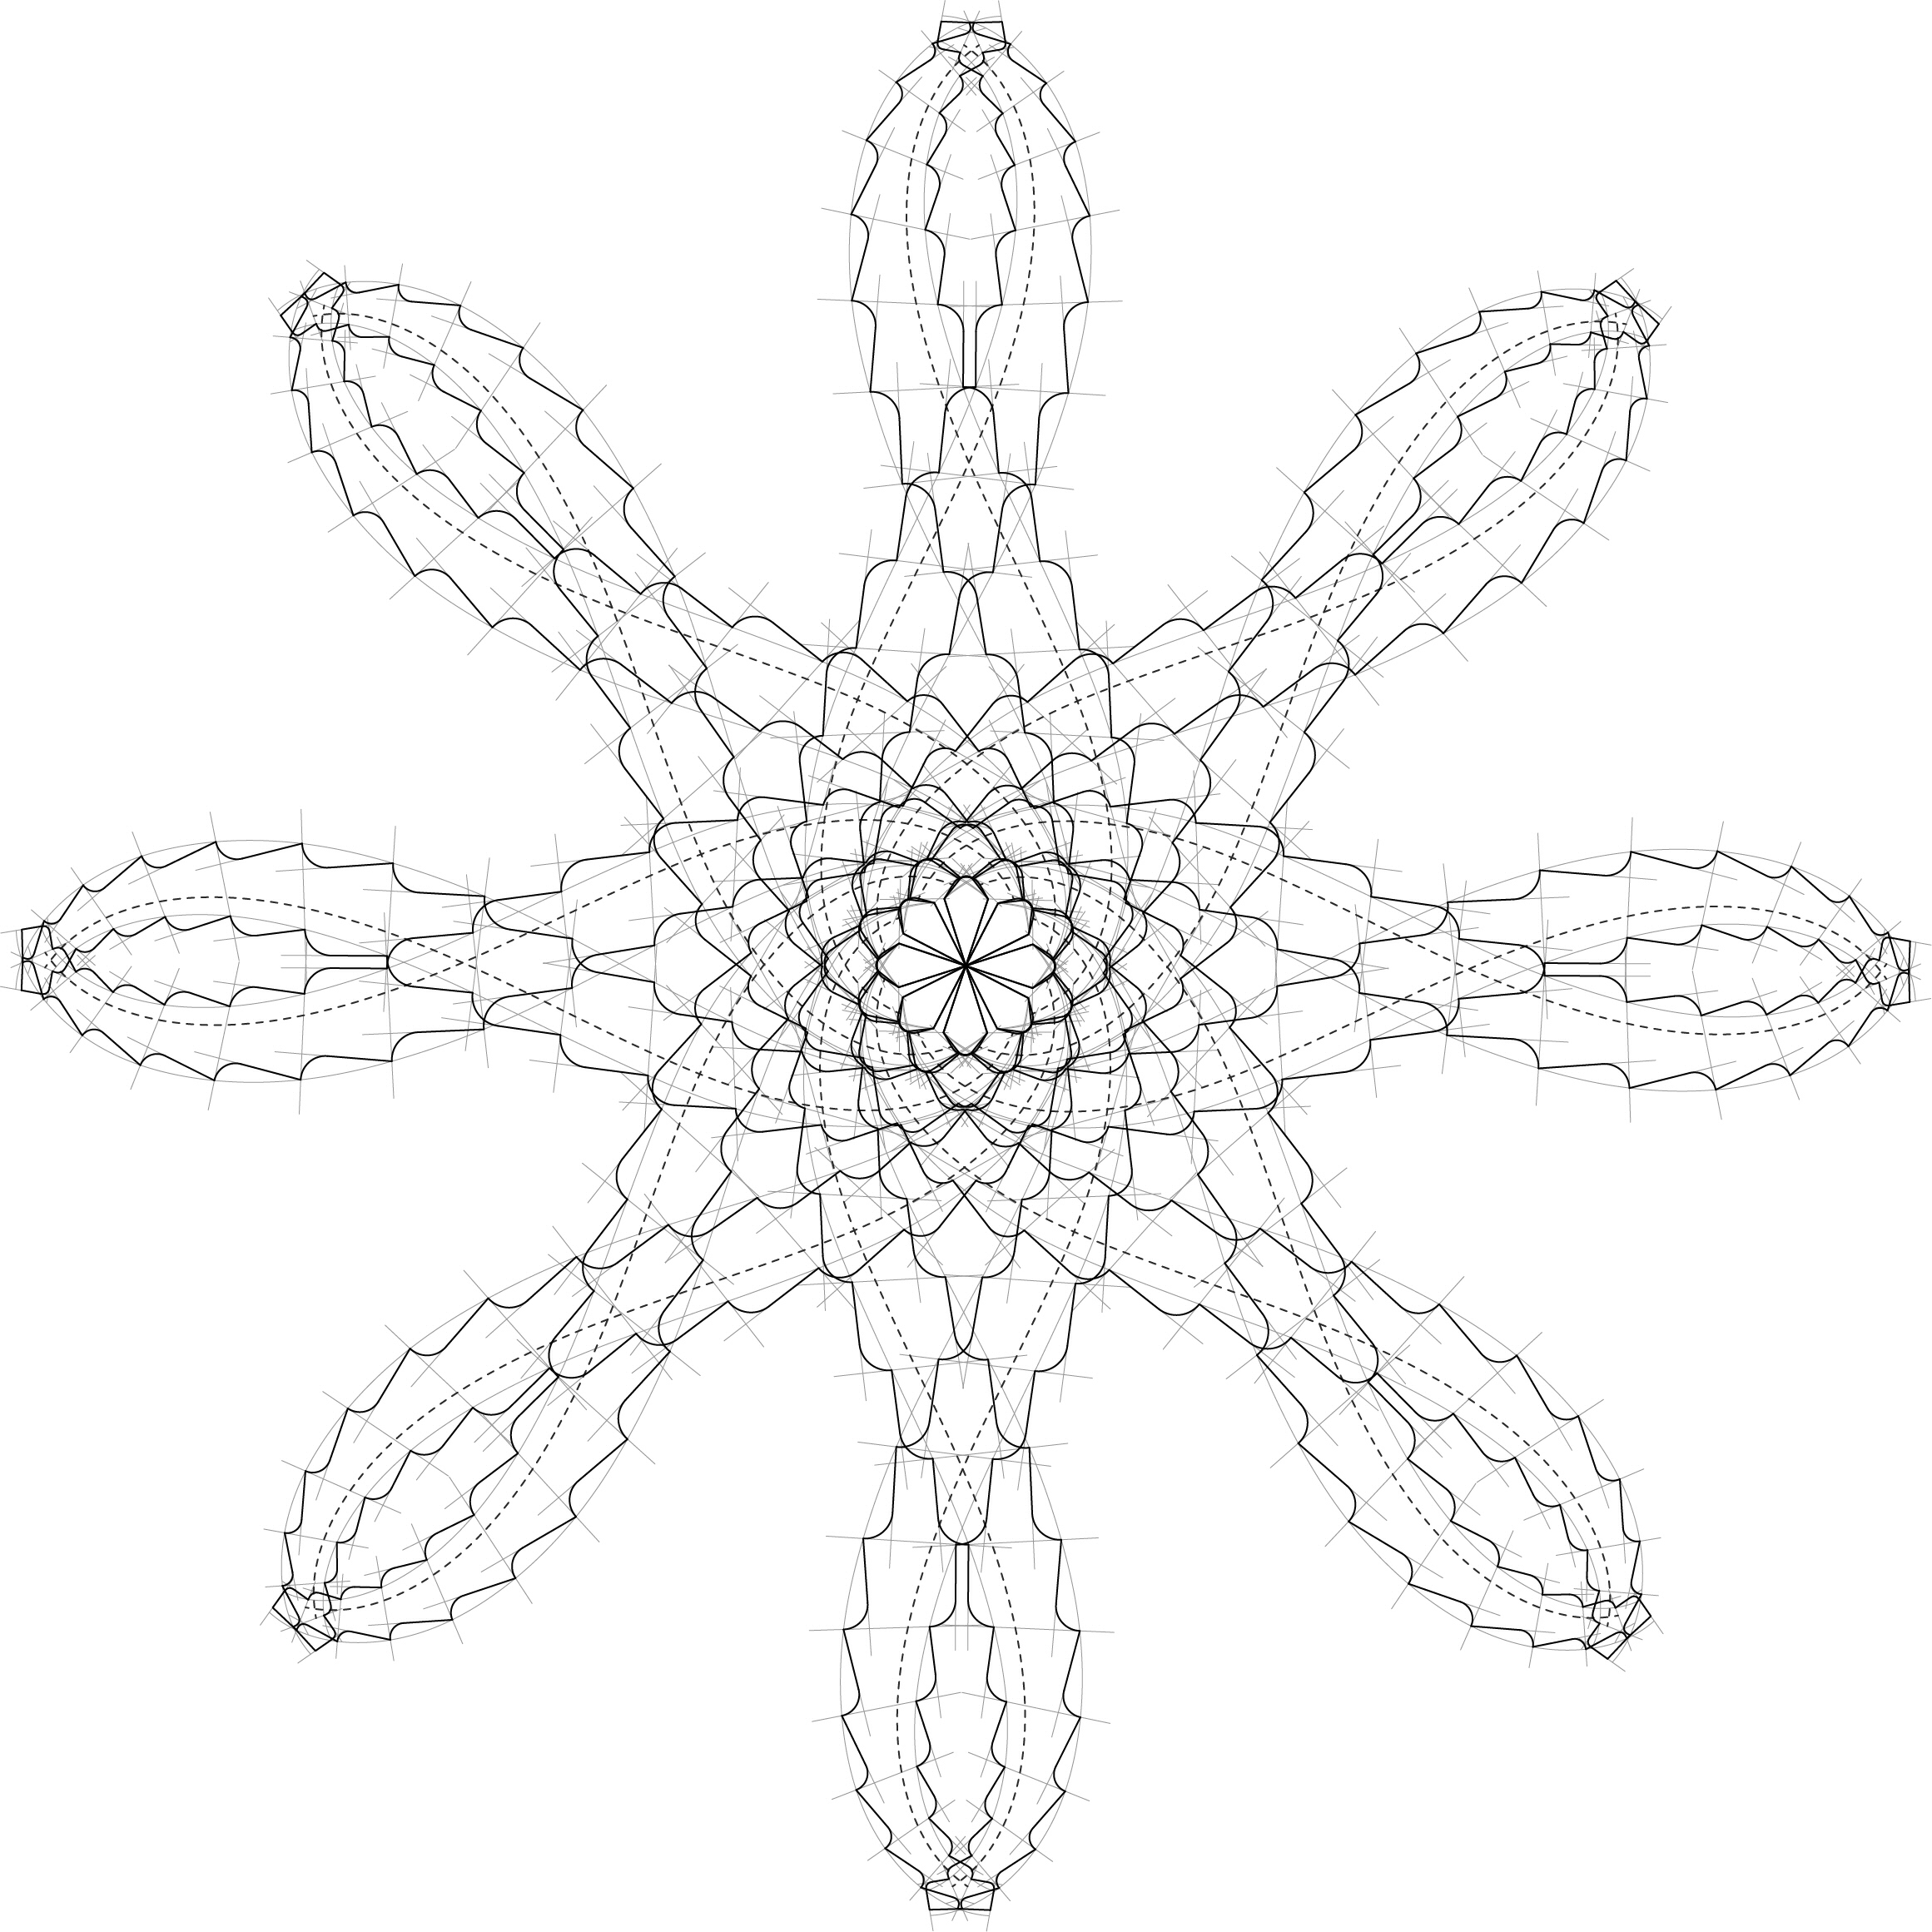
- Cut out each of the Pages 1 and 2 twice. Note that the patterns on Page 1 and 2 are not identical (PC 1)
- Take a ring pieces, any colour
- Take the arms you cut out using the templates on Page 2
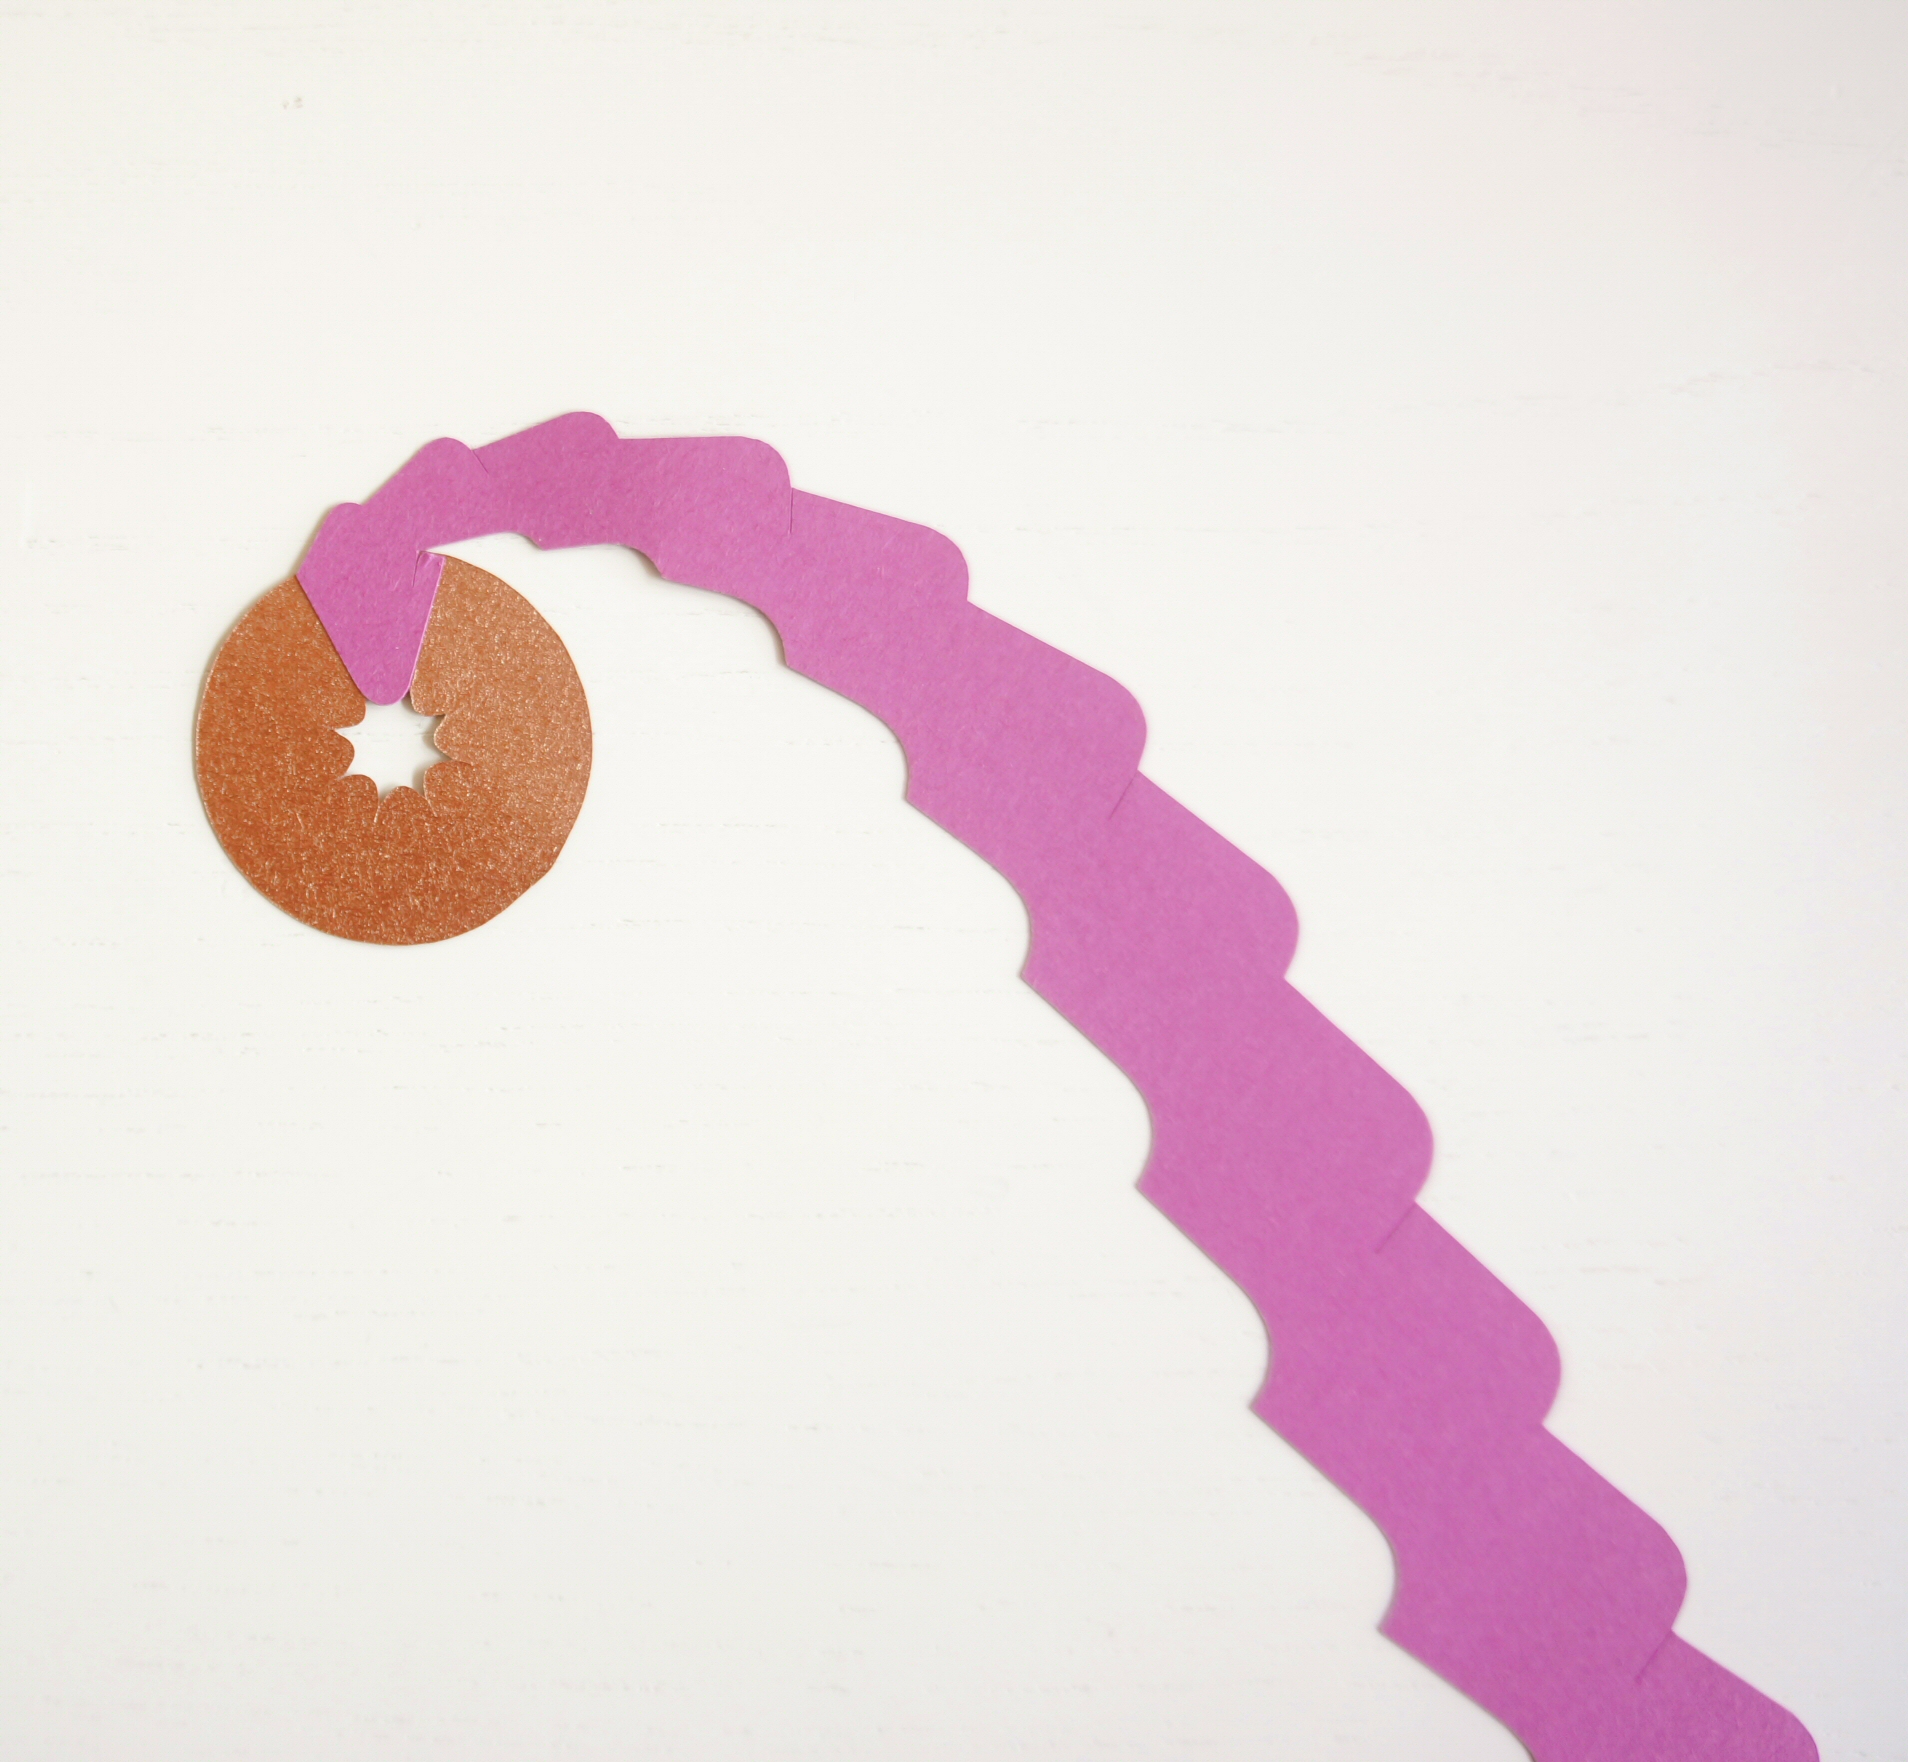
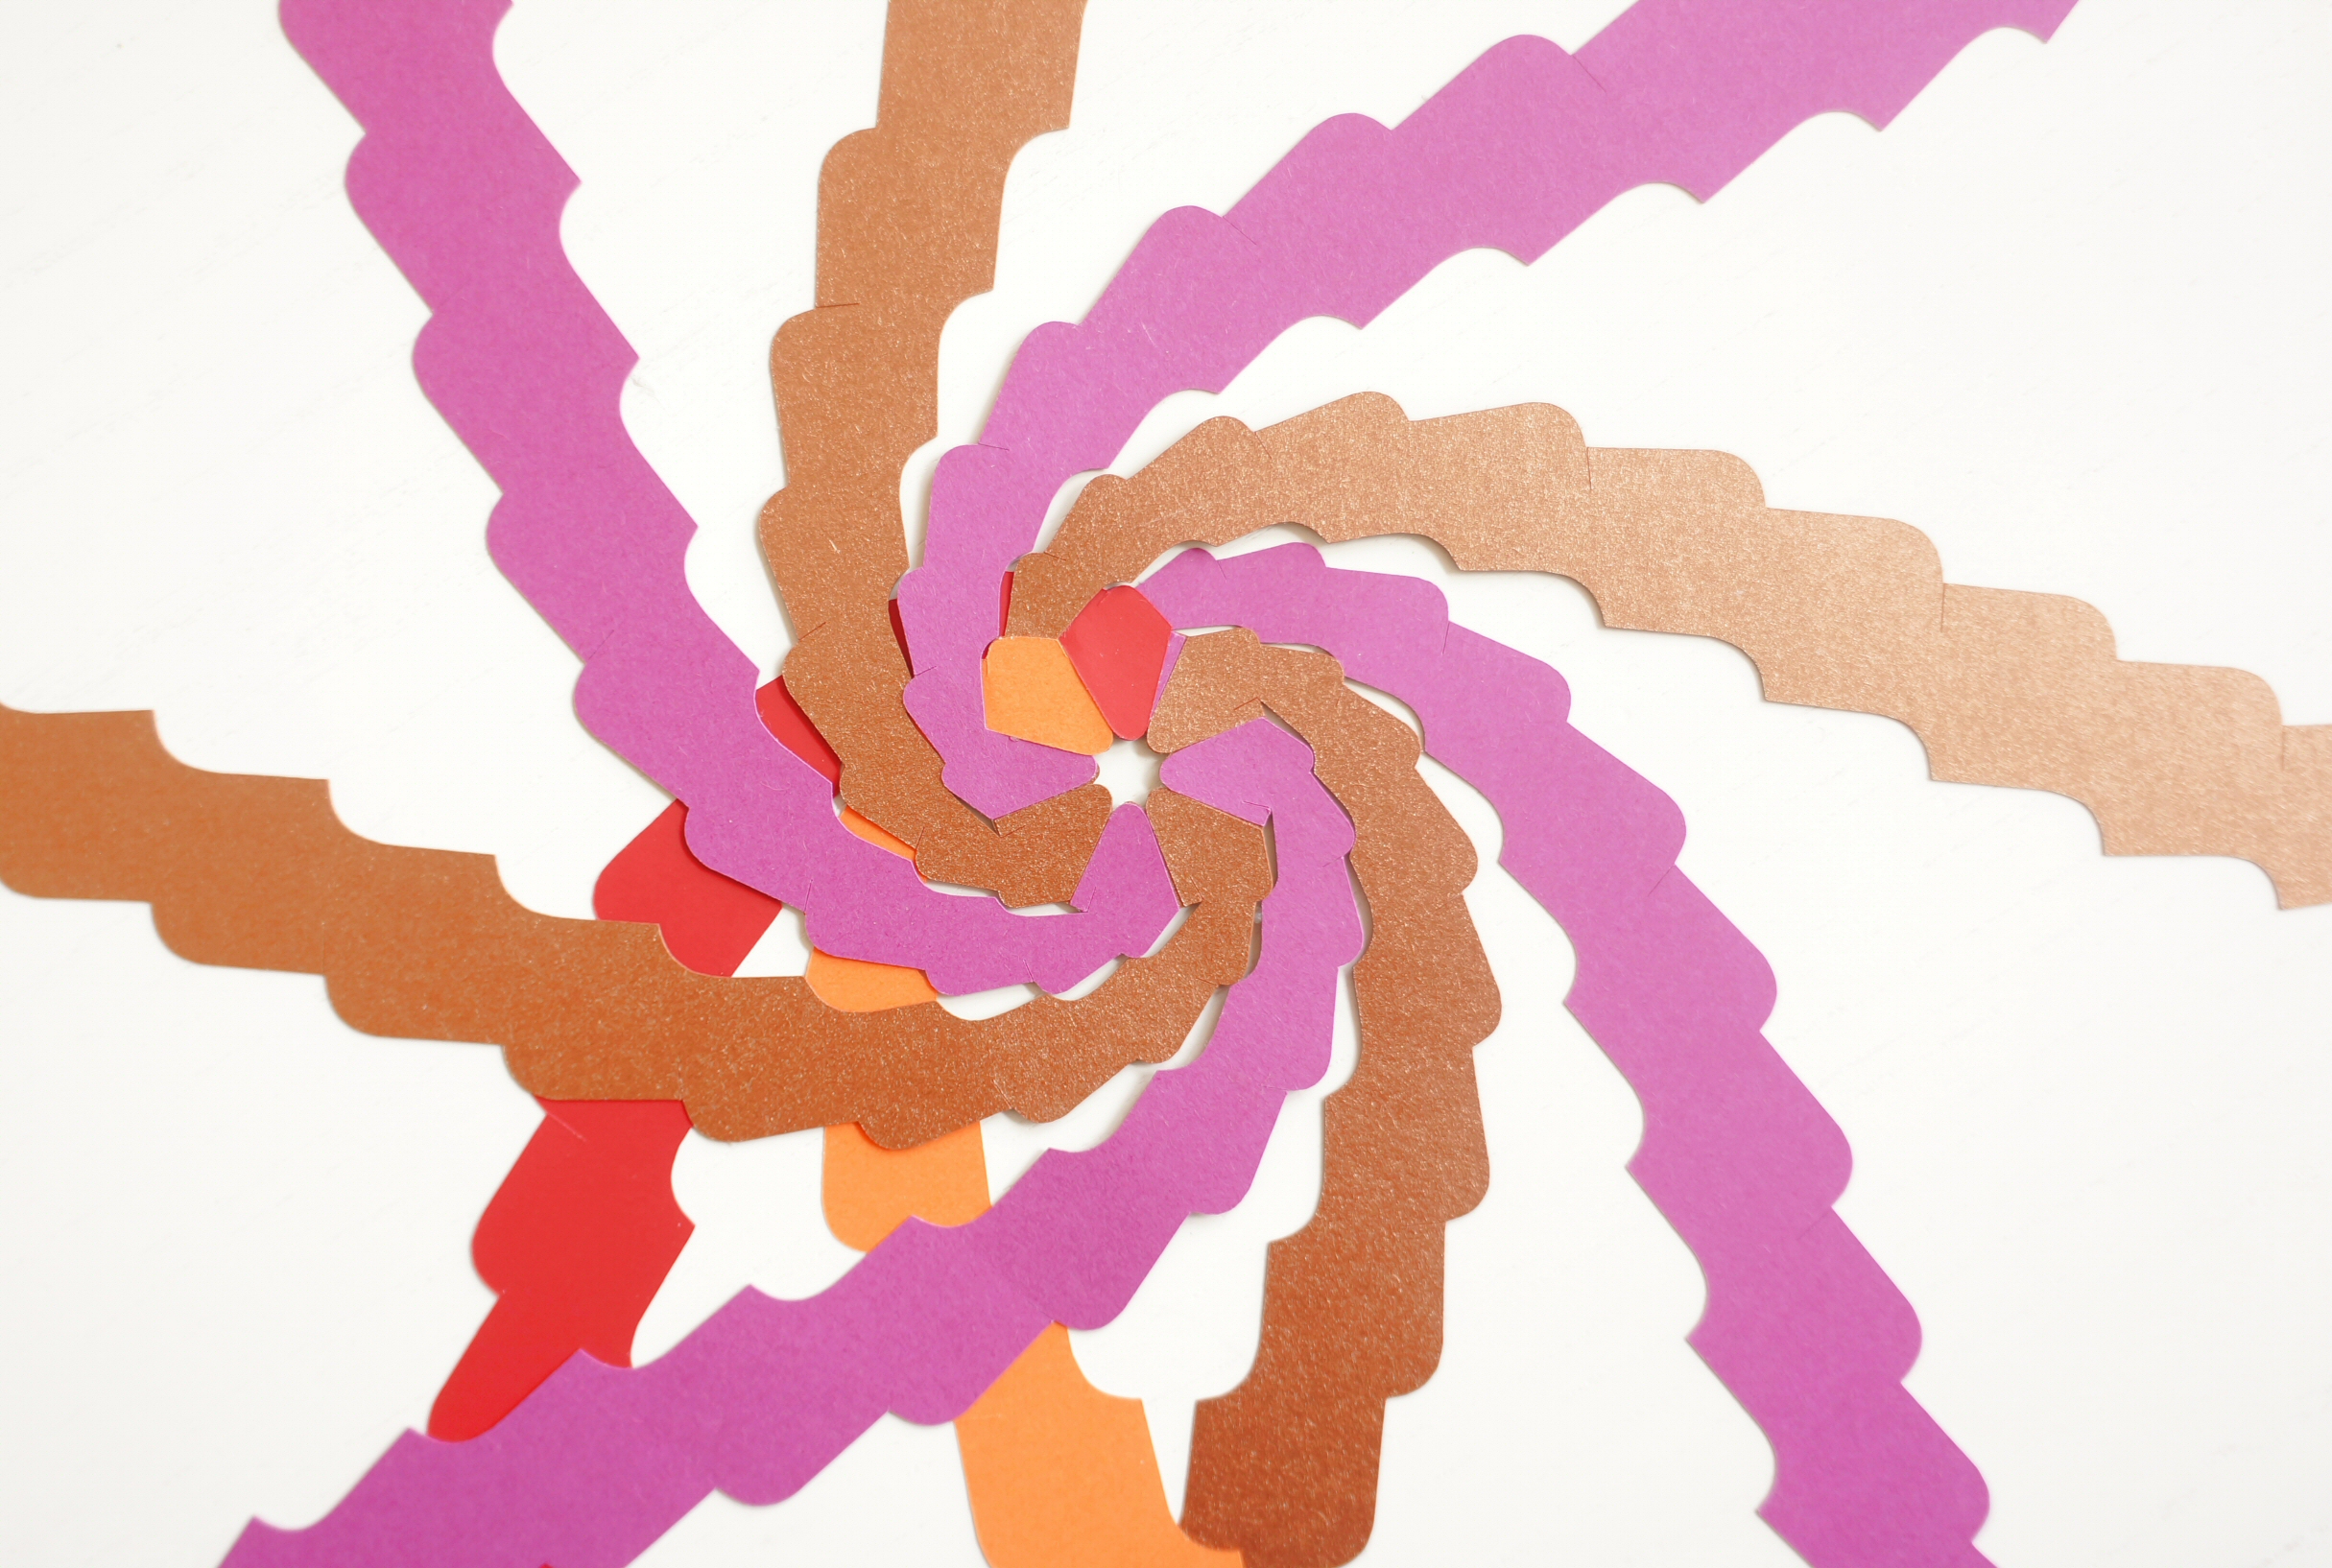
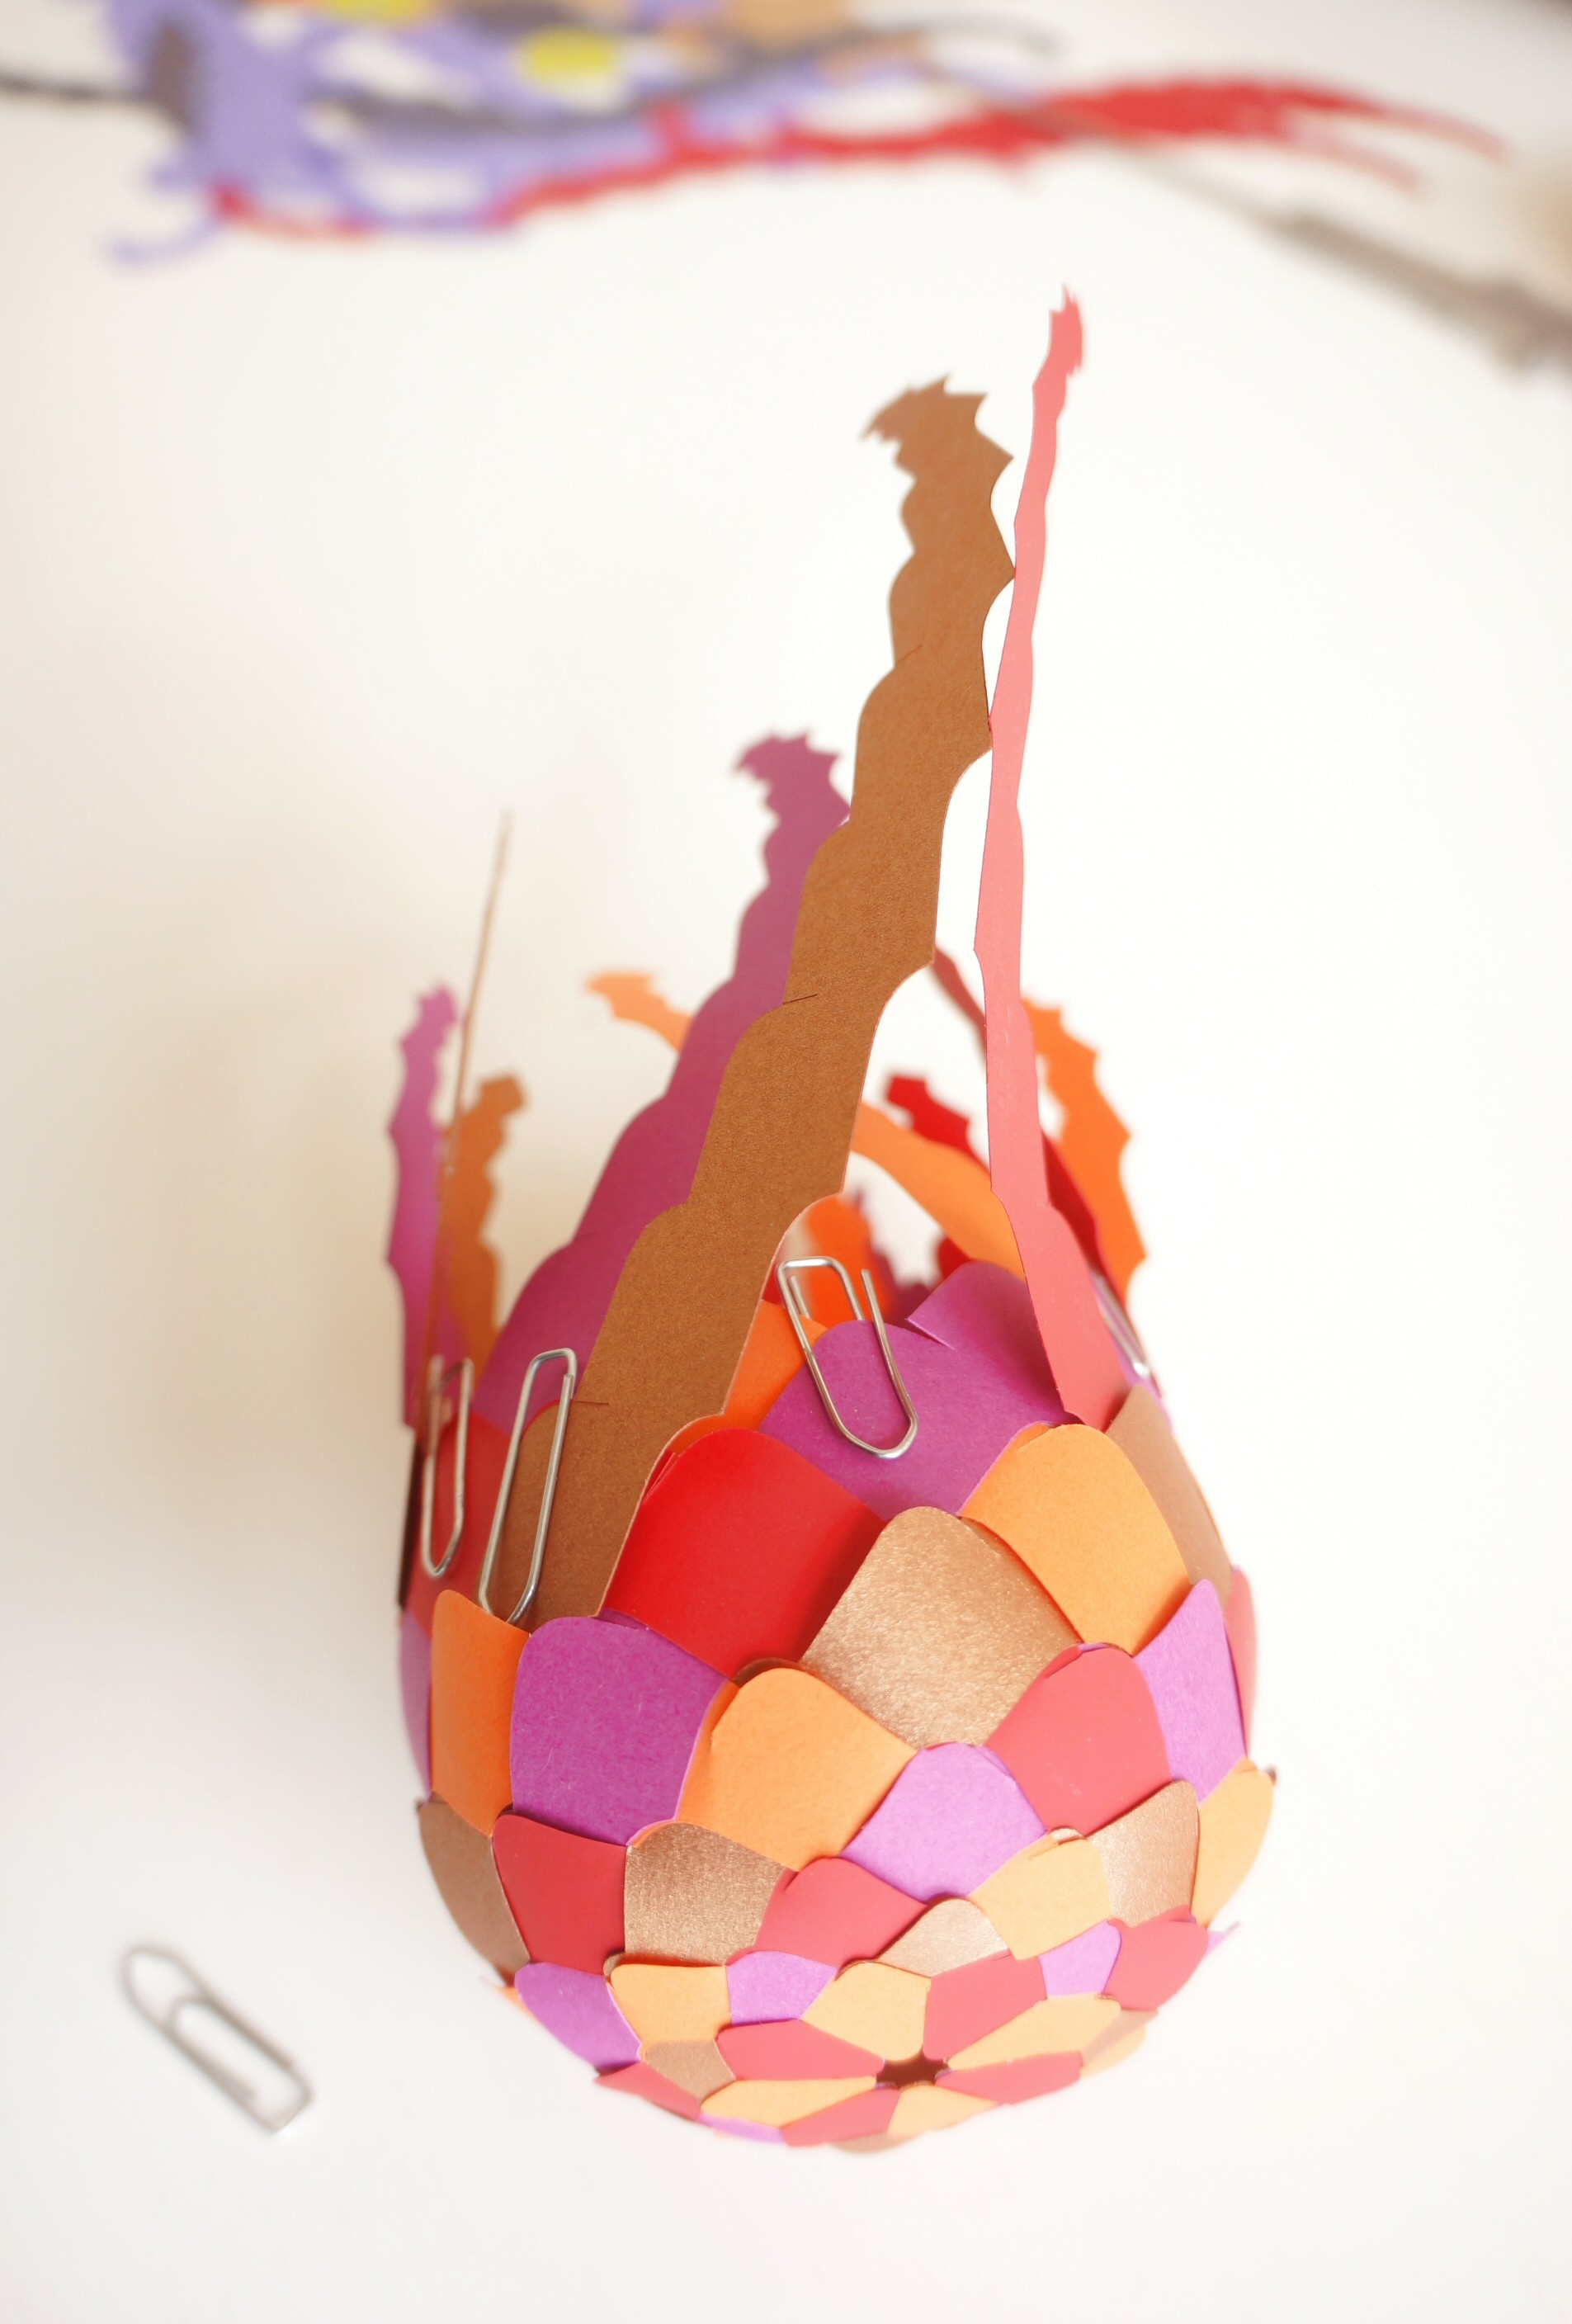
- Now you shall fix the arms to the ring piece with glue. Colours shall be alternating and all arms swirling in the same direction. You must fix the end of the arm with the small diamond, but only smear glue on the 2/3 of the diamond closest to the point. The points shall be aligned with the small arches at the centre of the ring piece and the edge of the ring (PC 2) (PC 3) (PC 4)
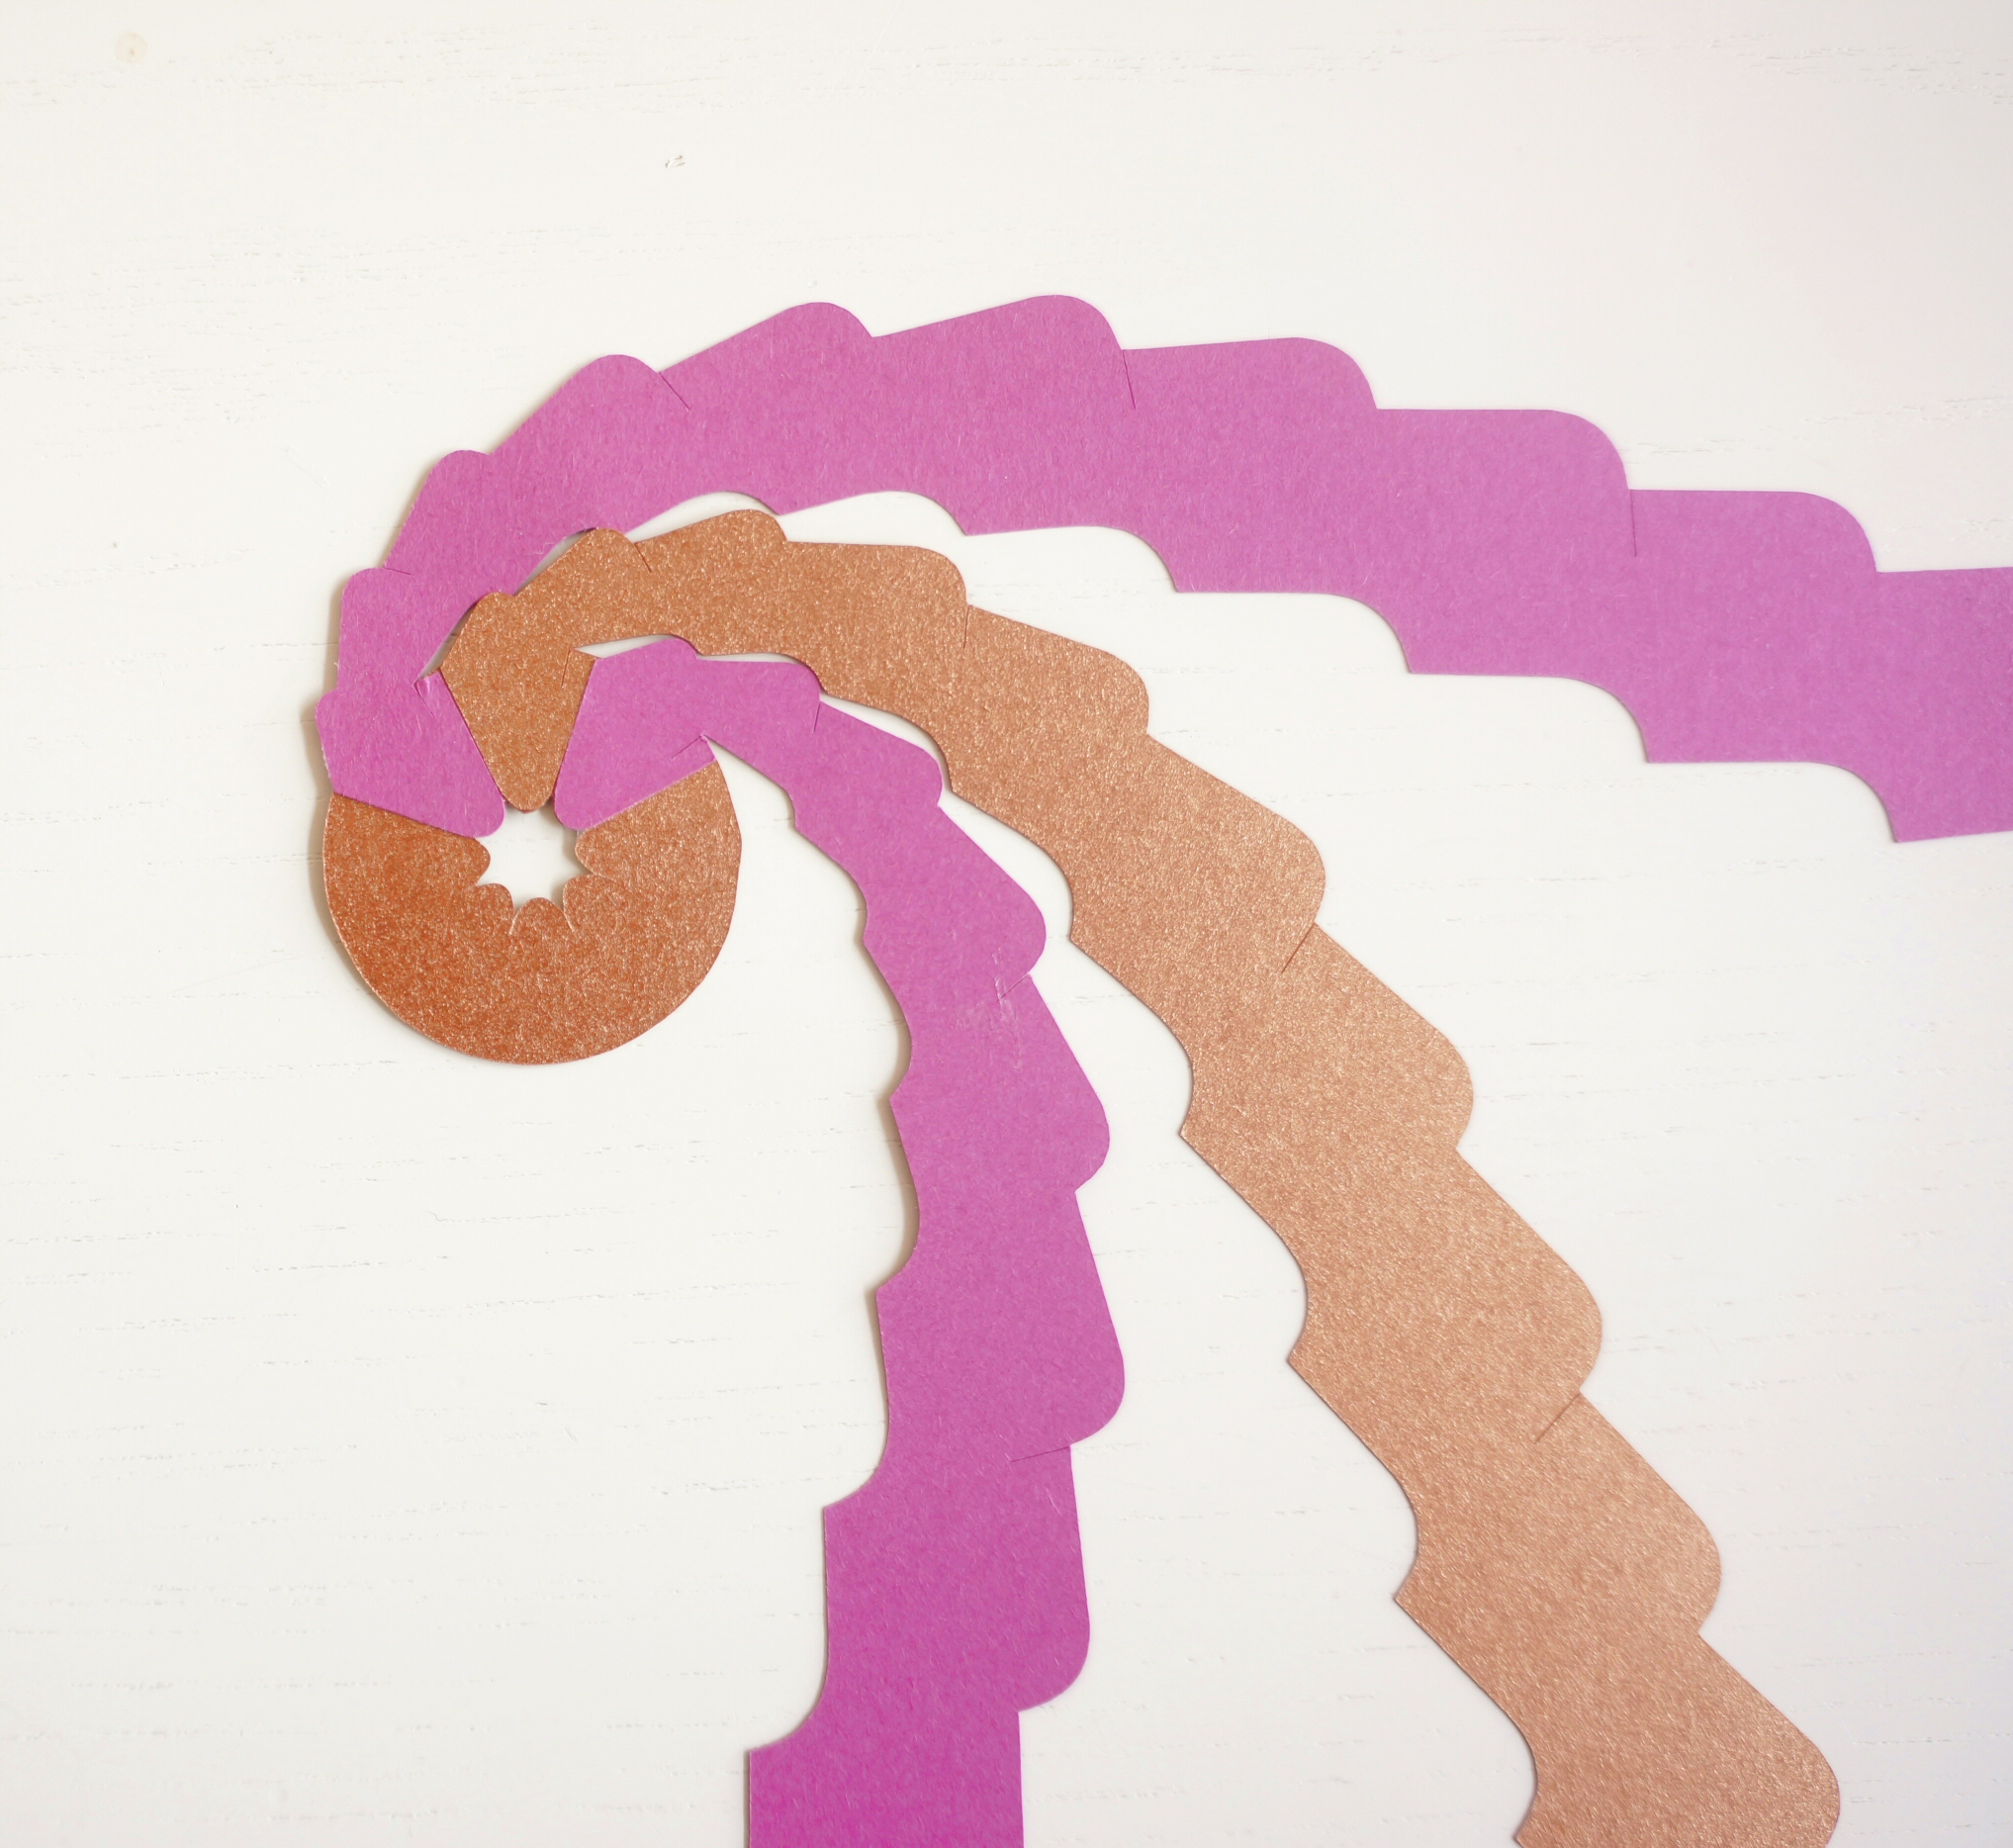
- Next you shall fix the second layer of arms cut out using the templates of Page 1, all arms swirling in the opposite direction of those in the first layer. The diamonds of the two layers shall be positioned so that the points near the centre and the long diagonal are aligned. This means that the sides are shifted slightly and the side of the upper diamond is aligned with the small slit in the diamond below (PC 5) (PC 6) (PC 7) (PC 8). When fixing the arm weave the first square by pushing the arm under the arms below
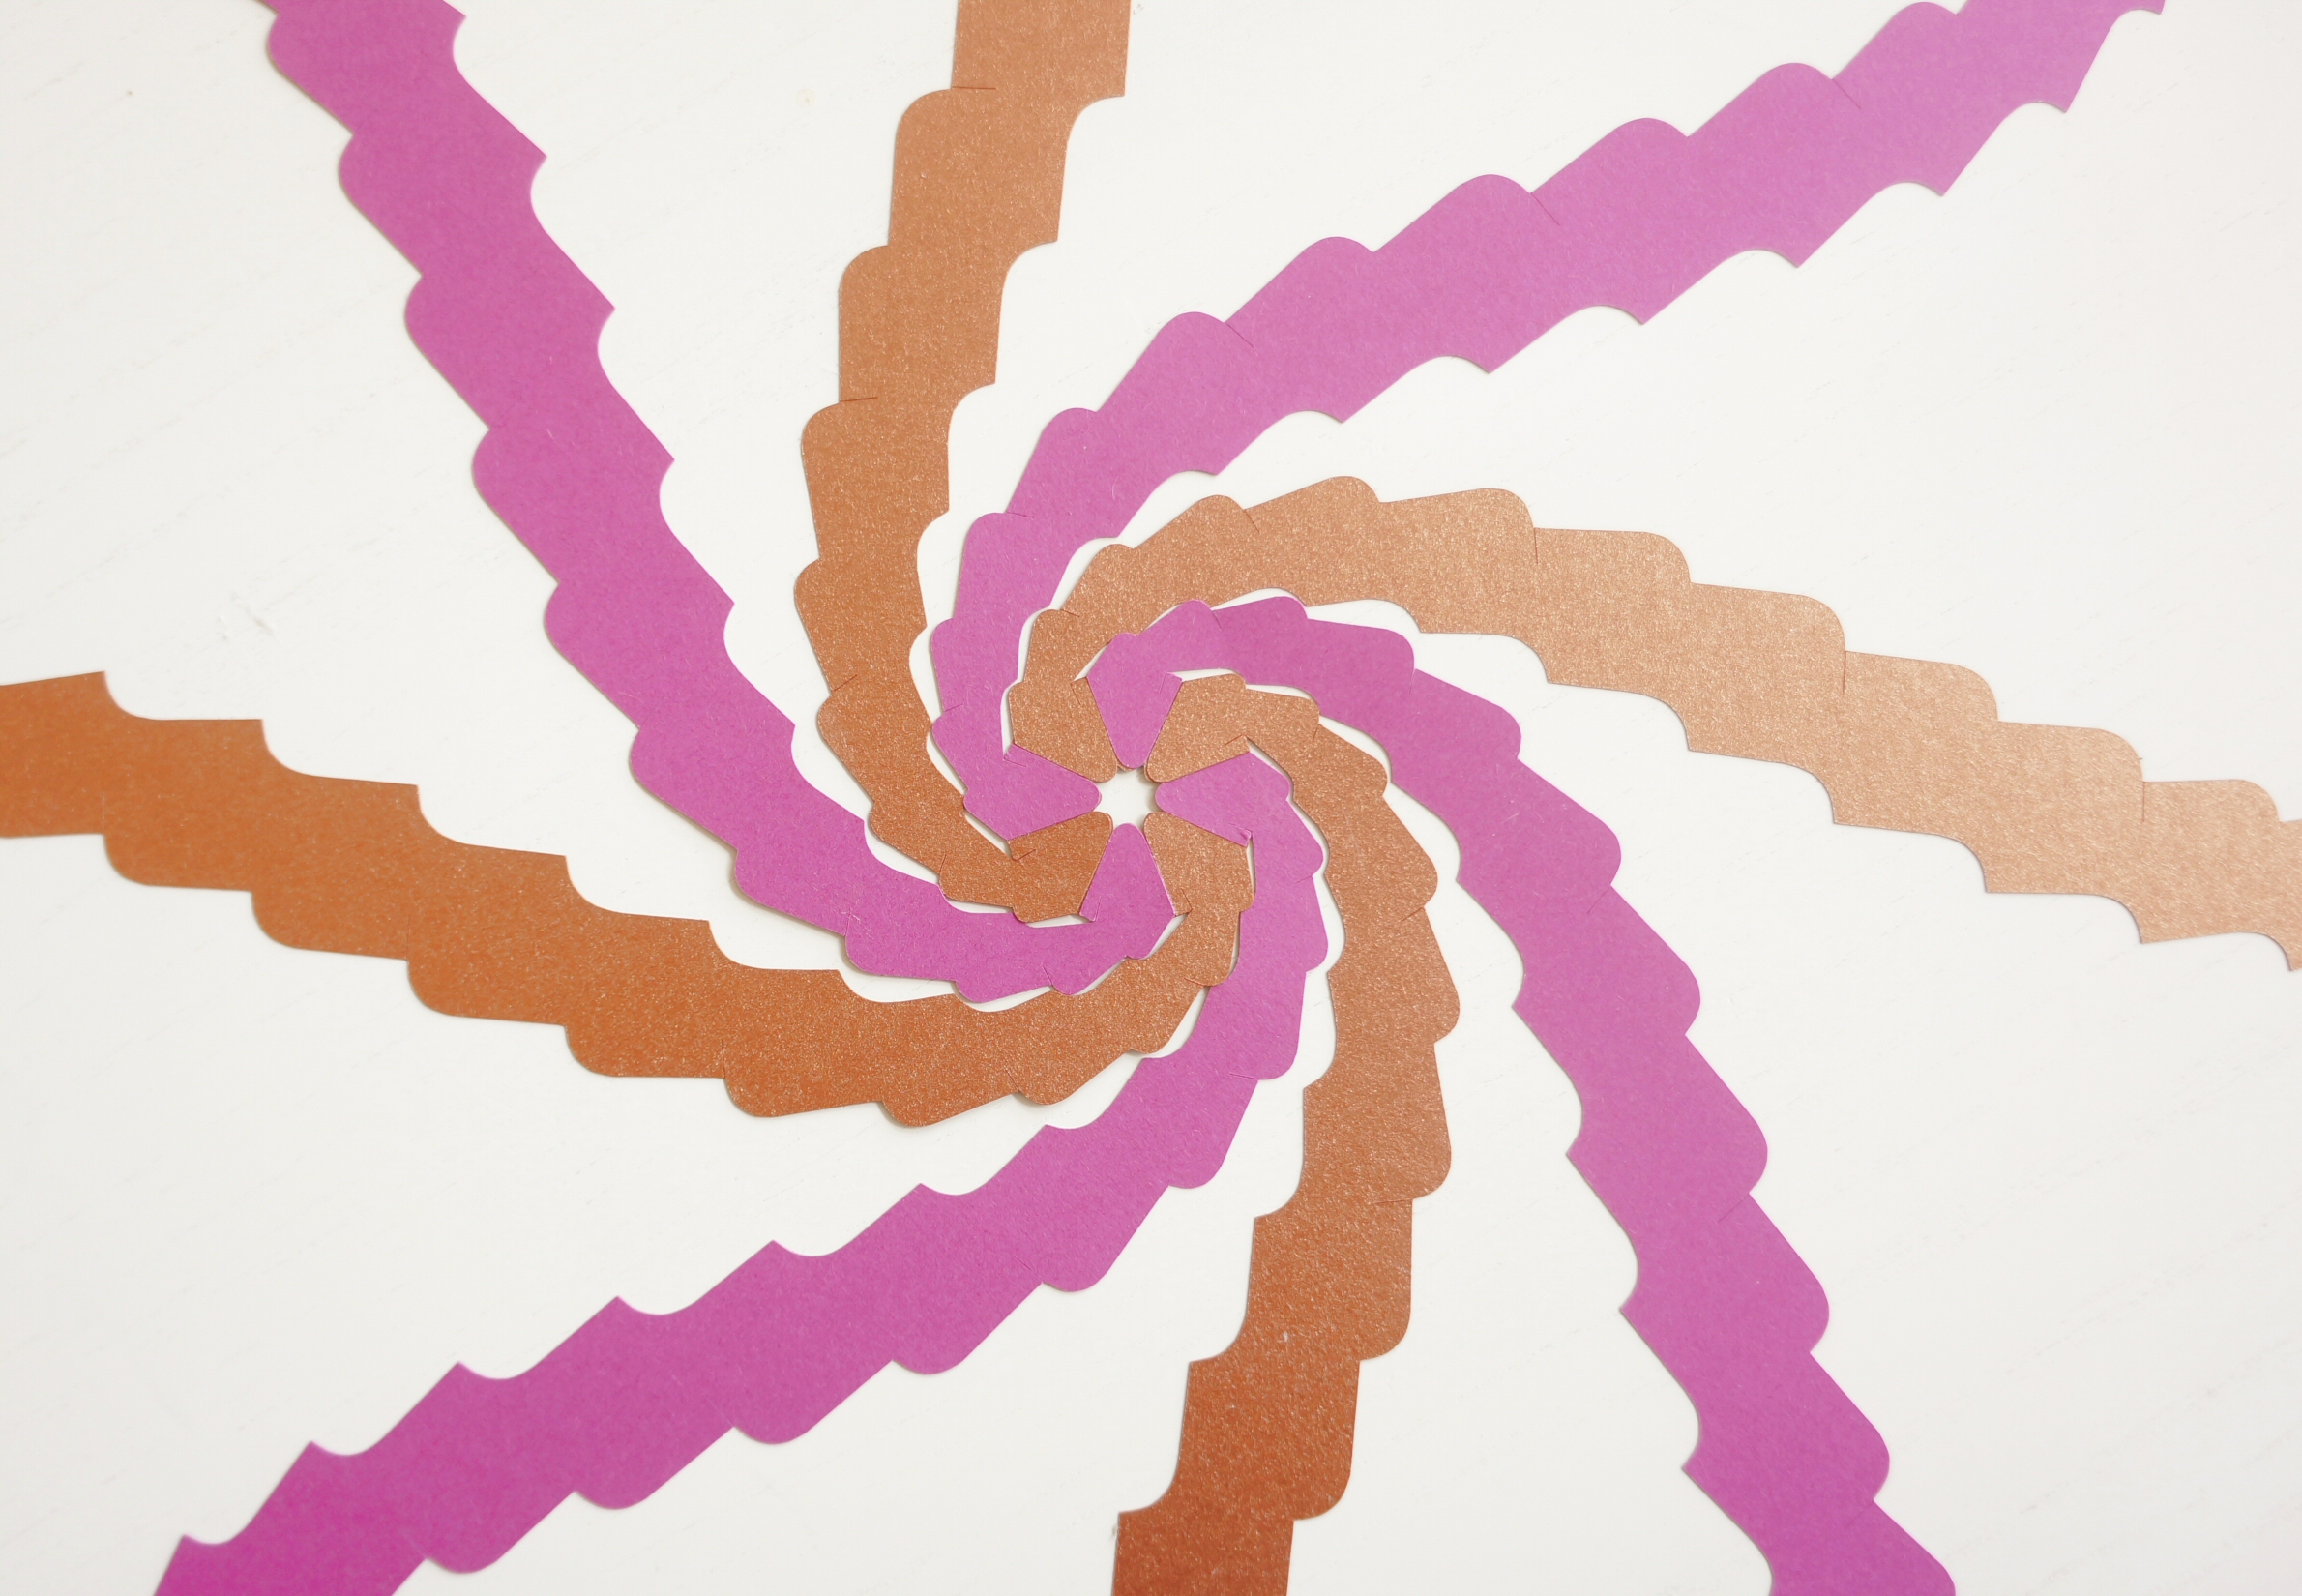
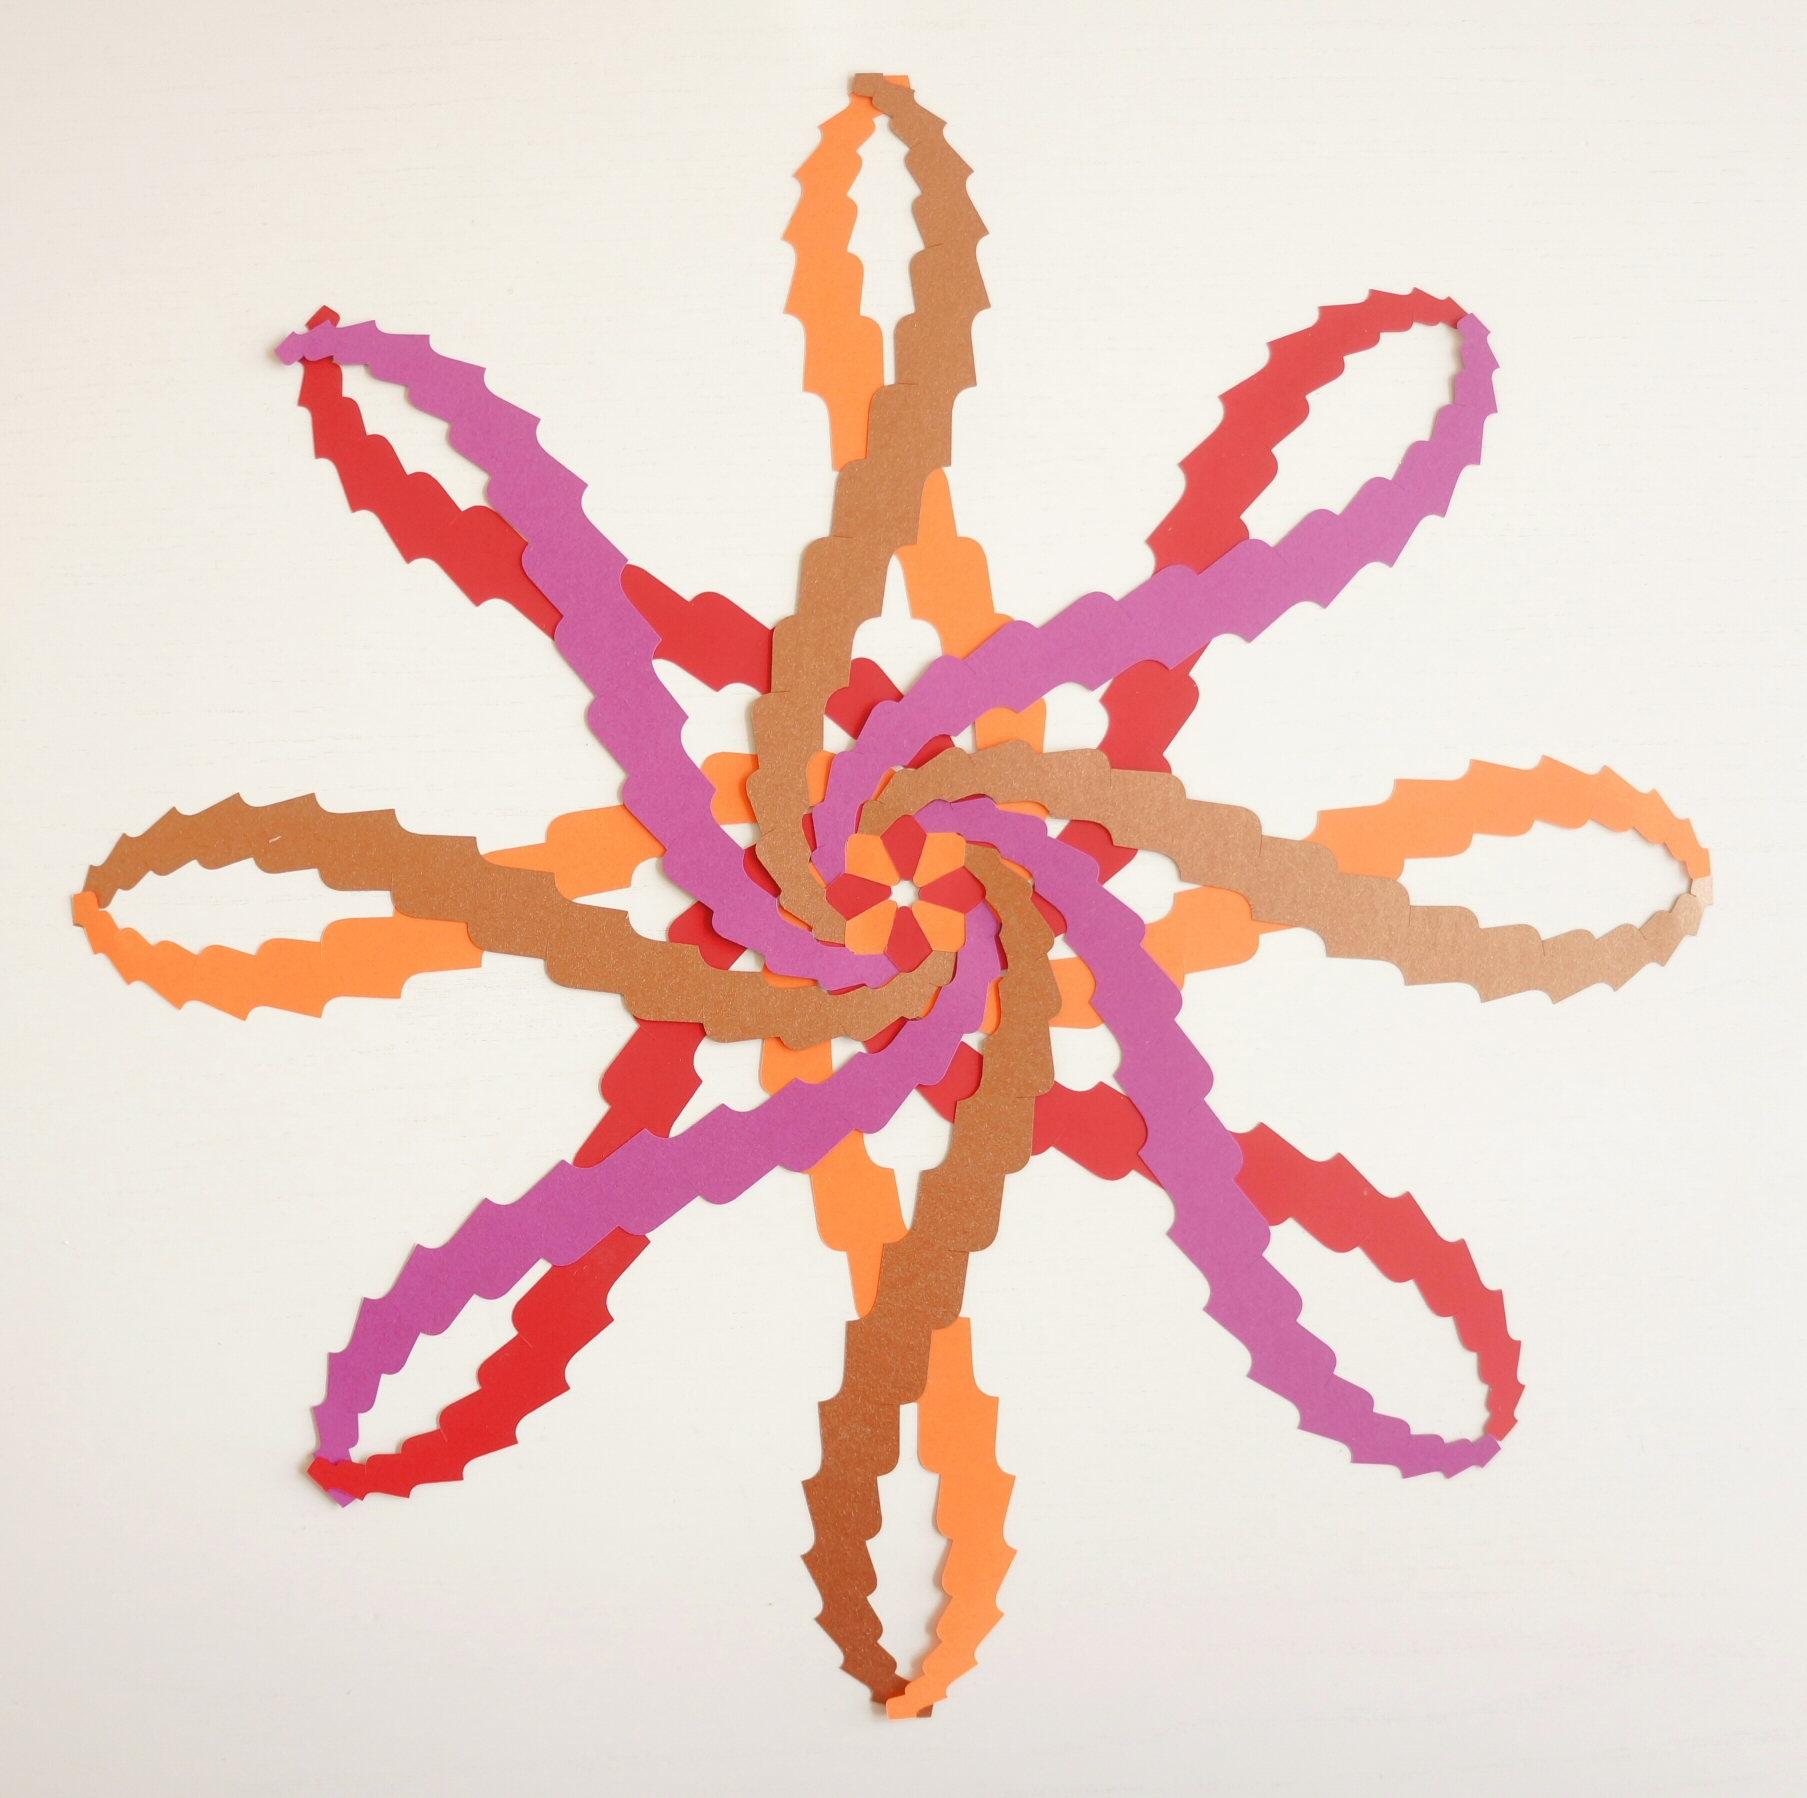
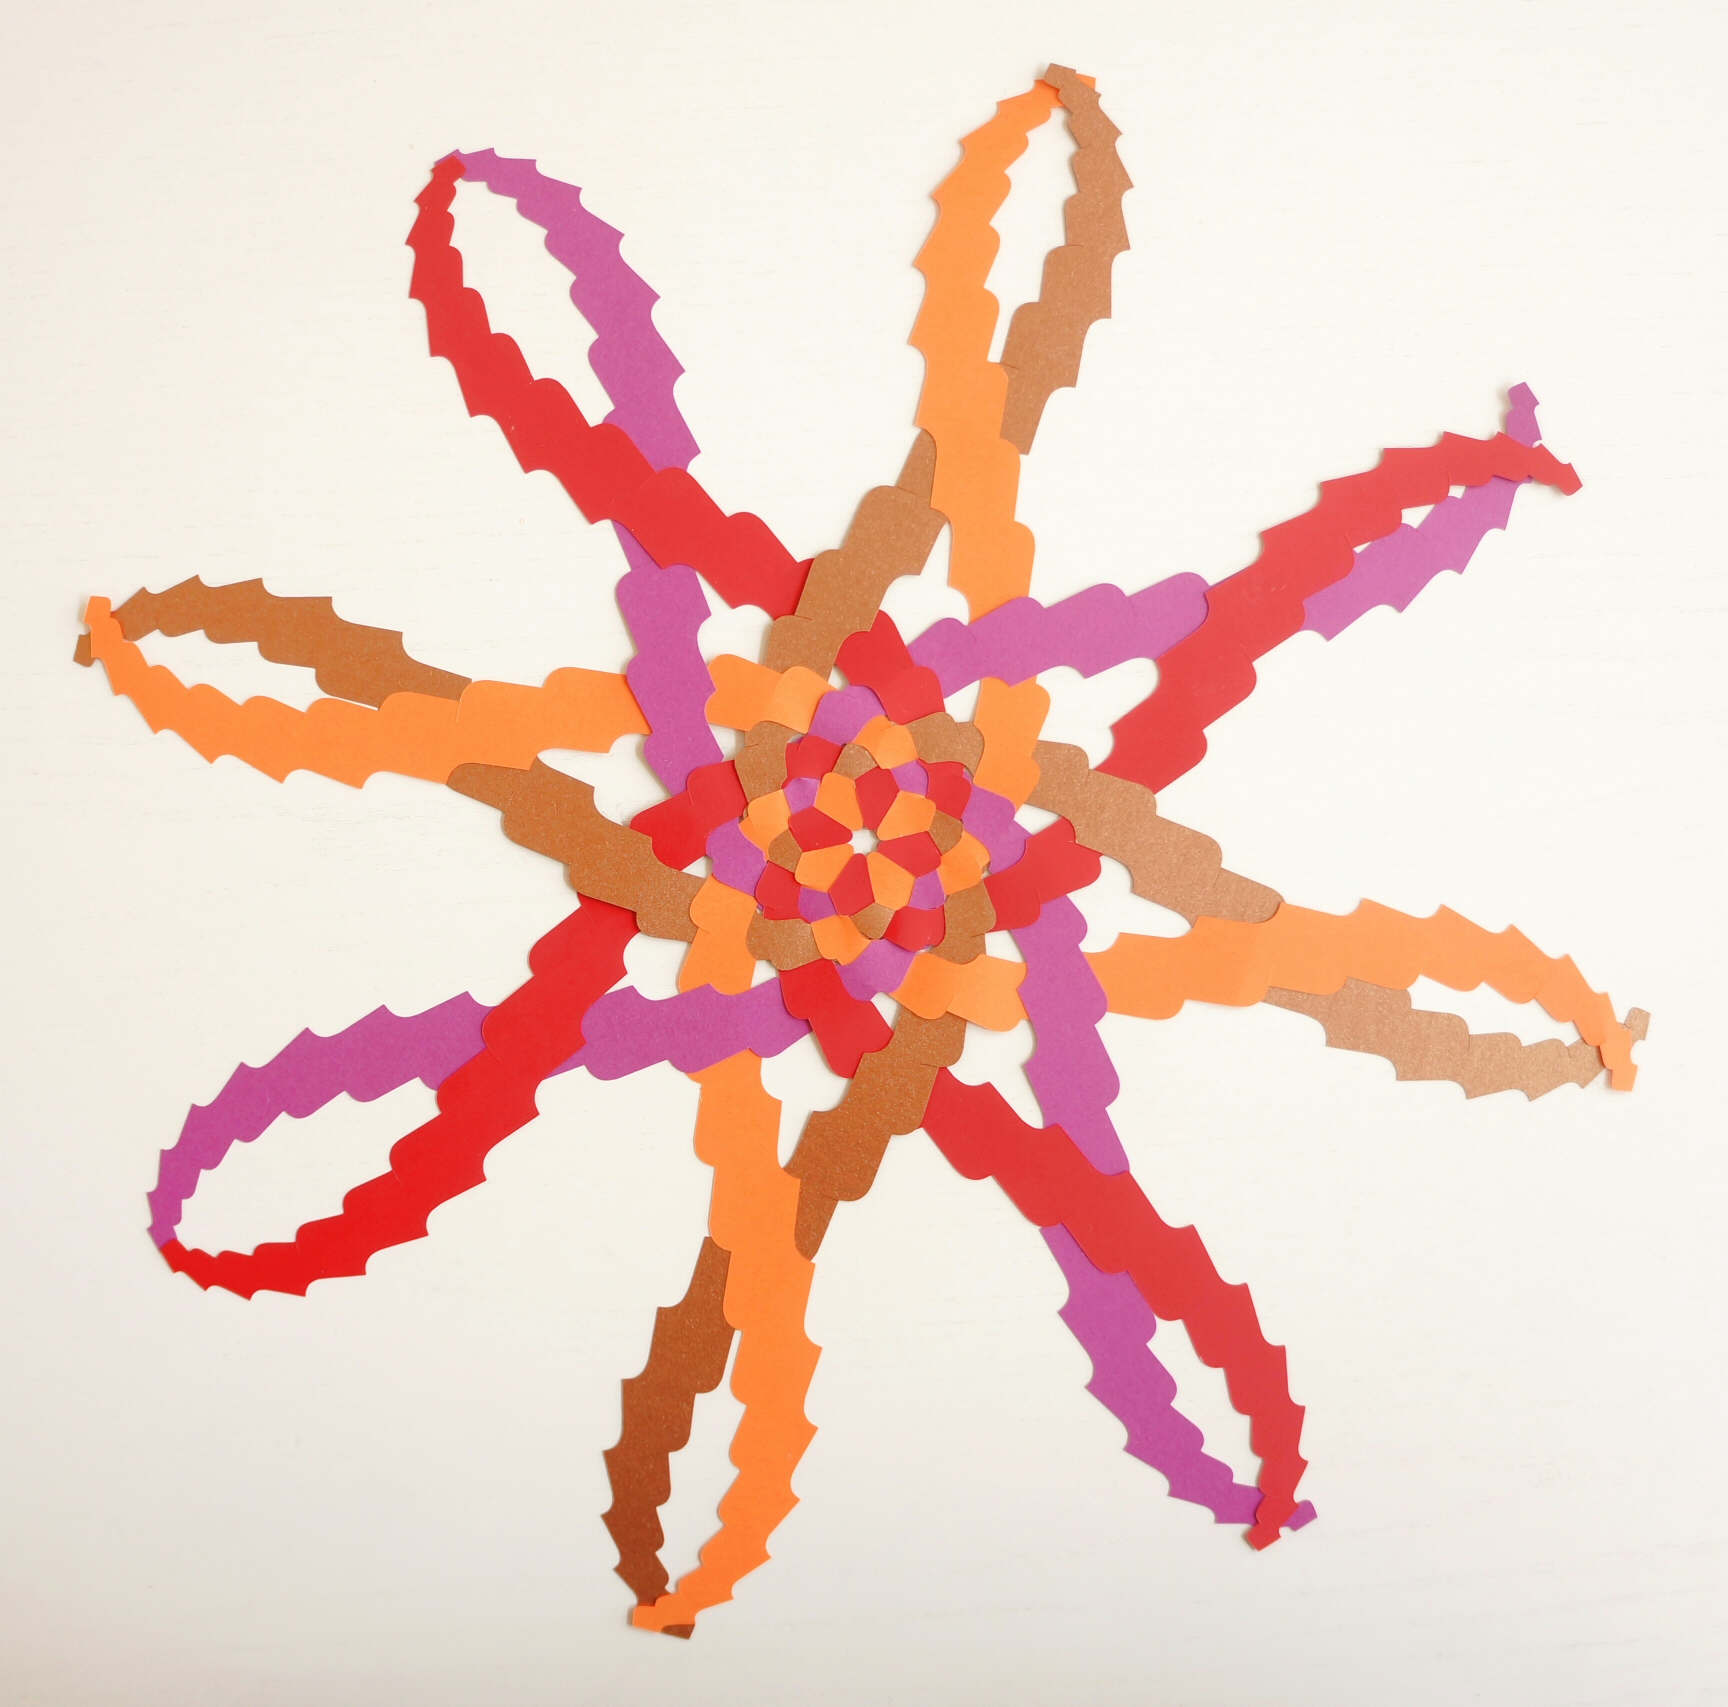
- Weave as much as possible while still flat (PC 9)
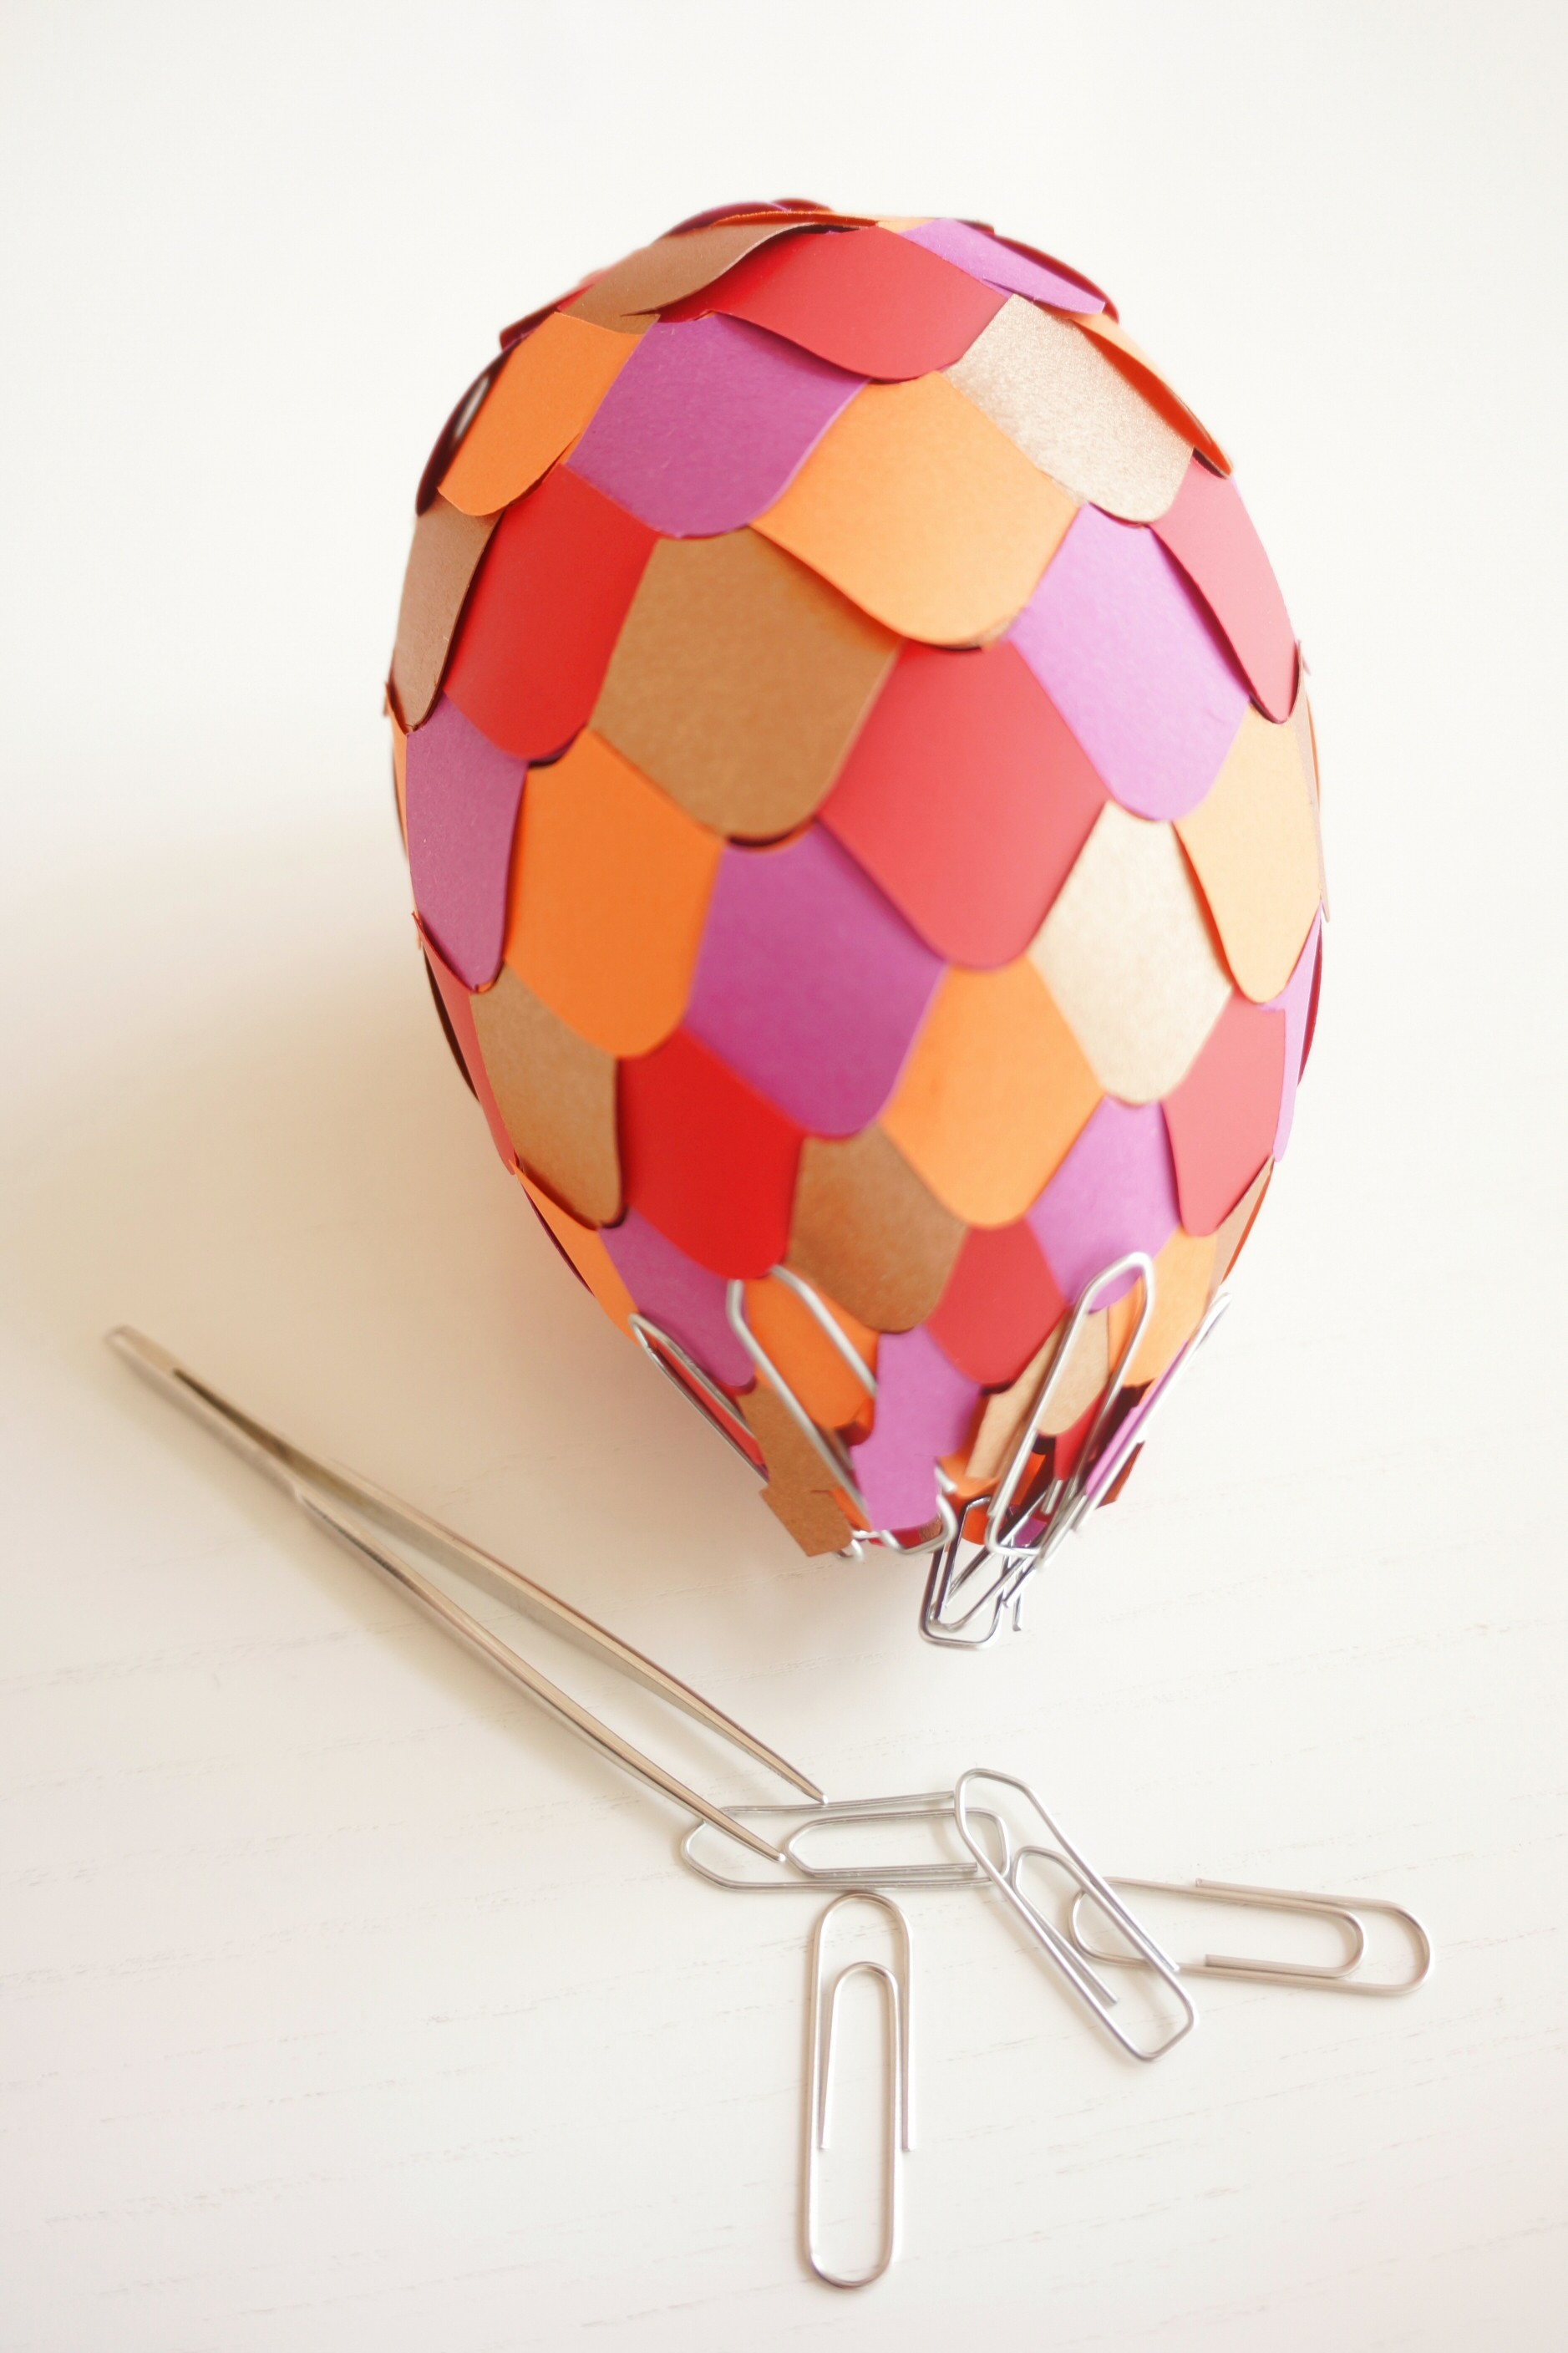
- Tighten and fix with paper clips
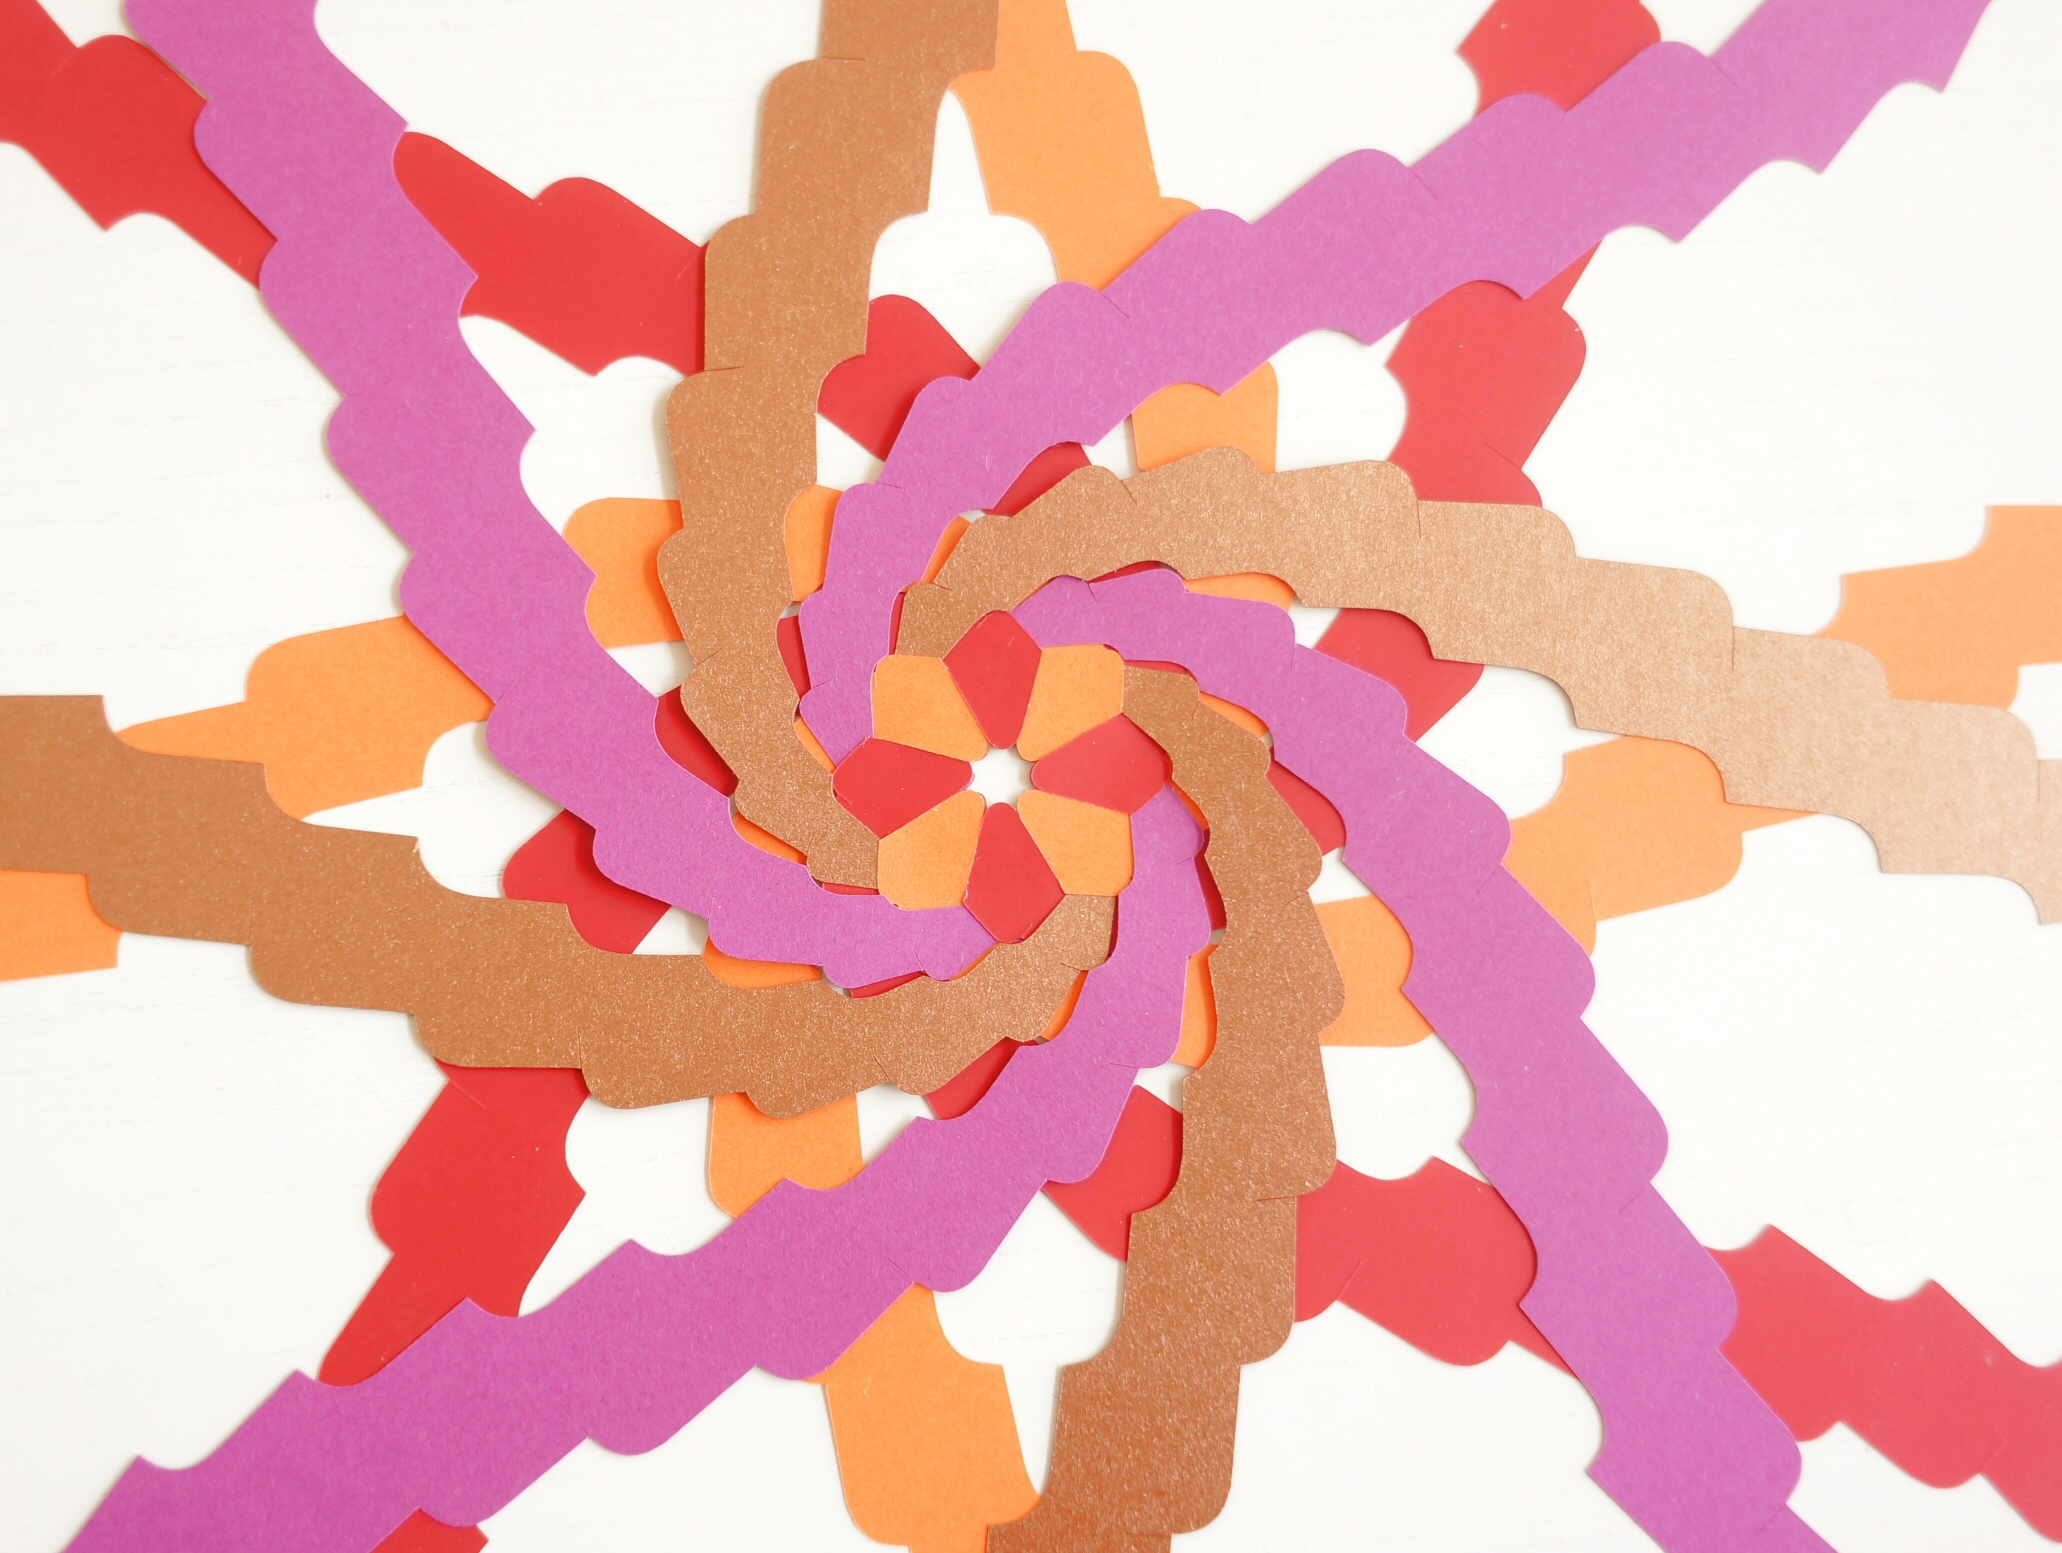
- Weave row by row, aligning the points, and keeping together the arms using paperclips when needed (PC 10). A pair of tweezers is a good help, when the squares turn small
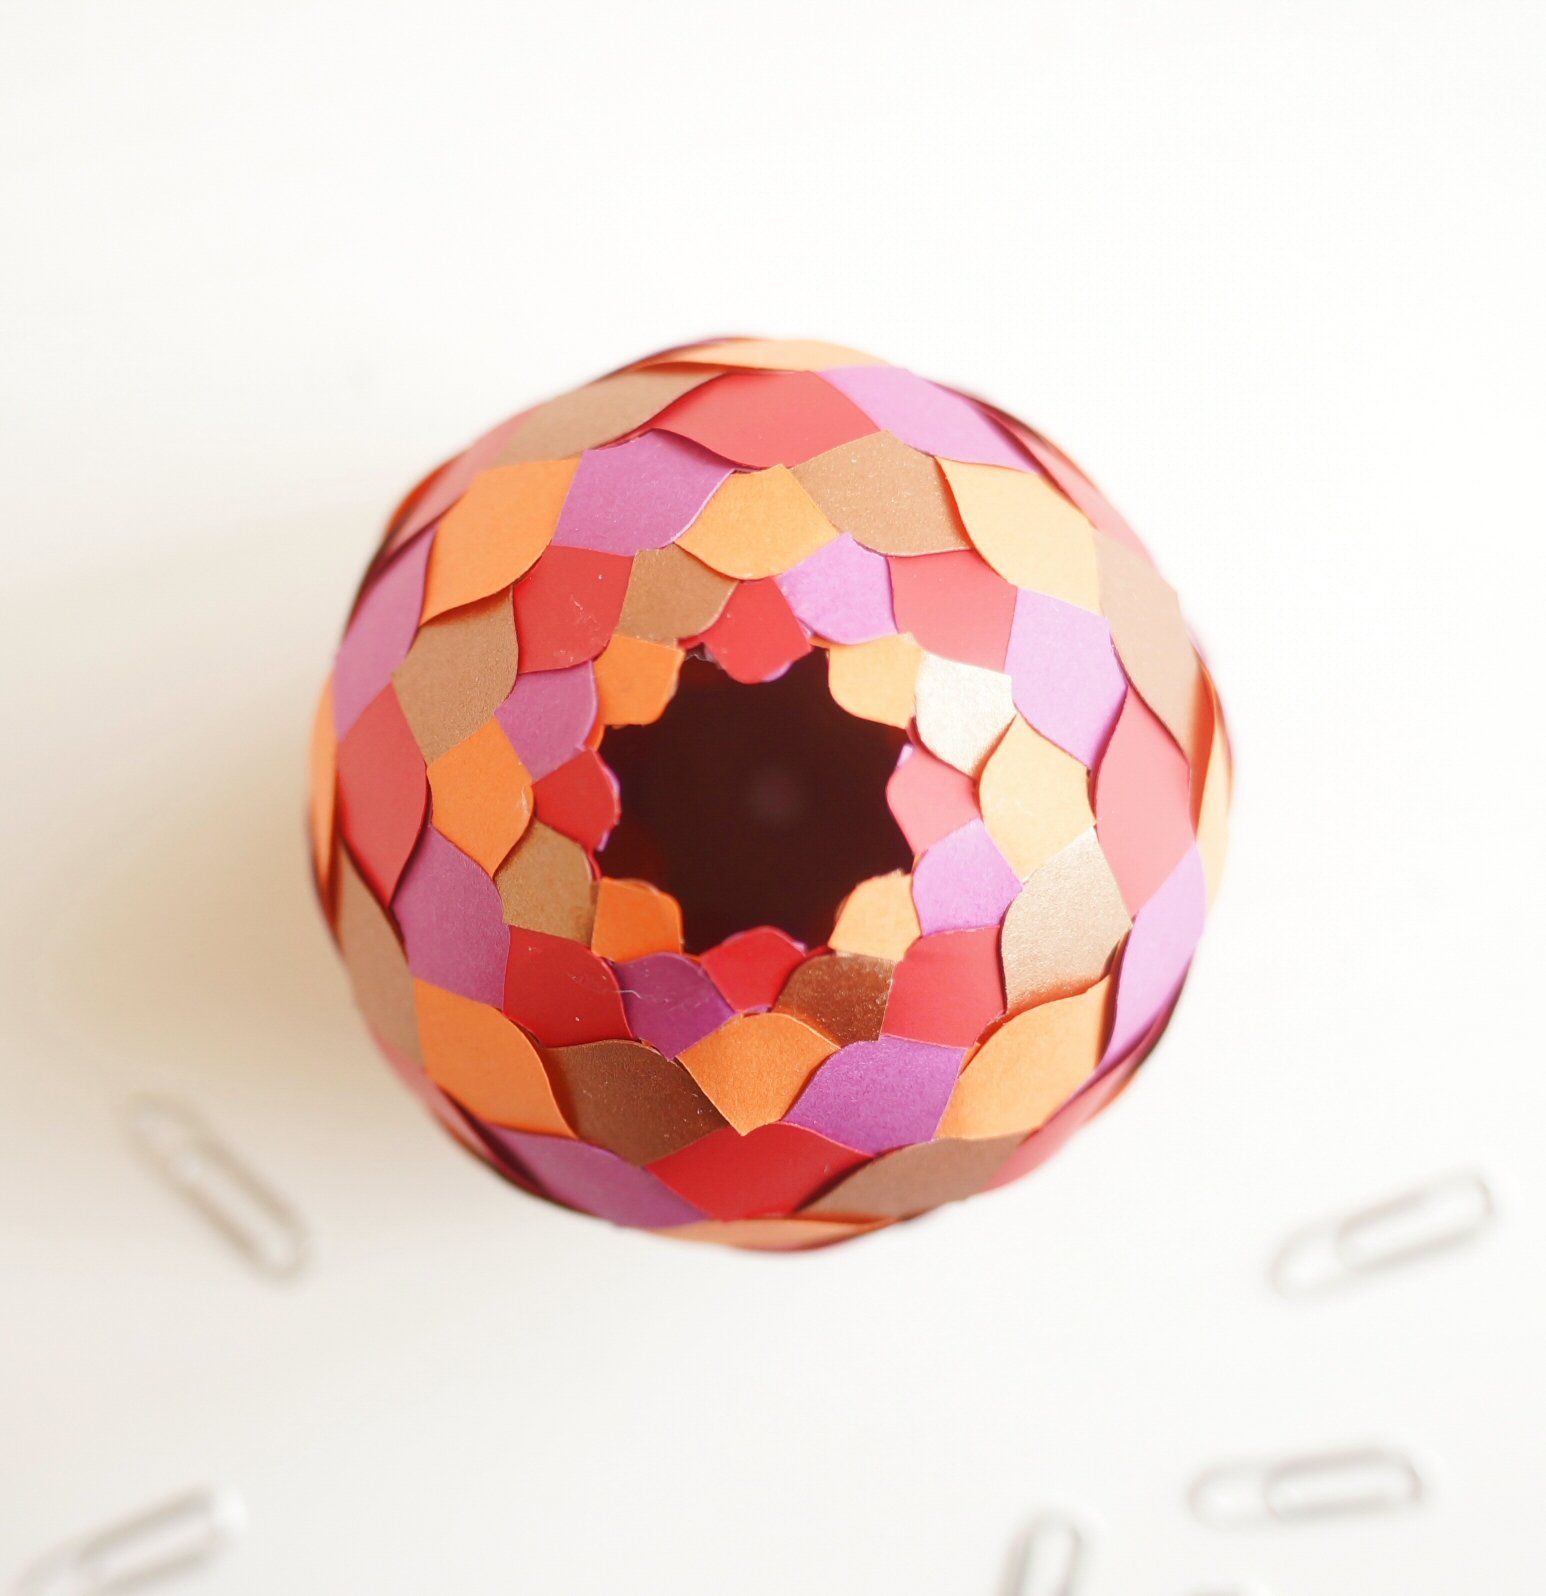
- When all is woven, align the points and sides of the last squares as well as possible and fix with glue. The Pinecone is meant to be somewhat flat at the pointed end, so do not refrain from pulling and shaping a little to align the sides (PC 11) (PC 12)
- You may add a piece of ribbon to hang the Pinecone.

And pdf-vector files for cutting: pine cone 01 1 cut ; pine cone 01 2 cut


I really want to try this But do you have any suggestions how to make the templates?? Thanks
Sent from my iPhone
Simple printout and scissors
If you have decided to use papers of a kind accepted by an ink printer a simple process is to:
• Load the printer with the paper you have decided to use
• Print out the pattern sheets with the templates you need
• Cut out by hand using a pair of scissors.
Digital cutter
Some crafters are so fortunate as to have a digital cutter. The cutter works like an ink printer, however the pen has been replaced with a small knife cutting the paper instead of drawing. The cutter is operated by a computer with software able to understand CAD files and transform them into cut files.
Unfortunately different types of digital cutter use different types of cut file. Yet no common standard has been developed. We have provided basic pdf-vector files. These files may be transformed into CAD files (dxf-format) using a program like Inkscape (freeware) or Adobe Illustrator.
Beautiful – I will give it a try! Thanks so much for taking the time to share your creations.
I am very glad that you take an interest in PaperMatrix. I visit your blog All Things Paper frequently. You provide loads of inspiration. Lene
Thanks Lene, mutual admiration society – that’s us! 🙂
each of your projects is unique and exquisite! This one is gorgeous! Thank you for sharing the pattern and the instructions.
HI,
I have just discovered your web site and I really love your work.
I’ll try to do one of your model but I have a question, do you plan to do a tutorial on how are designed your pattern? Do you start from a 3D model on computer or is it pure mathematical shape?
Anna designs the 3D objects using the computer software RHINO. We are currently planning a Christmas workshop in Copenhagen, where we shall teach how to weave the Pinecone.
absolutely beautiful, can’t wait to make these for my Christmas tree.
Hi there, I think you have the most inspirational link I have come accross!
As I’m new to origami art I’m not so good with diagrams:-(
Will you have more tutorials on you-tube? (Pls say “yes”)..
Thnx for sharing all the wonderful art with us..
Yes, we shall. Lately we have, however, been very busy preparing our new books. Our two small German books are each provided with two videos explaining how to weave spheres, balloons, cones and boxes. Making these films we definitely upgraded our video skills. Now we just have to find time to make more.
Wow its great. Thank you for sharing.
My pine cone turned out to become an egg, but I guess it looks okay for an egg. Thanks for sharing!
Many thanks for sharing your work! You bring me back in my childhood when i was only dreaming about something like this.
Thank you! Merry Christmas. Lene
Merry Christmas to you too!