Please enable Javascript for better experience...
 
Installation and Configuration Guide for vSphere Data Protection(VDP) 6.1 # Part-1
By Pranay Jha | Jul 6, 2016 | In Articles | Update: Jul 27, 2016 | Total Views [ 12107 ]
Taged In
(3 Like)
Rate

Step by Step Installation and Configuration Guide for vSphere Data Protection(VDP) Backup and Recovery Solution.
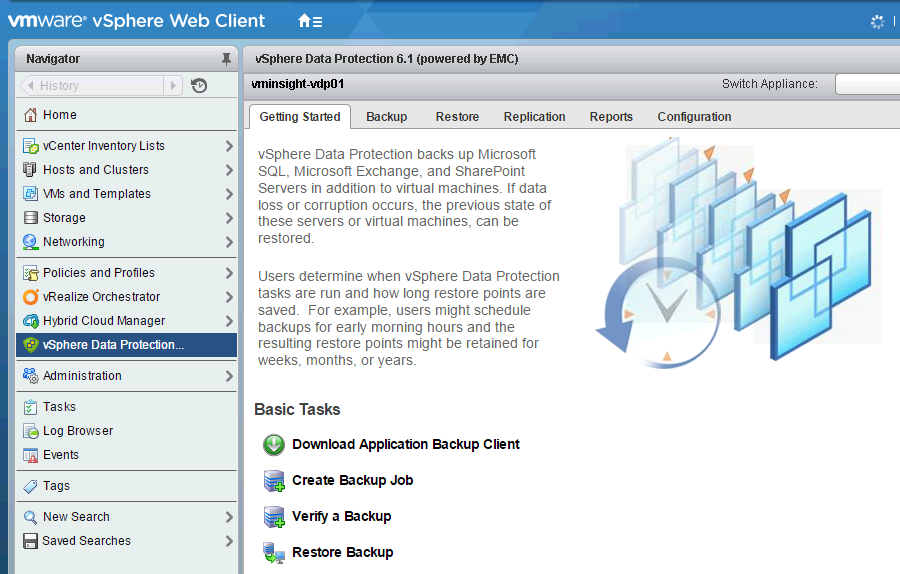
What is VDP?

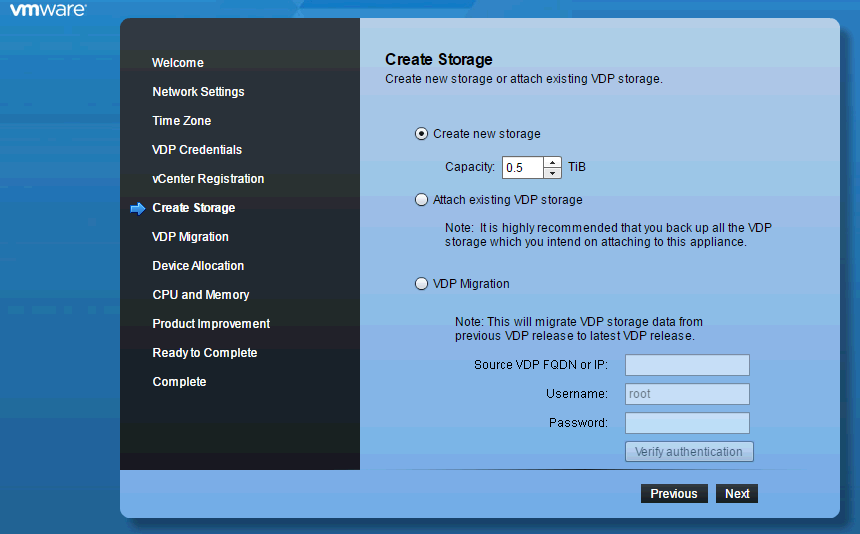
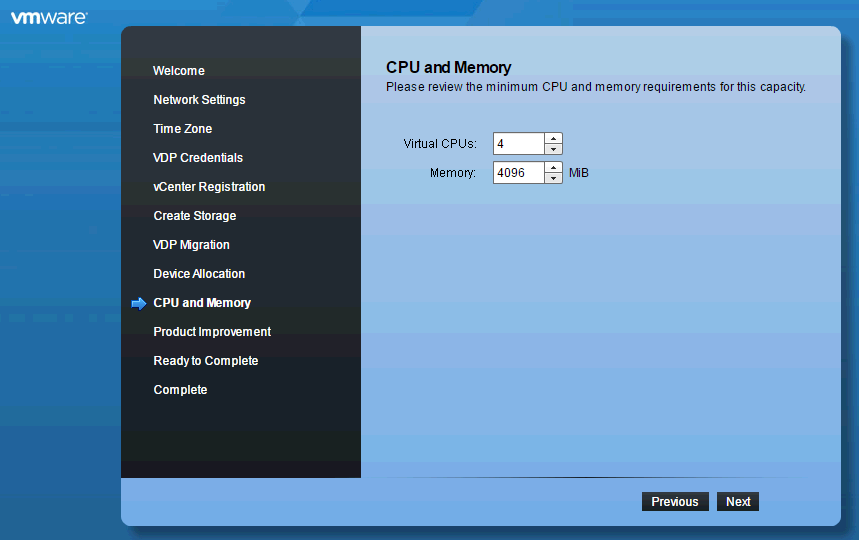
VDP formally known as vSphere Data Protection, designed and powered by EMC Avamar. It's fully integrated with vCenter and Web Client. VDP solution has designed for backup and restoration of VMware Virtual Machines. VDP is appliance which is build up with Suse Linux, and runs with 4vCPU and 4 GB of RAM. It's prepackaged OVF which is very simple to deploy in environment. While thinking about sizing the datastore, make sure you to use a larger Data Protection  datatastore, as it cannot be increased once application has been deployed. Refer to recommendation from VMware for VDP data sizing.

It's agent-less backup which doesn't required any kind of agent in Virtual machine. Simply add ESXi host or particular virtual machine to backup job and start making an additional copy for future recovery. It takes image level backup as well as file level recovery for all VMs. Provides encryption and de-duplication of data  to make it more secure and compact.

Most important options you would have thinking about is licensing cost. Please! There is no extra cost to bring this in your environment. It's integrated product and have licensed even if you Essential Plus or Higher license of vSphere.


Points to remember before proceeding for Installation and configure a VDP for backup solution:-

  • This product must required ESXi Host 5.0 and vCenter 5.5 or later version to work.
  • VMware Tools are also required for some features used in File Level Restore.
  • Make sure that all virtual machines are running hardware version 7 or later to support Change Block Tracking (CBT).
  • DNS entry must required before configuring VDP backup. Create a DNS record for the VDP appliance before deploying the appliance. Ensure both forward and reverse lookup are enabled in DNS.
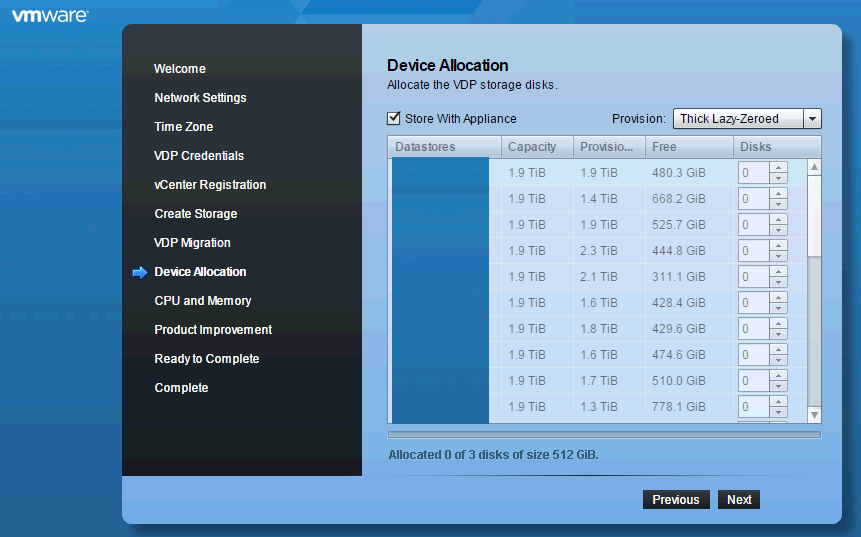
  • As per the best practices, VDP appliance should be segregated with other Virtual machines datastore as keeping in same datastore may degrade the performance during backup process.
  • Do not select all virtual machines in single backup job, or through single appliance. Better to have segregation in different jobs and consider different backup start time.
  • HotAdd transport mechanism is recommended for faster backups and restores.
  • Virtual Volumes(VVOLs) are not supported.
  • NTP should have configured same as vCenter and ESXi Hosts to work properly.
  • Must have administrative access on vCenter to configure VDP backup.
  • Few dependencies on below Disks type  which are not supported by VDP.
    • Independent Disks
    • RDM Independent - Virtual Compatible Mode.
    • RDM - Physical Compatible Mode.
  • The VDP appliance connects to a vSphere host using port 902. If there is a firewall between the VDP appliance and the vSphere Host, port 902 must be open.

Once you are done with all these prerequisites, let's take a quick look for Installing and Configure vSphere Data Protection(VDP).


Install vSphere Data Protection:-

  • Download VMware vSphere Data Protection OVA appliance from Vendor Website.
  • Login to Virtual Center through vSphere Client or Web Client.
  • Select Home>>> Inventory>>> Host and Cluster.
  • Select any Host where you have to Deploy VDP appliance. Go to File Menu, Click on "Deploy OVF Template".
  • Select the Source of OVA template. Click Next and review the template details.
  • Accept EULA, and Click Next.
  • On the Select name and folder screen, type the name for the VDP appliance. Use fully qualified domain name (FQDN). Click Next.
  • Select Datastore. Make sure to follow Vmware best practices to choose datastore. Recommended this appliance to not be in same datastores where other virtual machines are running.
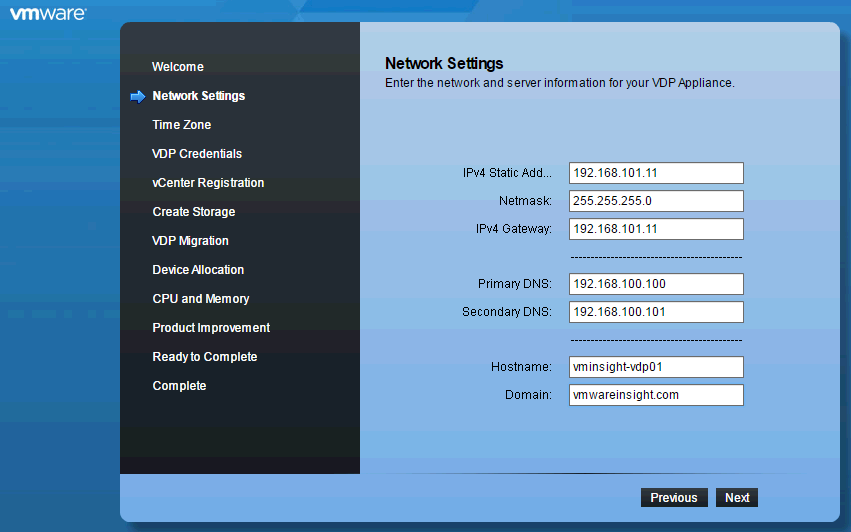
  • On the Setup Network Screen, specify IP address, DNS, Gateway, and Netmask. Please note that DHCP is not supported, only static IP required.
  • Click on Finish to complete the Installation of VDP.


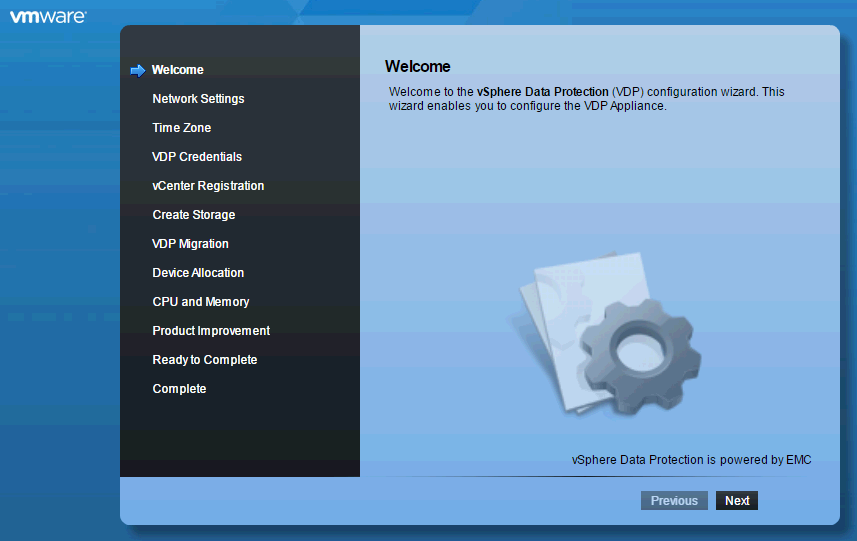
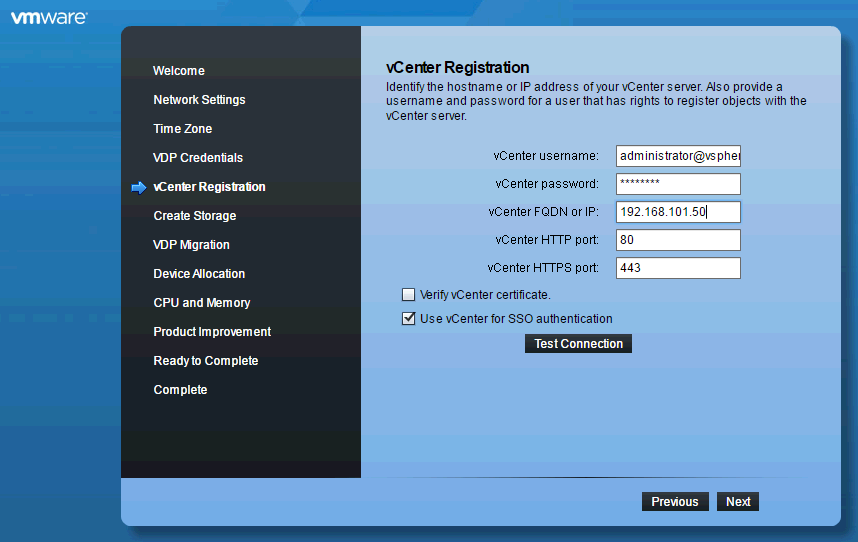
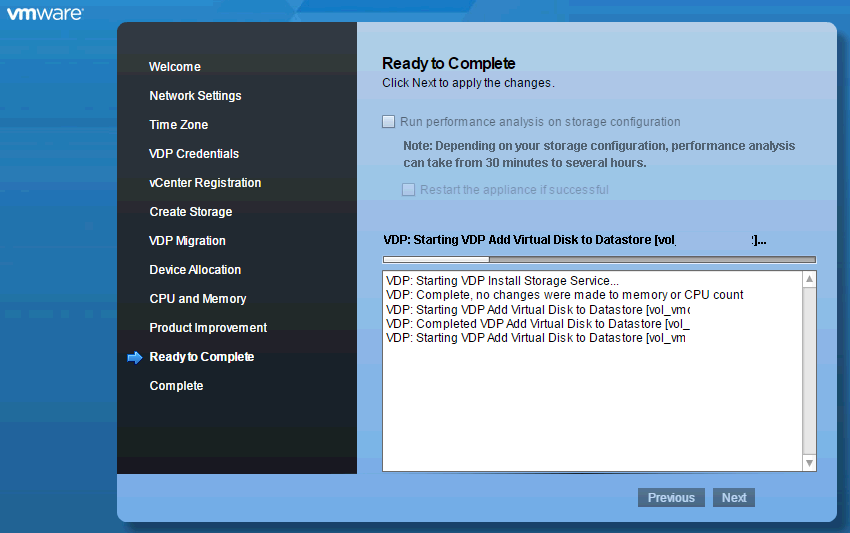
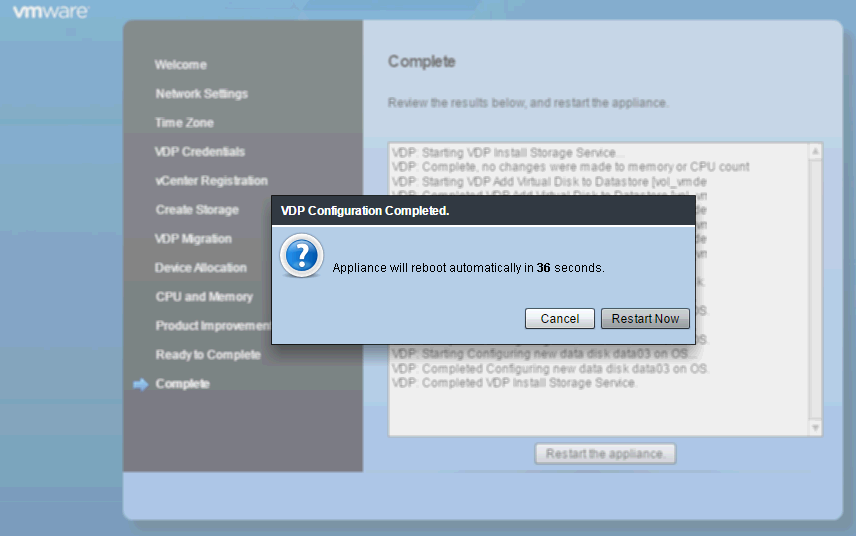
Configure vSphere Data Protection:-

  • Once Installation part is completed for VDP appliance, you will see below screen on direct console. Now proceed for configuration part.

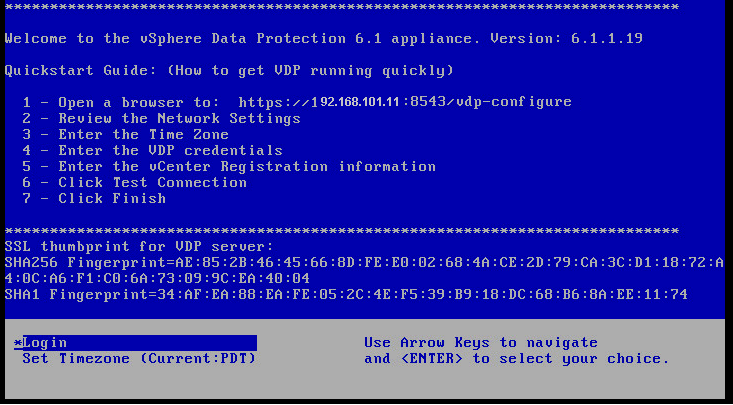
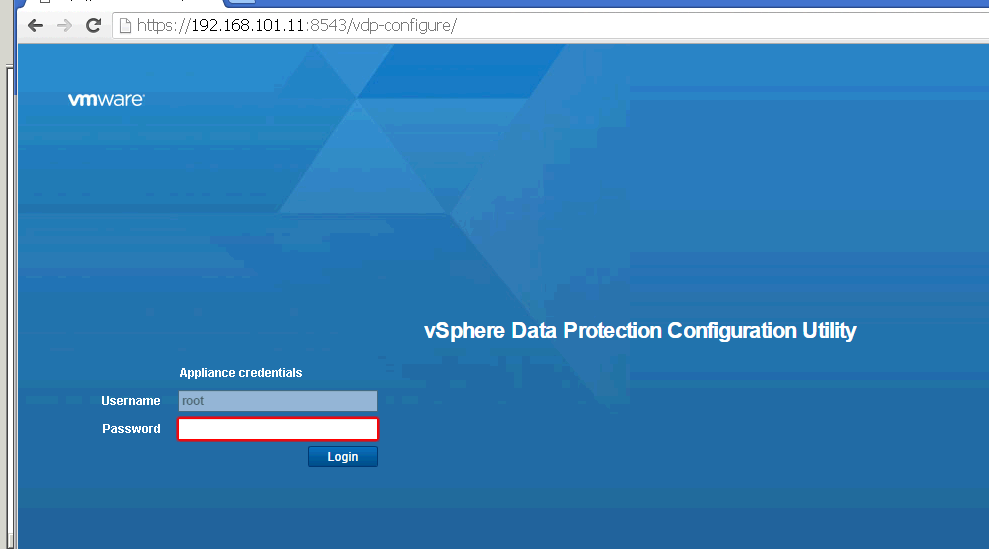
  • Open a Web Browser and type https://<IP_address_VDP_appliance>:8543/vdp-configure/. It will open VDP login page as shown below.
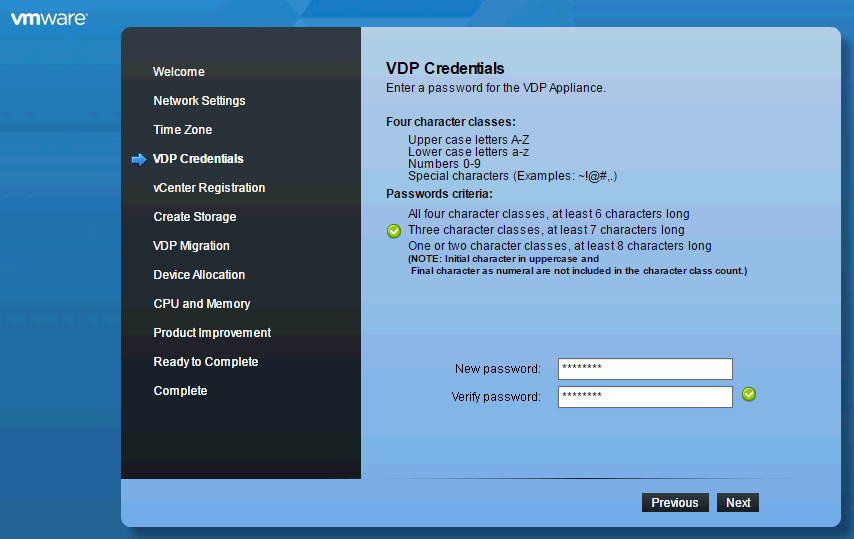
  • Type credentials to login into VDP appliance. Default User ID is "root" and Password is "changeme".

  • Once entered, click on login. It will appear you to VDP Welcome Page. Click Next.

  • Network Settings Configuration page will appear. Enter the network and server information for your appliance. You will required below informations.
- IPv4 Static Address
- Subnet Mask
- Default Gateway
- Primary DNS Server
- Secondary DNS Server
- Hostname
- Domain Name.
  • Make sure that DNS records have been created in DNS Server for IP to Host and Host to IP entries. Else, it won't allow you to move further.

  • Select Time Zone and click Next. Ensure to have related vCenter, ESXi Hosts, and VDP appliance is in same Time Zone.

  • Enter Password for VDP Appliance. It will be use when you login to VDP appliance through SSH or Web client portal. Default Password for this appliance is "changeme"

  • Now your on vCenter Registration page. Enter vCenter details to get authenticate and integrate this VDP appliance to your specific vCenter Servers. Details you required are as follow:-
- vCenter User Name
- vCenter Password
- vCenter FQDN or IP
- vCenter HTTP Port
- vCenter HTTPS port
  • Leave vCenter for SSO authentication enabled as vCenter is getting authenticated through SSO.
  • Once entered the required information, Click on "Test Connection" to verify the information.

  • Test Connection option will verify the information and will show Connection Status. It must be appear as "Connection Success".

  • Click Next, and Create Storage page will appear.
  • Enter the required information. If it's new VDP appliance, click Create new storage option and select Capacity. Select one of the available Capacity option. It will be like 0.5, 1, 2, 4, 6, 8 TiB. Click Next.

  • Leave the "Store with Appliance" option enabled if you want to keep in same datastore where appliance exists. Select the Provision type from drop down option. Click Next.

  • Select vCPU and Memory for appliance. Default is 4 vCPU and 4 Gig of Memory.

  • Click Next in Product Improvement page.

  • Ready to Complete page will appear. Enable "Run performance analysis on storage configuration" option to ensure that the storage configuration meets minimum performance requirement.

  • It will start the storage configuration test. Click Yes to continue.

  • Ready to Complete page will start VDP Add Virtual Disk to datastore you choosed earlier.

  • Once compelted, VDP appliance will get reboot. Restart Appliance to affect the changes you have done previously.

  • Take a quick look in VDP appliance direct console. Restarting appliance will show you as below screen. Once restart process completed, let's again come back to Web Client to verify if it's working fine.

  • Login to vSphere Web Client with vCenter IP address. (https://vCenter_IP_Add:9443/vSphere-client). Enter SSO user ID or Domain credentials to get authenticated.

  • Go to Home>> VDP icon will appear in Home page as well as in left panel as vSphere Data Protection.

  • Newly Configured VDP apppliance will appear here. Select VDP Appliance and click Connect.

  • Once appliance is connected, it will take you to Getting Started page to start using it for Backup and Restore operations.


This article is all about Installing and Configuring vSphere Data Protection 6.1. Refer my next Part of Blogs in VDP section to know about how to Manage this.


Thanks for visiting here. Share this article if you found it useful.
Like Facebook Page https://www.facebook.com/VMwareInsight/
Connect to twitter https://twitter.com/imPranayK
Subscribe my Channel https://www.youtube.com/vmwareinsight
Connect over Linkedin https://in.linkedin.com/in/impranayk
Share this on Social Media

About the Author

Pranay Jha
Pranay Jha
Founder, Contributer VMwareInsight.com

Public profile: user/profile/99900000


Follow me

facebook linkedin twitter G+ VMTN youtube

Thank you for visiting my profile. I am Pranay Jha, bring along a total of 11+ years of extensive experience with me in Information Technology sector for organizations from small business to large enterprises, wherein my current assignment I am associated with IBM as a Technical Solution Architect for Virtualization platform. I am vExpert x 3 (16/17/18), VCIX-DCV, VCAP5/6-DCD, VCAP5-DCA, VCP7-CMA, VCP5/6-DCV, VCA-DCV, VCA-Cloud, VSP, VCE-CIA, MCITP, MCSE, MCSA(Messaging). I am also an Independent blogger and founder of http://vmwareinsight.com and https://cloudpathshala.com. I can be reached via email at pranay1988jha@gmail.com or Direct Message via Contact Us form.

 
Please SignUp/Login to comment...

Or comment as anonymous...
* Name
* Email ID
Comment
 
Sponsors


Facebook Likes