
As part of a commitment to expand my portfolio in 2017 with work that showcase a broader understanding of concept and light, I decided to plan a shoot centered around a vintage travel theme. After weeks of planning the style, location, and overall shots I wanted to take away, I finally had the opportunity to execute the shoot yesterday and I’d like to share the results as inspiration for any interested readers.
Planning
As with any venture in life, planning ahead will save you a lot of grief when it comes time to put that plan into action. Many days on my way to work here in Austin, TX, I had driven by a site where several vintage train cars had recently been relocated to a permanent site complete with tracks and railroad memorabilia. The trains as it turned out were from an old passenger rail service called the Texas Zephyr operated by the Colorado and Southern Railway Service which commenced service in 1940, and saw its final route on September 11th, 1967. After weeks of sitting idle, crews began renovating the cars for what appears to be a collection of bars, diners, and other retail shops and although part of a larger complex, I struggled to find any contact information for the trains themselves after weeks of research. So without an option for permission which most likely would have been denied anyway, I planned the shoot late on a Sunday afternoon when I expected few people to be around. At the very least, this ensured we stayed out of anyone’s way and did not disrupt work in the area plus there would be little traffic en route to the site which was outside of town.
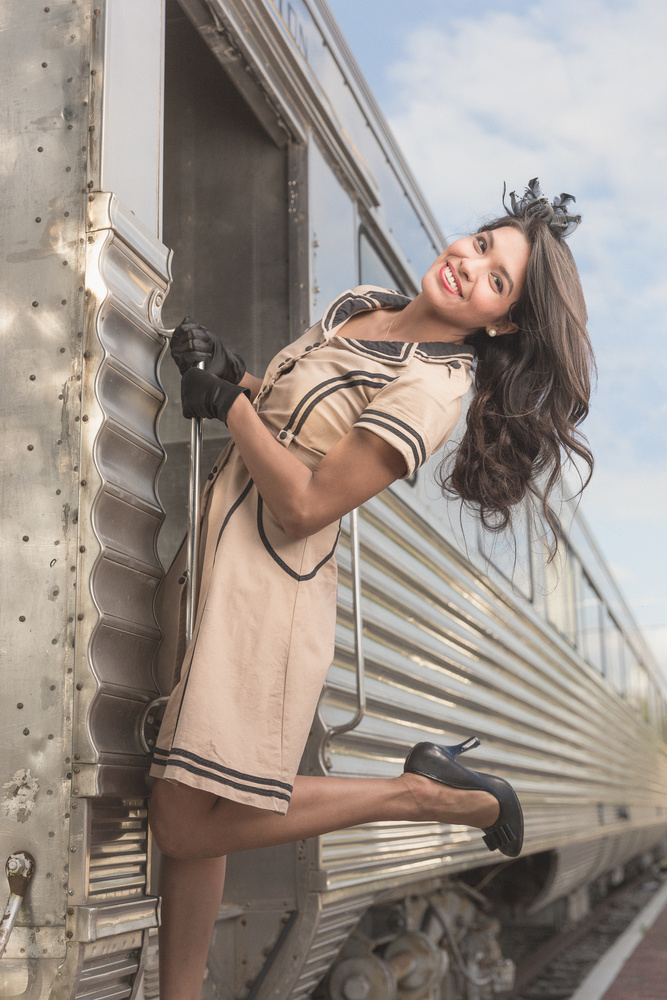
The trains were incredibly well preserved and placed in an artful manner that invokes a very nostalgic emotion, perfect for a themed shoot. I pitched the idea to a friend I recently met that was perfect for the role and she was ecstatic at the concept. So much so that she offered to rent a costume for the occasion including a period specific dress, suitcase, gloves, and shoes. All because she was excited about the idea, not the pay. Which brings about a good point. For work of this nature if it imperative that not only you but your model and those involved are excited and invested in the final product. Often times conceptual pieces such as this are unpaid and if those you are working with do not see the value of producing the concept, it will certainly show through in your images or worse, the team will cancel the day of leaving you high and dry.
With our model booked and a location decided upon, it was time to think about shots.
Shoot Day
The week of the shoot was particularly busy for me leaving little time to compile a shot list or storyboard as I usually do. My brain is constantly daydreaming of visuals so even without this, I had several shots in mind before I hit the ground.
In general, I hoped to capture several variations of our model hanging from one of the cars with a suitcase, waving goodbye to strangers, looking out to the crowd for a familiar face, etc… Second, I wanted to capture her waiting by the rail car, with her bags, as if at the station. Third, I wanted to see her walking down the lane past the train with both bags in hand. Fourth, I wanted some close ups, say chest up, of our model peering over her shoulders with a look of wonder. And fifth, I wanted a shot of her standing on a pair of stairs at the site waiting for the arrival of a stranger or perhaps the train that would take her to new places.
All conceptual but having seen the site several times before hand, it was fair to assume most of these shots would be achievable. Which brings me to the next point: check out your location on foot and with your camera at least once before the shoot. Walking around looking for compositions, angles, the direction of the light, etc., will make you comfortable with the area and help you conceptualize the shoot long before you get on site. This is crucial to staying on time and executing the shoot properly without provoking anxiety in yourself, your crew, and especially the model who you want to feel as relaxed and comfortable as possible.
Luckily, everyone arrived on time at 5pm and we were able to get going with little disruption. The biggest obstacle was the wind which kept my assistant very busy holding our light and 47” octobox. Next piece of advice? Find an assistant, preferably someone who is good at all the things you are not and can provide sound guidance and direction while you are distracted with the camera. I have found assistants to be an invaluable resource and if you can’t pay them, offer to collaborate with them on the shoot so you both walkaway with work for your portfolio.

Here is a BTS look at the set pulled from a video my friend was filming

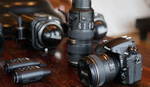
We shot for around two hours and were able to capture all of the planned shots and more! And speaking of gear, I went with the incredible Xplor 600 HSS battery powered strobe for my key light, Paul C Buff 47” Octobox, an Avenger C-stand for grip, a 48” reflector as a flag for reflections on the trains from the key or a fill for the key, my trusty Canon 6D, and the Canon 24-70mm f2.8L ii. Using a flash on location has become something I use more frequently as it helps me achieve a sense of drama in images that is difficult to replicate with just natural light. It can be a pain to haul around but the results are worth it. Speaking of which…
Post Production
In total, I walked away with about 300 or so shots. Assuming a 10% success rate, I’d hope for at least 30 of those shots to be keepers, although not necessarily portfolio pieces.
My post process begins with Lightroom where I import all of my images with tags such as vintage, portraiture, train, etc., which helps my catalog to remain organized as well as optimizes my images for searchibility on the web. I start by going through the entire sequence and deleting obvious failures. Then I repeat but this time I flag images I like using the P key. Once more I go through the images and assign numeric ratings from one through three, with three being a top favorite. Rarely do I assign three’s even though the number scale in Lightroom goes all the way to five. I try and be as objective as possible and part of that requires the ability to identify when an images stinks or is just so so. All in all for this shoot I walked away with 16 images rated as one, five images rated as two, and one rated as a three. Less than a 10% success rate but still several keepers.
Here is one of my favorites and the edit from start to finish.

One of my favorite shots from the set. The shallow depth of field and the light on her face were just right IMO
One of the first things I do in post is correct for skin tone and blemishes using a frequency separation technique. This technique can definitely be overused so dial it back using the opacity slider for that layer if it appears too heavy. Next I added a bit of dodge and burn to her face using a 50% grey layer set to soft light blend mode. This added a bit more dimension to her facial features.
Next I set about colorizing the image to give it a more film, vintage look. To do so, I de-saturated the image by about 30%. Using a curves layer, I pulled up the blacks to give it a bit of a hazy look and then I applied a gradient map set to dark blue for the shadows and orange for the highlights. This added a bit of film style color to just the darks and lights, respectively; with a smooth transition through those tones. Finally, I added a light yellow solid fill layer set to a Color blend mode and a low opacity of around 10%. The last step was bringing the image into Google Nik Color Efex Pro for some film grain and a bit more haze. I topped it off with a pop to the distinct reds and a light vignette. Here is a screenshot of my layers panel for reference.

My edit begins with correction for skin tone and blemish. Then I progress to color toning and film effects
Conclusion
In the end, I felt as though the shoot was a success! Both the client and I were happy with the results but more importantly, we enjoyed doing something we both love purely for the artistic creativity of it. Has this style been shot before? Sure it has but this post isn’t meant to be an introduction to something new, but rather inspiration to get out and have fun with your photography even if you’re not getting paid. Isn’t that why we picked up a camera in the first place?
BTS Video by Christian Puente: Pixel Brave
Model: Brianna Garcia


HOw are you using Buff modifiers with the XPLOR strobes?
Hey Michael! Great question. I bought a $20 speed ring adapter from B&H: https://www.bhphotovideo.com/c/product/854850-REG/Bowens_RD_6210_BOWENS_....
Amazon sells a cheaper one but you have to cut around the ring to make it fit. Works like a charm and worth it to me, the PCB modifier(s) are incredibly well built