DIY Spring Bunny Cushion*
This post may contains affiliate links. Read my disclaimer policy here.
*The materials in this post were gifted by Hobbycraft, but all creativity is 100% mine. You can read my full disclaimer policy here.
The start of Spring is only a week away, and if you’re anything like me, you have already mentally plotted a list of all the things you're excited about.
To share a few of mine:
- Swapping your coat for a cardigan or light jacket (for obvious reasons, as I'm from the UK, we can't completely commit to a cardigan).
- Beautiful flowers are blooming, and I can't wait to fill my home with so many colours.
- Daylight lasts a little longer because it still being light outside at 9pm is just heaven.
But my most favourite thing is, being able to finally bring out my spring and summer inspired decor - all those pastel colours, fun prints, and flowers absolutely everywhere. My love of flowers even inspired me to make a floral garland so I could keep that spring vibe out all year round. I just love it!
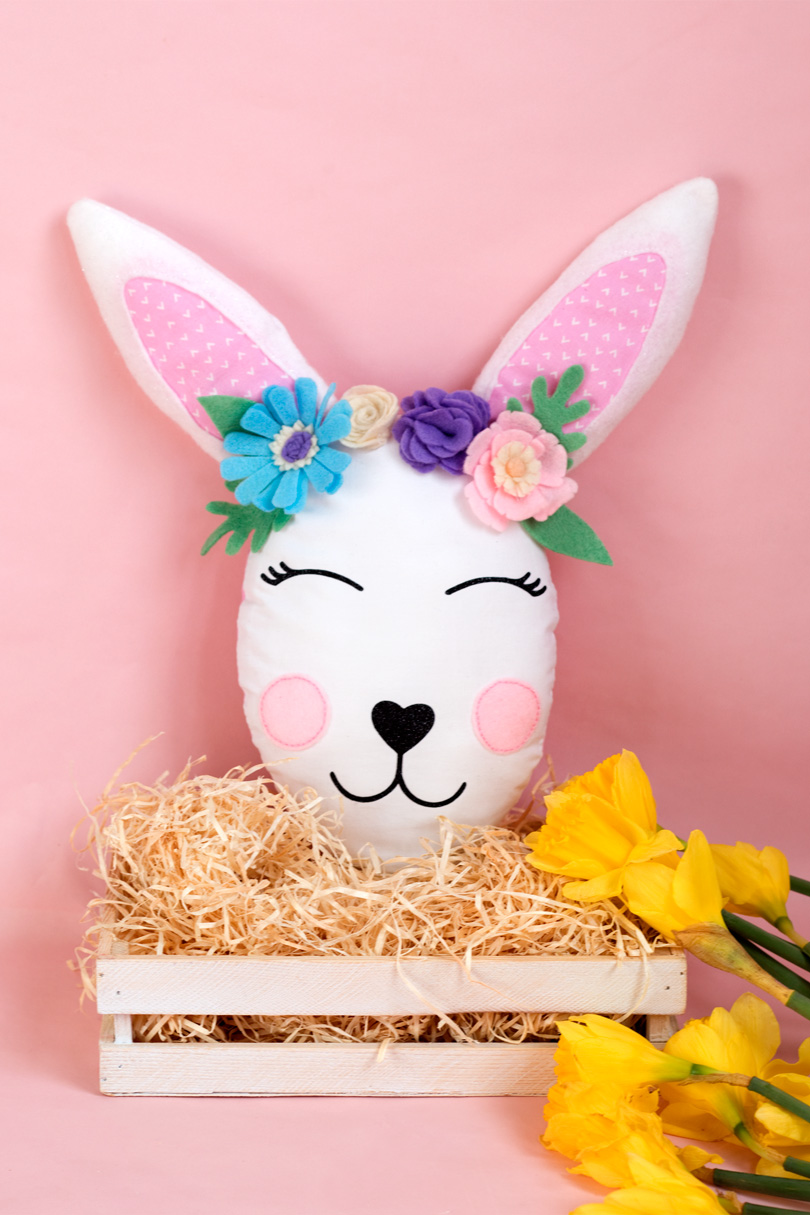
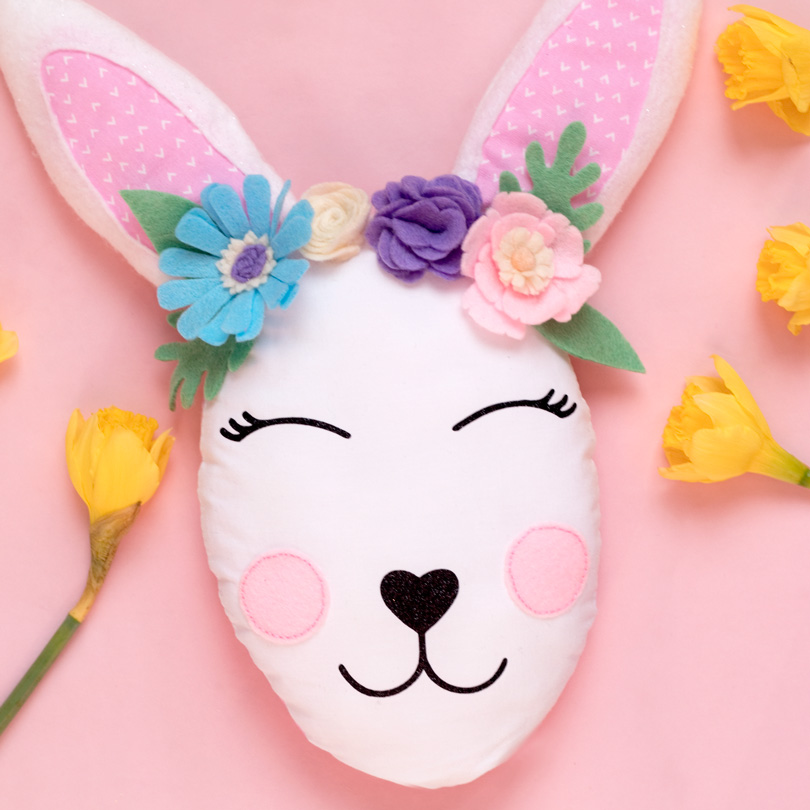
If you are looking to bring in some homemade spring decor, then you're going to love this tutorial. I am going to be showing you how to make your very own spring-inspired bunny cushion with a flower crown. I have even included a template for you to download and print, making this a perfect DIY for all skill sets.
We are just going to pause this tutorial for a little as I need to share some very exciting news with you all.
I am such a huge believer in putting things out into the universe. At the start of the year, I posted a Tweet mentioning a few brands I would love to work with, in 2019. One of those brands were Hobbycraft, and in less than a week, I had secured a collaboration. You must all know how much I am obsessed with Hobbycraft, so having this opportunity is honestly a dream come true!
Not only have I been working on creating this post, but I will also be taking over Hobbycraft’s Instagram stories. I'll be sharing my favourite crafts, my workspace, a fancy freebie for your phones, and a step-by-step craft guide. This is going to be happening tomorrow (Tuesday 12th March), but don’t worry if you’ve missed out on that, I’m going to be sharing 3 crafts on their feed too, and your support would be amazing. If you have come over from Hobbycraft's Instagram, hello and welcome, and don't forget to introduce yourself in the comments below.
Now back to spring bunnies!
I have kept the design and fabrics very simple for this craft. This is also the perfect project for fat quarter lovers, or for those of us who enjoy saving small pieces of fabric. I'm that crafter who will keep hold of all cuts of fabric, even the very smallest, just waiting for a crafting project that may require it. You will need a piece of white cotton for the front of the face, a sheet of white felt for the ears (I decided on glittered felt), and a piece of printed patterned fabric for both the back of the head and the inside of the ears. I've kept my colour palette very simple and very me, but feel free to work in materials and colours you love. All the materials I've used are from Hobbycraft, and you can find the exact links shared during the tutorial below.
This DIY also marks my very first official project using my beloved Cricut Maker. I do feel like I was being slightly lazy as these simple shapes can be cut by hand, but I think I had just as much fun watching the maker work than I did putting this all together. I have used Cricut iron-on sheets to create the eyes, nose and mouth, but you can also use felt instead.

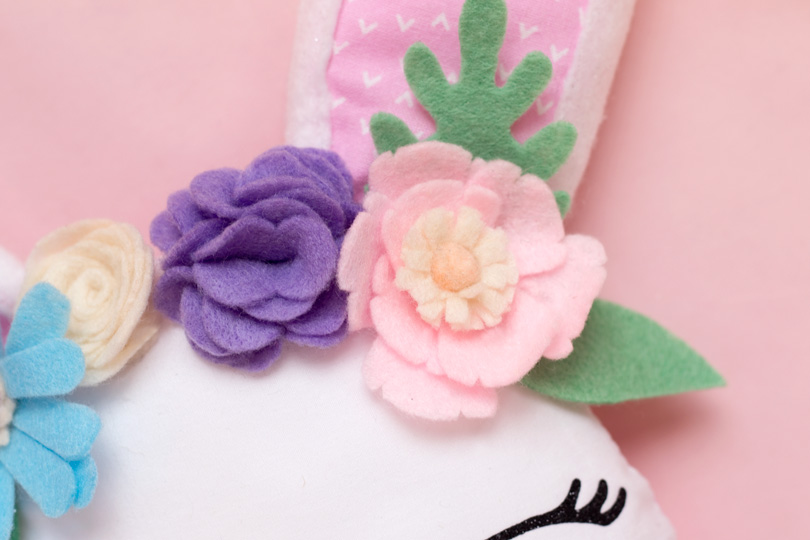
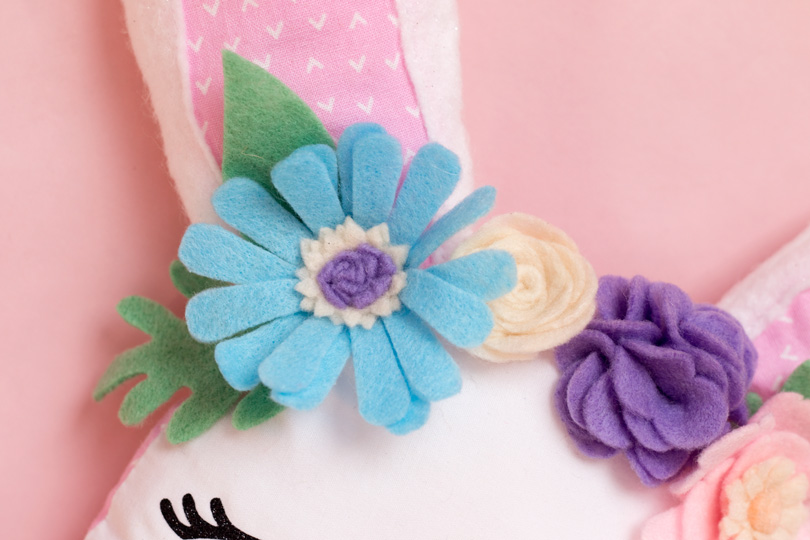
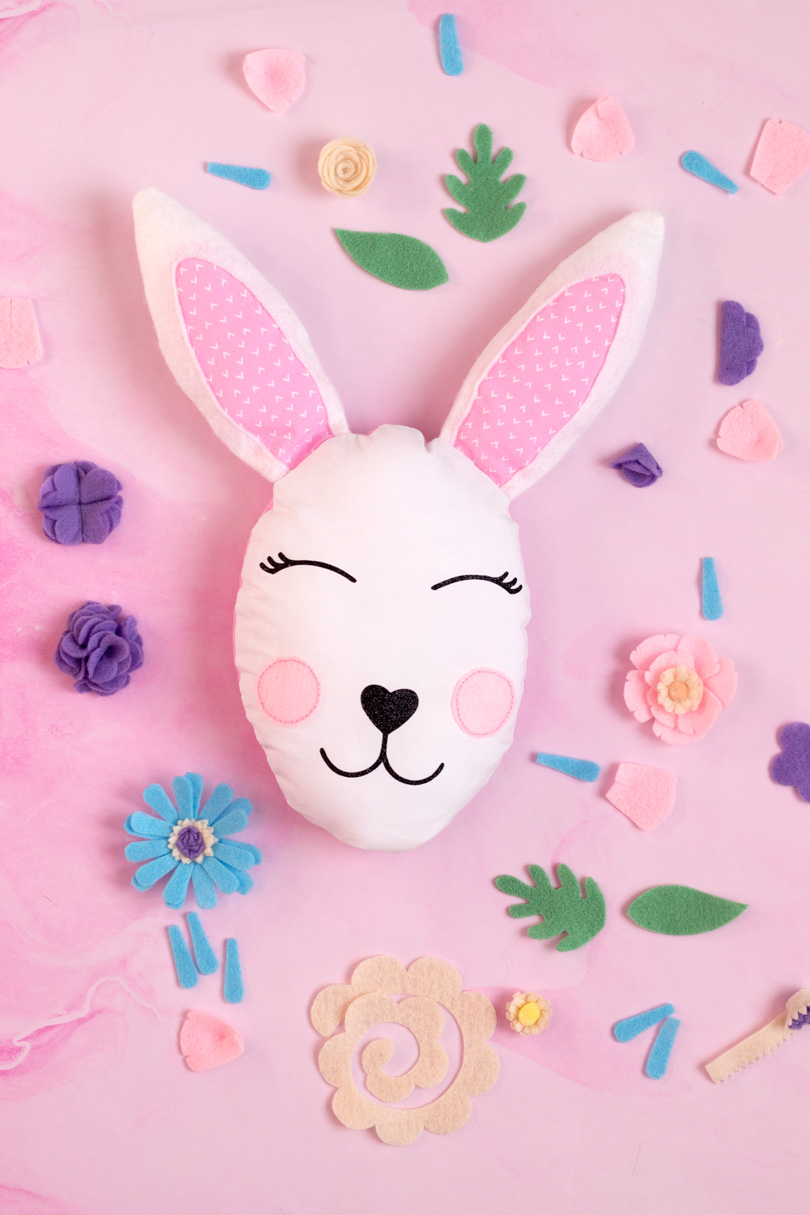
Like I mentioned, the template for the flowers and bunny are linked below. All you need to do is print them out and cut. The number of pieces is marked on each piece too, so make sure you have everything you need to begin with. The flowers that we will be making are a ranunculus, a carnation, a gerbera daisy (my absolute favourite flower), and an anemone. What starts off as flat felt pieces are then transformed into sculpted flowers made by our very own crafty hands.
Aren't you just obsessed with her felt flower crown and wish you could have your very own? I know I do.
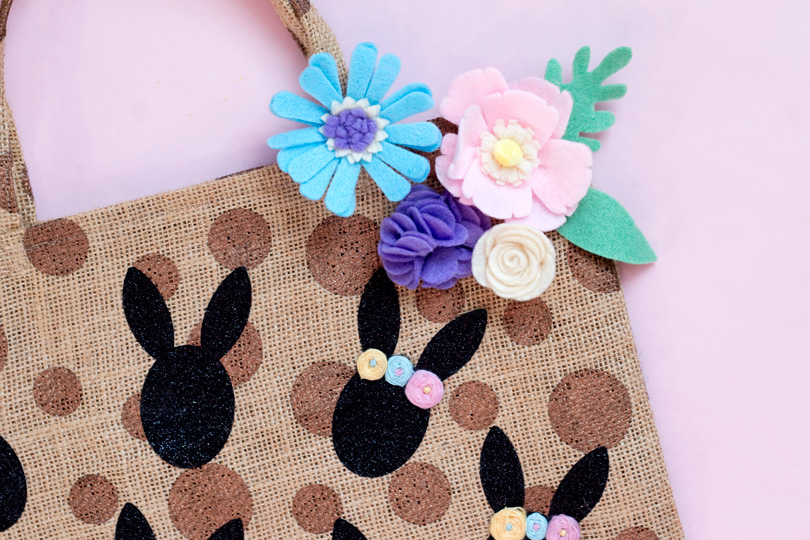
Once you start making felt flowers, it becomes very addictive - but please use this to your advantage. If you have an old tote bag that needs a little life, just add your felt flowers. I have sewn a very simple hessian bag together, and have customised it with iron-on glitter bunnies, and hand embroidered 3D flower crowns. It's so easy to recycle old fabric items we already own by customising them with our own creativity.
I have classed this as a cushion to help clarify what this diy is, but you can use this as a decor piece to decorate your home in a number of ways as it's not your traditional square shaped item. For example, you can use this as a styling prop for shelves or display units, as table decor, or to decorate your bed. Share it as a gift along with chocolate eggs (definitely another perk of spring), this Easter too.
I know you all can't wait, so let's get started!
YOU WILL NEED:
- Template
- White and patterned fabric
- Felt sheets
- Hot glue gun
- Iron-on glitter sheets
- Soft toy filling
INSTRUCTIONS
-
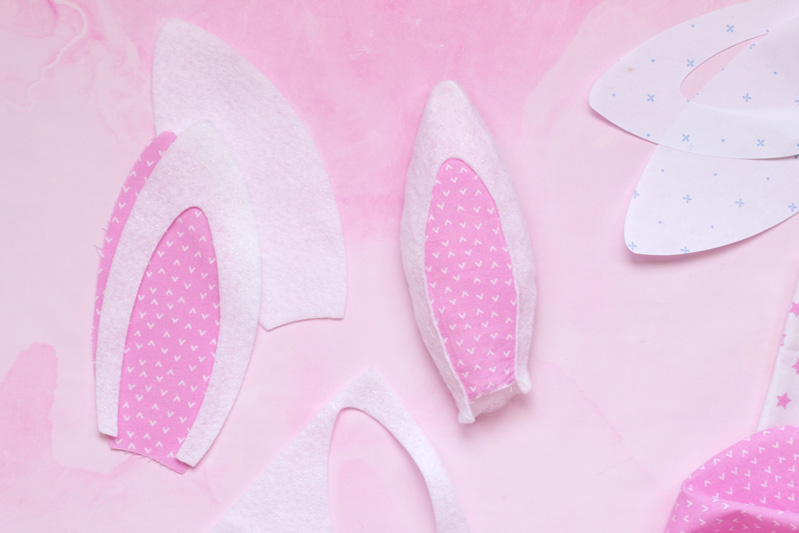
Cut the front and back pieces of the ears from felt. You will also need a front piece cut from a printed or coloured piece of fabric, but make sure you only cut the inside section out of the front felt piece. Place the front felt on top of the printed fabric, and sew along the inside edge to secure. Sew the back and front together (fronts facing), turn the right way and fill with toy stuffing.
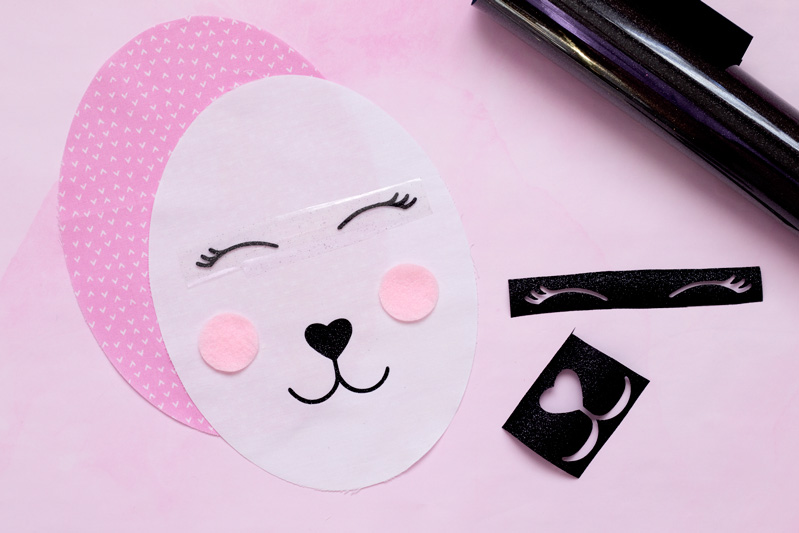
To create the bunny, cut the front piece from white fabric and the back piece from printed fabric. Cut and hand sew two felt circles for the cheeks. Cut the eyes, nose and mouth from the iron-on sheet and apply. You could also use black felt.
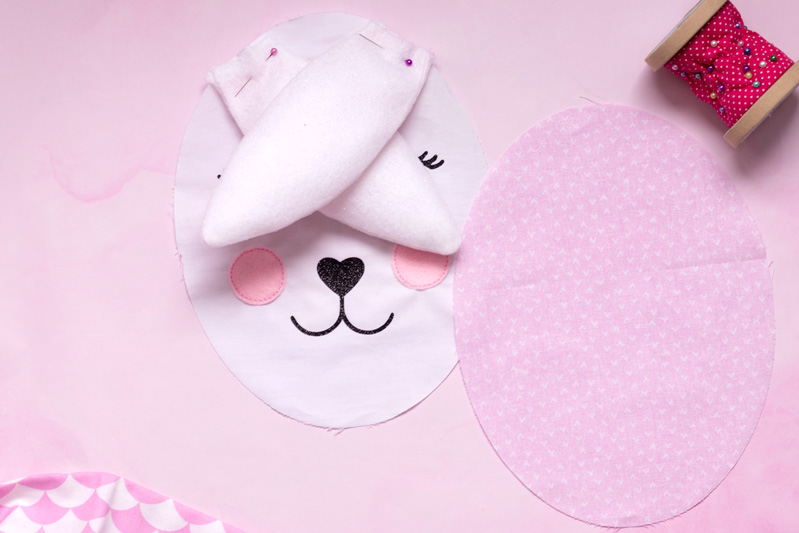
Pin the ears into place and then place the back piece on top (fronts facing). Make sure the ears are tucked in so you don't end up machine sewing those down too. Carefully sew around the edge, leaving a gap at the bottom to add your toy filling.

Turn your bunny the right way, and add your toy filling. Use an invisible stitch to close up the gap. Now let's create those flowers!


ANEMONE: Cut out the pieces from the template labelled 'anemone' - you will need 8 petals. Wrap the strip around a mini pom-pom to create the centre of your flower. Secure with a glue gun. Snip into your petals. Overlap and glue secure. Glue down 4 petals under the centre. Repeat with the 2nd layer, glueing the next row between the previous petals.

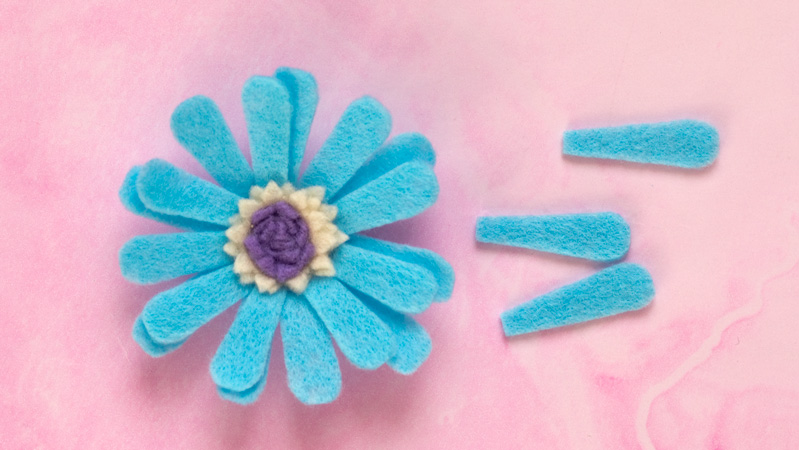
GERBERA DAISY: Cut out the pieces from the template labelled 'gerbera daisy' - you will need 16 petals. Fold the shorter strip in half, roll it tightly and keep hold. Wrap around the long zig-zag strip and secure with glue. Glue down each petal around the centre. Repeat for the 2nd layer, glueing the next row between the previous petals.

CARNATION: Cut out the pieces from the template labelled 'carnation' - you will need 6 petals. Fold the petals in half and secure with glue. Fold in half again and secure with glue. Repeat with all 6 petals. Glue 4 of the petals onto the circle making sure they all point to the centre. Glue the next 2 petals onto the middle to create your carnation.
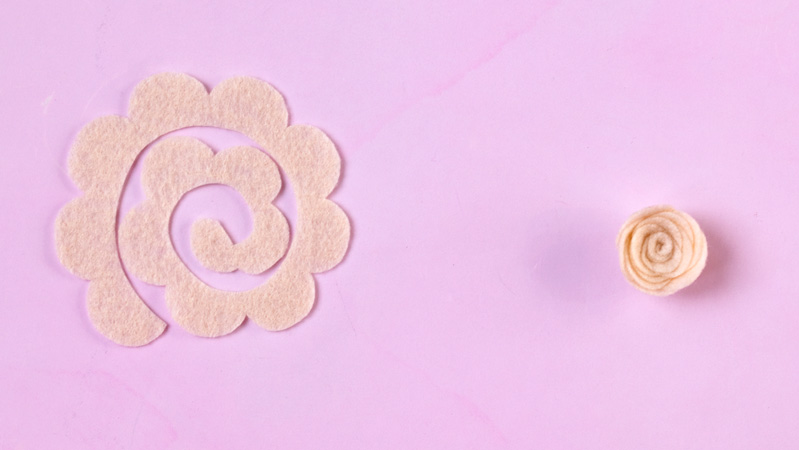
RANUNCULUS: Cut out the pieces from the template labelled 'ranuculus'. Starting from the inner, roll the felt tightly between your fingers, and glue down once you've reached the end.
All you have to do now is glue the flower crown down. Don't forget to cut out the leaves from the template too!
I am so excited to know what you think of this diy! Let me know in the comments below if you'll be making a bunny too, and please share any photos.


LEAVE A COMMENT BELOW
and let me know your thoughts on this post!