

Introduction: How to Run Cross Country


If you are looking at this Instructable, I can only assume you are curious about the sport known as cross country. Who can blame you? Now, for those of you who do not know, cross country is a long distance running sport. It is run at meets, like track & field, but unlike track, cross country is ran on trails, golf courses, and even roads. The sport is not only a challenge of who can run the fastest, but who can run the longest, and who can master the terrain the best. In the end though, all that matters is running to the best of your ability. As a cross country runner at my high school for four years, I know a good deal about running. I have experienced the ups and downs (yes, that does mean hills), the good and the bad, and of course met many great people along the way. Unfortunately, there are many people who do not know how the sport works, or what it is. Whether you are a beginning runner, or are just looking for a new challenge, you have to come to the right place, because in this Instructable I will show you how to run cross country in high school*.
*Yes, I understand many of you who read this are not in high school, and therefore cannot run on a high school team, but the steps given in here can also help anyone who is desiring to become a distance runner.
Step 1: Supplies


Yes, I know it may seem strange, but there are a few supplies that are needed before you can run. You will need:
Running shoes*
Proper running attire*
A watch*
A coach and team (if you plan on running on a high school team)
Time (not really a physical supply, but very important)
Willpower (again, not a real supply, but cross country is a very trying sport, both physically and mentally. Always have goals and don't give up on them)
*The price of these items is really up to you, because you can either spend a little bit of money and get the same basic results, or spend more if you choose and get a few bonus features with your running products. I'm not saying that paying more money always means you're being scammed, because in some cases throwing in the extra cash will actually help some, but the key is knowing whether or not you need or even want the extras. In the next few steps I will help explain what is needed and what might help while running, but in the end it all comes down to personal preference.
Step 2: Purchasing Running Shoes


This may not be as simple as it sounds, but luckily you don't have to make this choice on your own. I recommend avoiding larger chain stores and looking at smaller businesses and runing specialty stores when purchasing running shoes. This is because smaller stores have employees who are trained to analyze your walk, posture, and even ask you questions to help find the right shoes for you. But one thing you do need to do on your own, is decide which type of shoes you are buying. There are two basic types of running shoes in cross country: trainers and spikes.
Trainers are your basic all-terrain, all-purpose shoes. They are used in all workouts, and off many different varieties to fit every runner's needs. It is even possible to run races in trainers.
Spikes, on the other hand, are specialty shoes used only in races. They are called spikes, because the bottoms of the shoes have holes to insert metal spikes of various sizes and shapes. Because the spikes are not impervius to wear and tear, these shoes can only be worn off-road. In other words, on the track or on the trail.
Now that you know what type of shoe you are buying (maybe even both? Most experienced cross country runners will use trainers throughout the week and for warmups, and spikes during a race), and an employee has helped you select a few pairs that will work for you, test them out. Walk around, do some jogging, wear shoes from different pairs at the same time. This is very important to find the shoe that feels the best for you. The trick is to find a healthy balance between weight, comfort, shape, and price. The shoes should be supportive, generally light-weight, help your stride, and be of a reasonable price (running shoes can range from $60-$70 up to hundreds of dollars). As with most steps in this Instructable, you have to find your preference.
Step 3: Choosing the Right Clothing

This step will change from day to day, and is determined by the climate and weather where you live. The most basic standard for running attire is shorts, and a t-shirt, but if you live in an area where the temperature rarely exceeds 30 or 40 degrees, you will need to dress more warmly (and no, it is not impossible to run this kind of climate). When choosing what clothing to wear on a particular day, ask yourself these questions:
What is the weather like? – If it is sunny, shorts and t-shirt are acceptable. If it is raining or just cold, a lightweight jacket or sweatshirt will help keep the body warm and dry. If you live in the type of climate I mentioned above you will most likely need multiple layers across your whole body, including a hat, gloves, and even a face mask.
Is this comfortable? – Considering the goal of the clothing is to aid in physical activity, the clothing should not inhibit the ability of its user. When dressed in comfortable workout clothing, you should still be able to run to the best of your ability, otherwise the training will be useless. This is more difficult the more you wear, but that is where the challenge lies: in finding balance.
Does it look good? – Because self-confidence is important in a sport such as cross country, don’t just be physically comfortable in what you wear, be psychologically comfortable as well. Clothing can harm or help a runner both physically and mentally.
Step 4: Learn to Use a Watch

Unlike the two prior steps, this one is actually quite simple to achieve. The basic principle is that the less you spend on a watch, the easier it is to learn its functions. All that is needed in a watch to workout is a stopwatch. Become familiar with the location of buttons and what the watch can do. When you know how to use the watch, you can accurately record the times you run, which will help you improve over time. Of course if you want more features on your watch, spending the extra money is not a bad thing. For example, GPS watches cost a good deal more than basic stop watches, but can do much more, such as record you speed, distance ran, pace, and even heart rate, plus much more. Again, this all comes down to personal preference.
Step 5: Meet the Coach and Team


This is very important when running cross country in high school, because your coach will be the person who organizes your workouts, arranges meets, provides supplies, and of course offers motivation. This motivation also comes from the team, which is why knowing the runners on the team is just as important as knowing the coach. Because you will train with the other runners with ability similar to yours, you will get to know these runners well, and run races with them. Knowing other team members and becoming acquainted with them is a contributing factor to running well in races, because teammates can provide the psychological advantage needed to run well in meets. Of course, this is not the only reason teammates are important on a cross country team. Cross country is not only an individual sport, but a team sport as well. Each race is run by the individual runners striving to reach their best time in each race, but each runner also scores position-based points to aid their team overall, which makes each runner just as important as the one who finishes ahead of them or behind them.
Step 6: Training
This is easily the most complex part of the entire process of becoming a runner. Of course, just like the other more complex steps, after practice and routine, training will simply become second nature. Now, running on a cross country team with a well-prepared coach will this step irrelevant, but many would-be-runners don’t have the authority of a coach figure to aid in their running, and this step will aid those individualized runners. There are three basic types of workouts:
Track (or split) workouts – Short distance, high speed. These workout split the race distance (most often times 5 kilometers, or 3.1 miles) into laps and are usually ran on a track faster than race pace.
Distance workouts – Long distance, slower pace. These workouts are longer than race length, but are ran slightly slower than race pace. They can be ran pretty much anywhere (excluding private property, or other places where you wouldn't be allowed under any circumstances). Because there are so many options when running a distance workout, one thing to remember is to stay safe. It is easy to attempt to explore a new location on a run, and then get lost or hurt. Always practice running safety on distance workouts, such as:
• Let a friend or family member know when you will be running for an extended period of time.
• Bring a cell phone, or some form of ID
• Wear visible and reflective clothing at night
• Don’t run somewhere if you feel you may get lost
Pre-meets – Recommended for running the day before a meet, these workouts are much shorter in distance and run at only a slightly faster pace than a race. They are usually no more than one mile (1600 meters) in distance and allow the body to stay in shape, but still rest some before a race.
Training is not just about what is run in one day, but what workouts are ran in the week or weeks before a meet. Therefore it is important to plan a workout schedule that incorporates each type of workout with equal consideration. Here is an example of a typical workout schedule for the week before a meet:
Monday: Track workout
o Warm up: 10 minute jog and stretch
o 1 x 1200 meters (three laps)
o 1 x 800 meters (two laps)
o 2 x 600 meters (one and a half laps)
o 4 x 400 meters (one lap)
o Cool down: 10 minute jog and stretch
Tuesday: 30 minute distance workout
Wednesday: Track workout
o Warm up: 10 minute jog and stretch
o 1 x 1600 meters (four laps)
o 2 x 800 meters
o 4 x 400 meters
o Cool down: 10 minute jog and stretch
Thursday: 45 minute distance workout
Friday: Pre-meet
o Warm up: 10 minute jog and stretch
o 4 x 400 meters
o Cool down: 10 minute jog and stretch
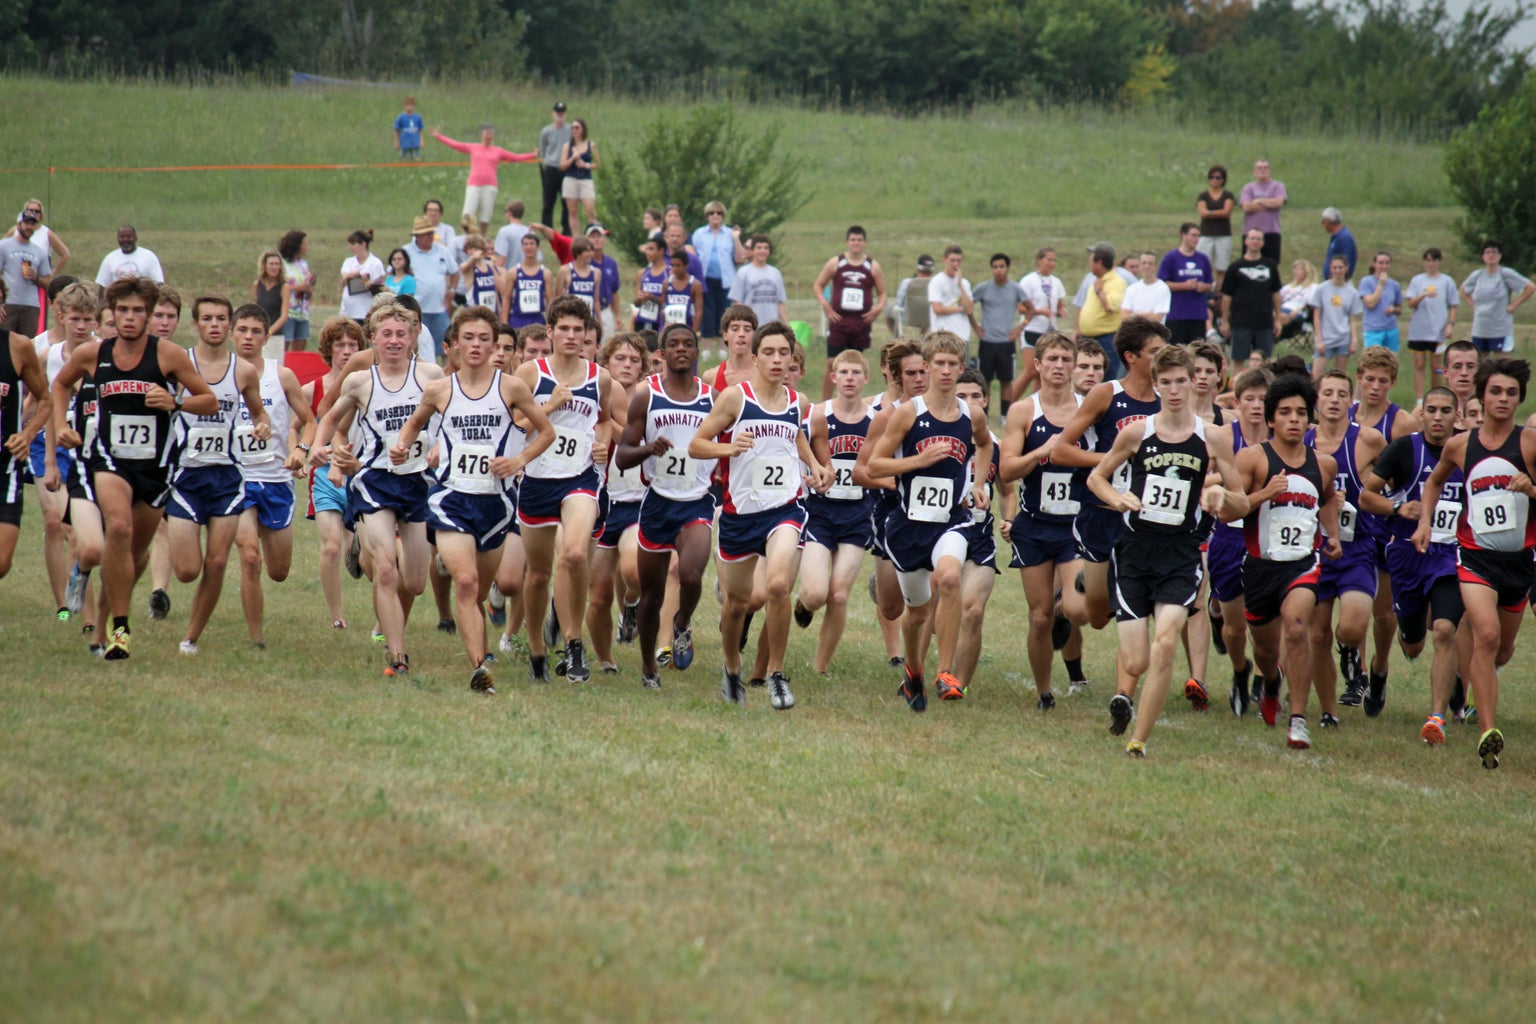
Step 7: Finally... Race
Once you have reached this step, and you have followed the other steps (and more importantly, the instruction of your coach), you are ready to participate in a cross country meet by running a race. In my opinion, this is the best part of participating in the sport. Gathering with your teammates, coaches, family, friends, and more importantly, opponents. Your goal as a runner is to work as hard as possible to run to the best of your ability in one race. The level of achievement is measured in two ways: time and position. Runners strive for either a PR, also known as a personal record, or a better final position in the race to gain points, or even both. The real challenge, though, is not in running one race, but in running many. During the typical high school cross country season, runners will run between seven and nine races, one every week. In most cases each course is different, and the competing schools are different as well, providing a new challenge at every meet. Of course this means that the overall goal is to gradually improve as the season continues, but if you have trouble improving every week, don’t fret. Most runners won’t run a PR every week, but instead slowly reach new levels of ability. The most important thing to remember when running a race though, is just have fun. Cross country is an extra-curricular activity, taken completely voluntarily. If you allow yourself to be a part of the meet atmosphere and to simply run for the sake of running, it will be no challenge to enjoy yourself. The only challenge should be in running a PR, or beating the next runner that is currently ahead.


