WPLift is supported by its audience. When you purchase through links on our site, we may earn an affiliate commission.
WordPress Gutenberg Tutorial: How To Use The New WordPress 5.0 Block Editor
On December 6th, 2018, WordPress underwent a massive change with the release of WordPress 5.0. Gone was the old classic TinyMCE content editor, replaced with a brand new block editor, codenamed Gutenberg.
While the new block editor does let you do some things that you weren’t previously able to do in WordPress, it’s also not always the most intuitive tool when you first sit down with it.
To help you get the most from the new block editor, we decided to create this tutorial to help you get up to speed with how to use the block editor to perform the same types of actions that you previously used the TinyMCE editor for.
Whether you’ve already upgraded your site to WordPress 5.0 or you’re still hanging out with WordPress 4.9, this tutorial should be able to help.
*Note – while the new editor was named “Gutenberg” during development, the fact that it’s now the default editor means that it’s just called the “WordPress editor” or “block editor”. Because the WordPress team wants to shed the Gutenberg name, you’ll often see me call it the “block editor” so that this tutorial makes sense to people browsing from the future!
A (Very) Quick Intro To The WordPress Gutenberg Block Editor
The biggest difference with the new editor is blocks (hence the name “block editor”). With the old TinyMCE editor, all your content was in one long field, kind of like a Microsoft Word document. However, with the new editor, every item in your content is a separate “block”. For example:
- A paragraph is a separate block
- An image is a separate block
- An embedded YouTube video is a separate block
- A heading is a separate block
- …I think you get it now. Everything is a separate block.
In this WordPress Gutenberg tutorial, I’ll reference “inserting a new block” quite a bit. So before I dive into the tutorial, let me quickly show you exactly how to actually do that.
There are three different ways to insert new blocks:
First, you can use one of two plus icons. These icons will open a popup where you can select which block you want to insert:
- The plus icon in the top-left corner is always visible. It inserts a new block at the end of your content.
- This plus icon only appears when you hover over the space between two existing blocks. It lets you insert a new block between existing blocks.


Article Continues Below
Second, you can also just hit Enter to create a new blank block below the block that you were working in. Then, you can use the plus icon to the left of the block to choose what type of block to use:

These various buttons will make more sense as you go through the block editor tutorial.
How To Use Text With The WordPress Block Editor
Let’s start with the most basic of content – text. In this section, I’ll show you how to work with things like paragraph text, headings, quotes, etc. Then, I’ll also show you how to insert links and other basic settings.
Adding Various Paragraph Text
Creating new paragraph text is easy – you just click and type exactly as you did with the old editor. The only difference is that each time you hit Enter, the editor will create a separate block for your next paragraph:

Adding Headings (H2, H3, H4) And Other Text Blocks
If you want to insert a heading, one way is to insert a new heading block:

Alternatively, you can also transform a regular paragraph block into a heading by using the toolbar:

You can use the same approach for other text blocks like:
- Quotes
- Lists
- Etc.
Formatting Text (Alignment, Colors, Etc.)
To format text, you’ll use two areas.
First, there’s the floating toolbar. This toolbar only appears when you’re not actively typing. It’s where you can:
- Change alignment
- Add bold and italics

If you don’t like how the formatting toolbar appears and disappears, you can also use the editor’s settings to fix the toolbar to the top of the interface, which is more like how the classic TinyMCE editor worked:

For other formatting options – like the color of text or font size – you can use the Block sidebar (which is automatically selected when you click on a block).
For example, if you click on a paragraph, you can use the sidebar to make the text larger or smaller and/or change the text color:

Unfortunately, these options are different for each block. For example, right now it’s not possible to change the color of a heading unless you use your own custom CSS.
Inserting Links
To insert a link, click on the block with the text that you want to link. Then, look for the Link icon on the formatting toolbar. That will open an interface where you can add the link (you can also click the toggle to make the link open in a new tab):

How To Insert Media Content (Images, Videos, Etc.)
Now that you have a good idea of how to use text in the block editor, let’s cover another integral part of your content – images and videos.
Inserting And Formatting Images (Including Alt Text)
One way to insert an image is to add an Image block. That will let you access your WordPress Media Library (just as with the old editor) or insert an image from a URL:

However, the block editor also adds a new method for inserting images that is a little easier. Now, you can just drag an image straight from your desktop into the editor interface:

Once you insert an image, you can use the right sidebar to:
- Add alt text
- Change image size
- Make the image link to a specific URL
You can also add a caption by typing directly underneath the image:

Inserting Videos (And Other Embedded Content)
To help you embed videos from YouTube, Vimeo, and many other services, the block editor gives you an entire category of Embed blocks:

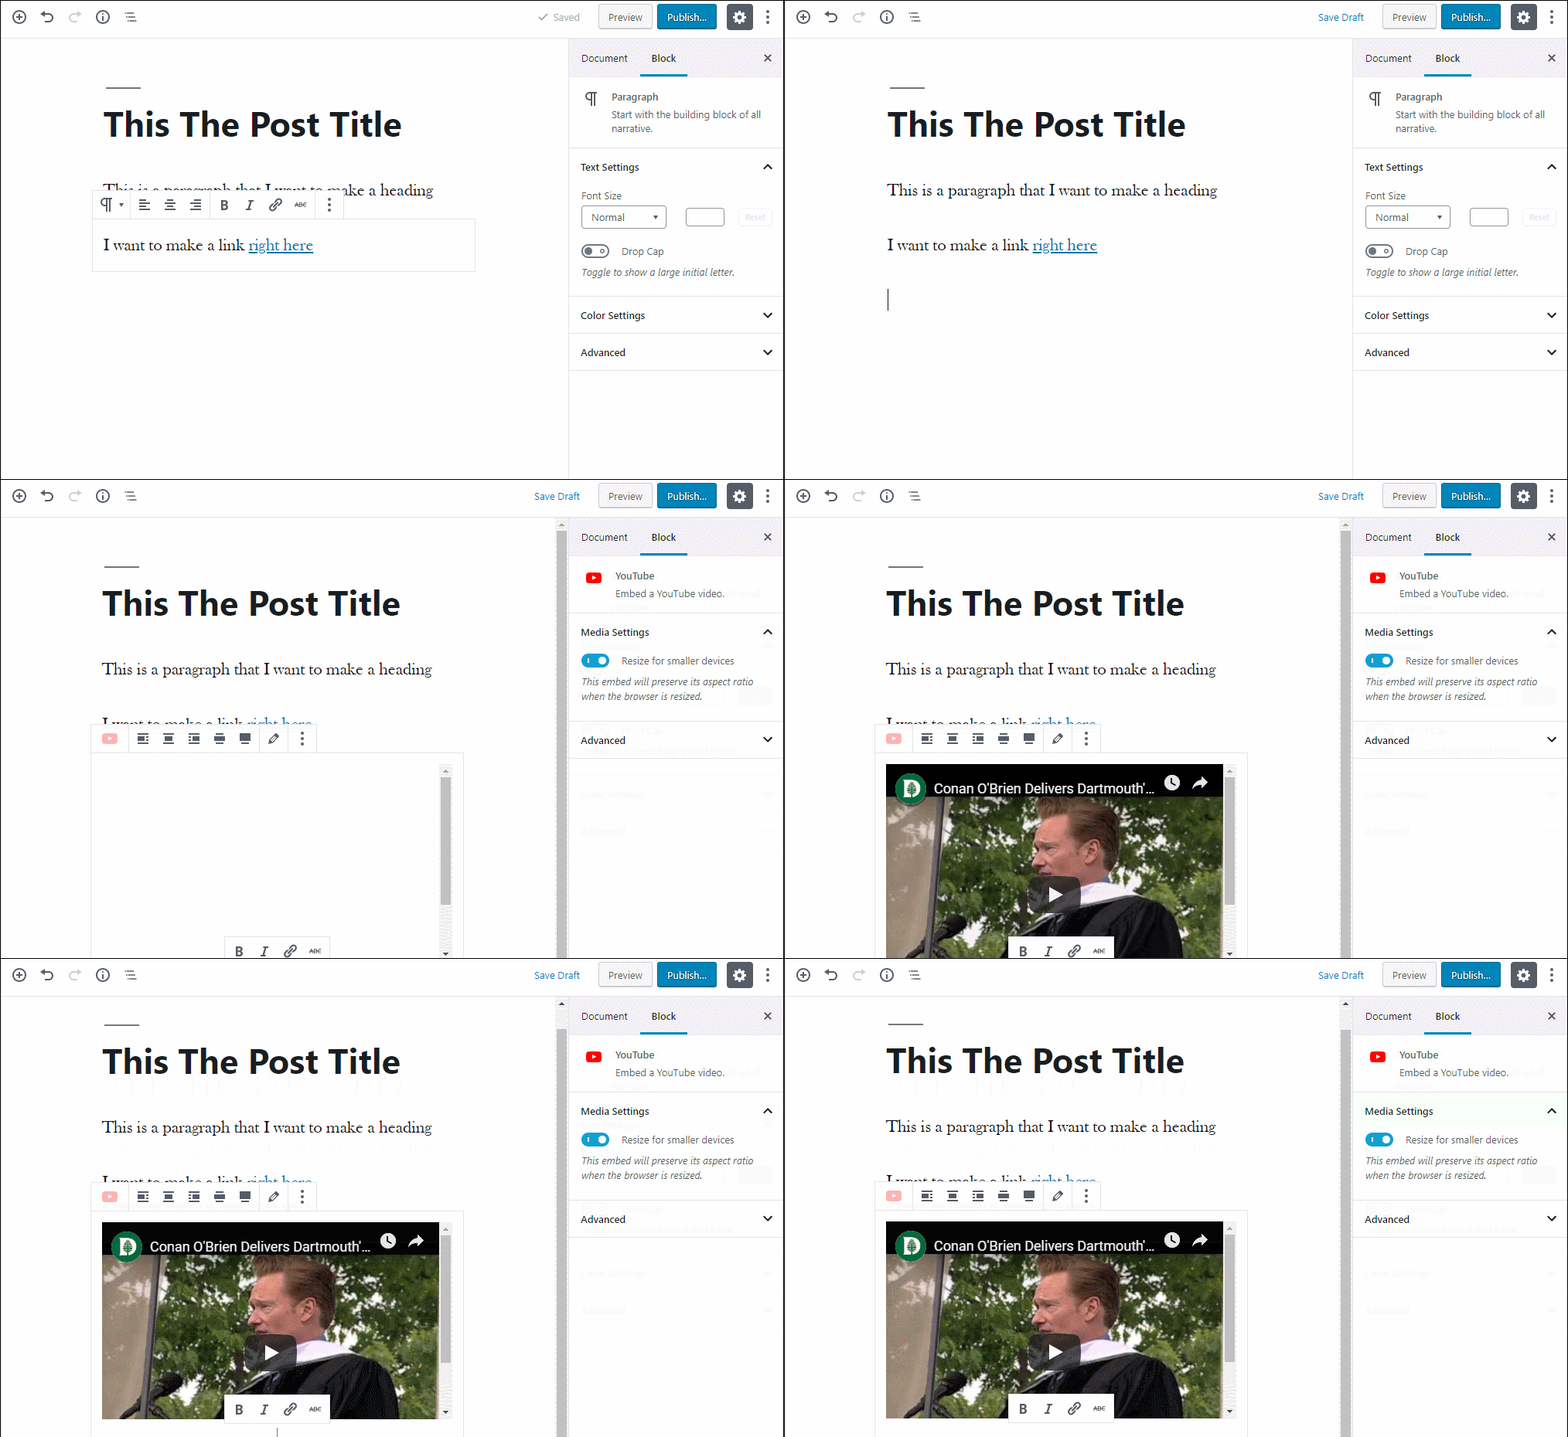
Once you choose a block, all you need to do is paste in the URL to the content that you want to embed:

Alternatively, you can also just paste a YouTube URL into a blank block, which saves you a few clicks:

You can use the same approach for all other types of embedded content.
How To Move And Rearrange Blocks
With the old WordPress editor, you had to use cut and paste to move content around. You can still kind of do that with the new block editor, but it’s not perfect.
For example, while you can cut and paste the text from a block, the empty block from where you cut the text will still be there, so it’s not quite the same.
Instead, you’re usually better off using the block editor’s built-in controls.
There are two ways that you can move blocks around. To access them, hover over the block that you want to manipulate.
First, you can use the arrows to move a block up or down one spot. Second, you can also use drag and drop to move a block anywhere on the page (to activate the drag-and-drop functionality, you need to hover your mouse over the six dots between the arrows):

20+ Tricks For Working More Productively With The Block Editor
I hope the WordPress Gutenberg tutorial above gives you a good idea of how to use the block editor at a basic level. However, once you have the basics down, there are a lot of tricks that can help you work more productively with the editor.
I’m talking about things like using “/” to insert new blocks more quickly, creating more complicated layouts with columns, using keyboard shortcuts to save time, etc.
Based on my real experience using the editor, I collected all those tips into a list of 20+ block editor tips to help you work more productively.
Expand Your Content With Even More Blocks
One of the great things about the Gutenberg block editor is that you aren’t limited to the default collection of blocks. Using third-party Gutenberg blocks plugins, you can add new blocks for things like:
- Pricing tables
- Image galleries
- Sliders
- Testimonials
- …plus a whole lot more
Can You Disable The New WordPress Block Editor?
Yes! It’s super simple to disable the new block editor and keep using the TinyMCE editor. In fact, we actually wrote an entire post dedicated to this subject. Learn how to disable the WordPress Gutenberg block editor and keep using the classic TinyMCE editor.
Put This WordPress Gutenberg Tutorial To Good Use!
Whether you know it as the Gutenberg editor or the WordPress block editor, I hope that you found this tutorial helpful and you now have a better feel for how to create content with the new block editor.
If you have any further questions about how to use the new block editor, leave a comment and we’ll try to help!


Hy I have read your post and it’s amazing.
Hey,
Thank You, for such useful information.
Really helpful artical.
Thank…
That was pretty helpful. Thanks a ton.