
Depth Scanner for After Effects: Create Depth Maps on Video Instantly
In this video tutorial, we’ll learn how to create depth passes on footage using the After Effects plugin Depth Scanner.
You may be familiar with using depth passes from 3D programs. But, wouldn’t it be awesome if we could instantly create depth passes from any video clip or image?
Well, now we can. And the results are stunning. Depth Scanner is a brand new After Effects plugin from Blace Plugins. You can instantly create Z-depth passes on any video footage or image with it. You can then use the depth passes with other effects to create amazing visuals.
Let’s check it out!
What Is Depth Scanner?
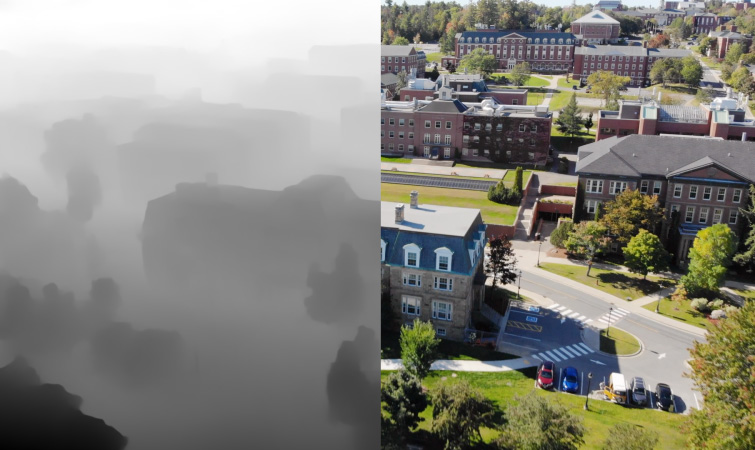
Depth Scanner is an After Effects plugin that uses artificial intelligence to automatically generate a depth pass on any video clip or photo.
In short, the plugin analyzes the clip and detects what parts of the shot are closest to the camera. Then, you can use the depth pass for all sorts of compositing techniques, such as adding in depth of field, subtle 3D parallax movement, depth-based transitions, and a lot more!
How to Use Depth Scanner
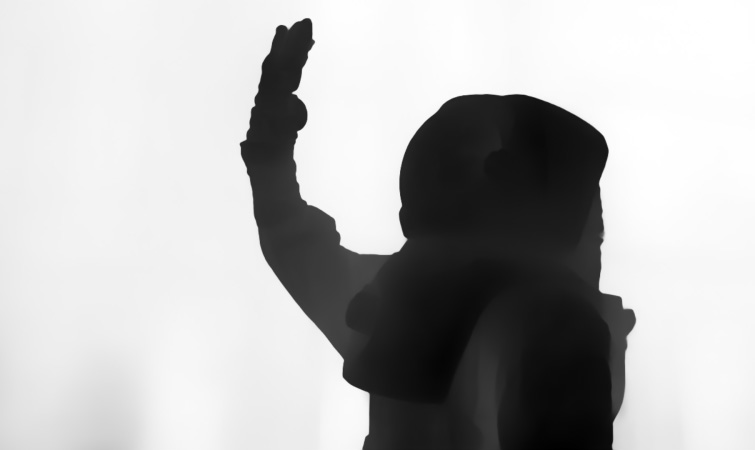
Using Depth Scanner is incredibly simple. After installing the plugin, select your video clip or image in After Effects, then apply the Depth Scanner effect.
Immediately, you’ll see a low-resolution depth pass. To increase the resolution, just adjust the Resolution setting. I recommend setting it to Large.
You can also adjust the Model, which is how the depth of your footage is interpreted. The default is set to Faster, which renders faster.
Accurate is the second option, which takes longer to render but can give you better results with problematic shots. I recommend trying both, then choose the one that looks best.
Depth Slicing
Depth Scanner also has a slicing mode, which essentially allows you to “slice out” parts of your video based on the depth pass.
To do this, change the Mode setting to Slicing. Then adjust the Minimum and Maximum percentages to slice out an area of your footage. You can also soften the edges with the Soft Border setting.
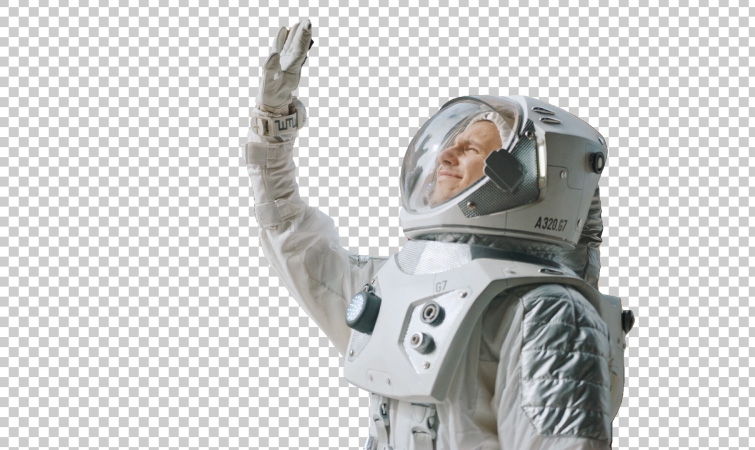
This slicing effect can also save you a lot of time if you need to remove something from a video clip. Simply slice it out so that you’re left with a transparent area. Then use Content-Aware Fill in After Effects.
Creative Effects
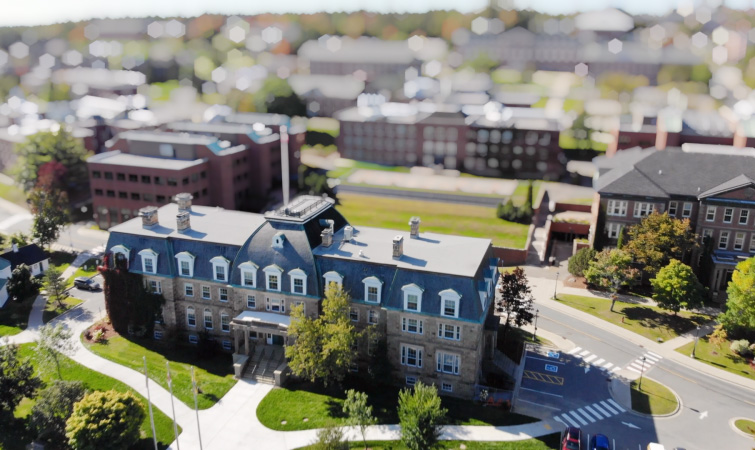
Now that you can create depth passes from any video, this opens the door for a lot of creative effects. One of the easiest is adding in Depth of Field. You’ll need two copies of your footage in your composition to do this.
Apply Depth Scanner to the bottom copy, then refine the settings for a good-looking depth pass. Now, apply the Camera Lens Blur effect on the top “normal-looking” copy of your footage.
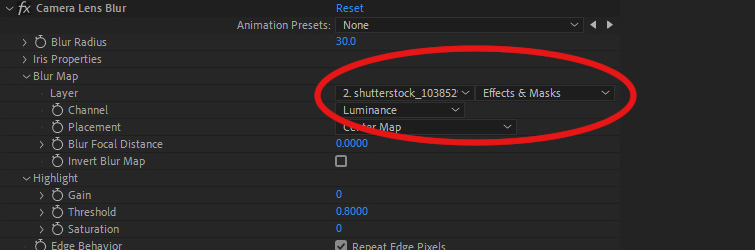
Set the Blur Map setting as your footage with Depth Scanner applied to it. You’ll also need to change the Blur Map Source to Effects & Masks. Then just increase the Blur Radius to see depth of field added to your shot!
Another excellent effect to try out is a Depth Transition. To do this, simply apply Depth Scanner to your footage and then change the Mode to Slicing.
Now, keyframe the Maximum setting from 0% to 100%. You’ll then see your video footage animate based on the depth pass.

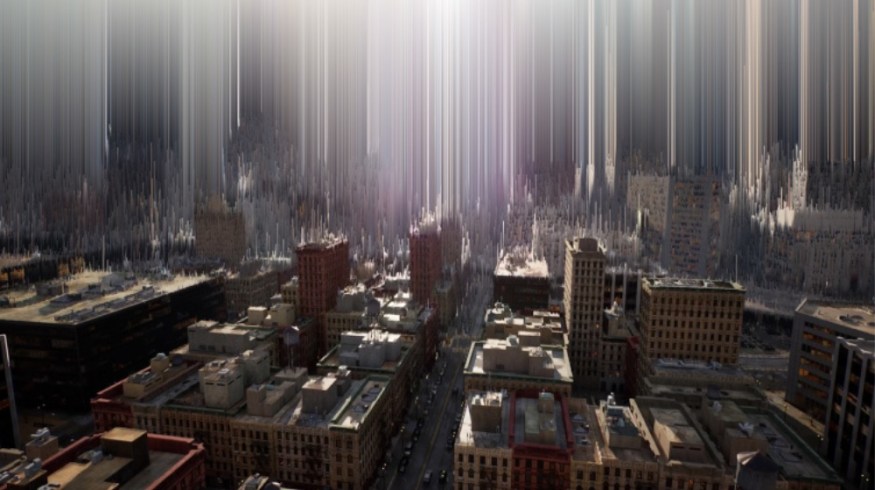
For a more stylized effect, create multiple layers of your video footage using the Slicing effect. You can even experiment with applying effects and presets to them, such as the 8-Bit Video Game preset.
Experiment with Other After Effects Plugins
Many other effects and plugins can utilize depth maps. Two of my favorites are Crossphere Bokeh and AE Pixel Sorter 2.
Crossphere Bokeh works similarly to the Camera Lens Blur effect, but produces better-looking bokeh and renders much faster.
AE Pixel Sorter 2 also has an Input setting, where you can set your depth pass and then control the “pixel sorting” based on the depth of the image.
Create a Depth Map in Photoshop
If you have the latest release of Adobe Photoshop, you can also create depth maps on images in one click, using their new Neural Filters.
Under Filter, select Neural Filters. Then check on the switch for Depth Blur. (You may need to download the filter. Click the Cloud Icon if it’s next to the filter name.)
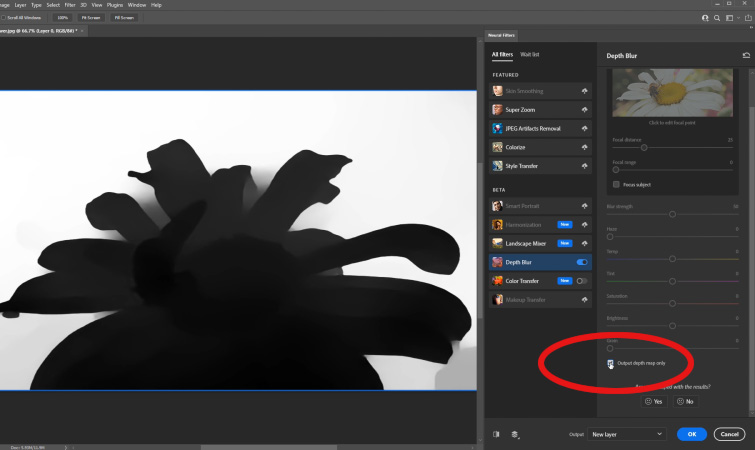
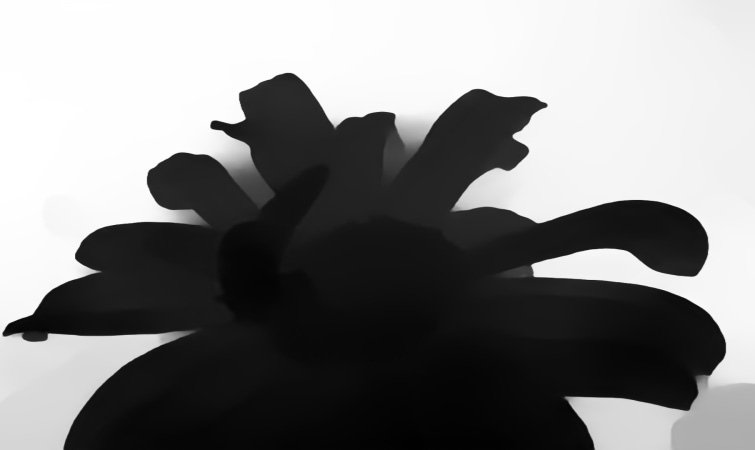
Then, at the bottom of the settings, select Output Depth Map Only, select OK, and you can save out your depth map.
Interested in the royalty-free tracks we used to make this video? Give them another listen:
- “Miami Nights” by Ben Beiny
- “Dream Waves” by Cymatix
- “Sakura Dragon” by Hybridas
- “Retro Chillhop” by Mattijs Muller
- “Chill Off” by Make Music
A few more interesting reads for your next project:


