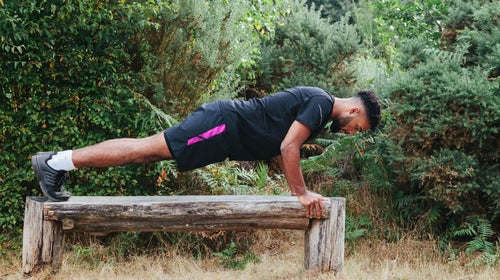
The humble push-up is one of the greatest general conditioning exercises for the outdoor athlete, and you can do them anywhere, no equipment required. “You always have ground,” says Steve House, co-founder of mountain athlete training program Uphill Athlete. Push-ups target the chest, shoulders, and triceps and work your core, back, and legs. They pack a serious punch for such a seemingly simple exercise, but you aren’t doing yourself any favors if your form isn’t dialed.
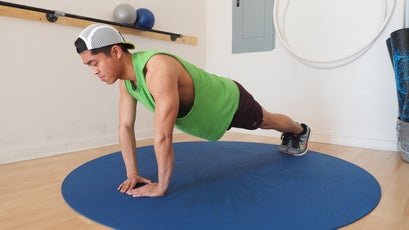
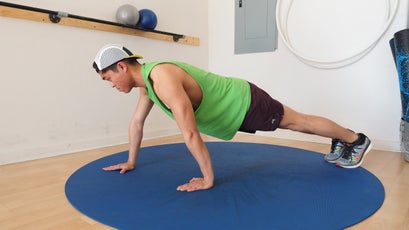
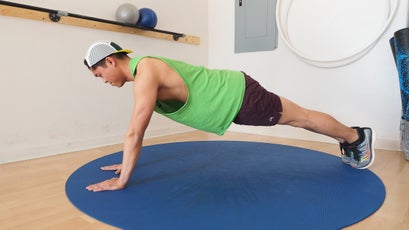
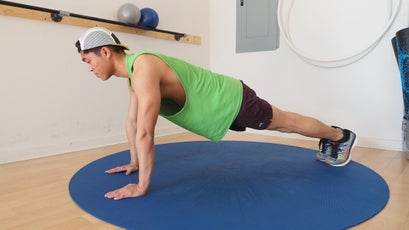
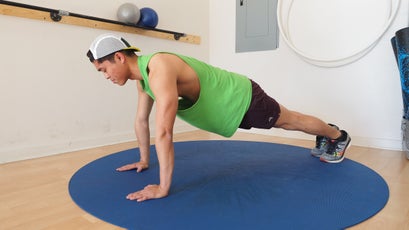
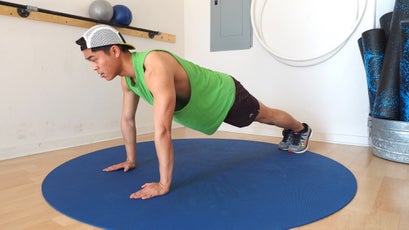
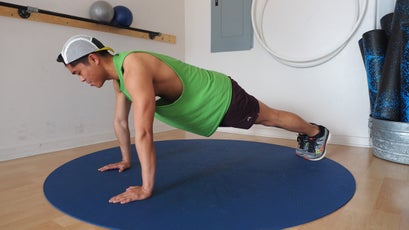
Great push-up form starts with a rigid plank. Your arms should be fully extended, with your hands, elbows, and shoulders all in line, and your feet should be no more than 12 inches apart—the closer together, the more difficult the push-up, because it requires more core activation for stability. Throughout the push-up movement (unless otherwise specified by a variation), your spine should be neutral, so that your body forms a straight line from your feet to the crown of your head. Remember to engage your core and thighs to keep your hips flat and level.
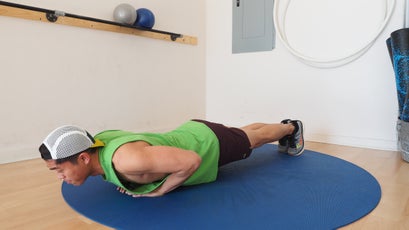
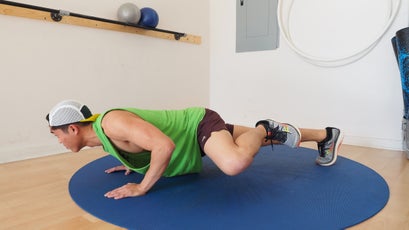
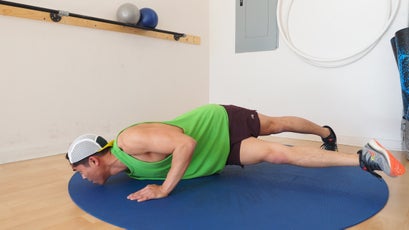
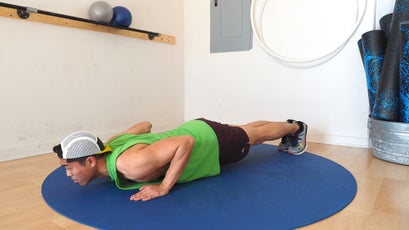
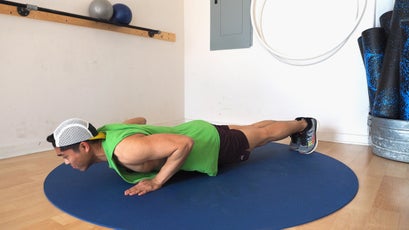
You can bend your elbows out to the side in a T formation, which fires up your pecs, or keep them tucked in along your rib cage, which biases the triceps, says Jared Vagy, a doctor of physical therapy and a certified strength-and-conditioning specialist. House coaches his athletes to always keep their elbows tracking back in the more triceps-oriented position. As an outdoor or endurance athlete, he says, “You’ve got to carry the engine. You don’t want unnecessary weight.” For functional movements, you rarely need bulging pecs, but the triceps are important—think poling when skiing, mantling when climbing, and maintaining balance as you move through uneven terrain. The elbows are also sensitive, especially for climbers who are prone to elbow pain, so having them track backwards can reduce the stress on the joint.
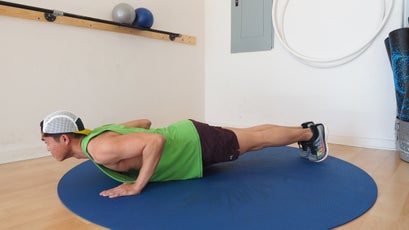
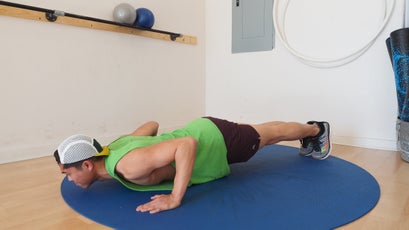
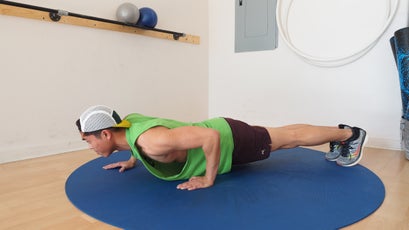
To protect your shoulders, Vagy recommends that you lower your chest just past the level of your bent elbow so that your upper arms are parallel to the floor. Dropping any farther increases stress on the anterior capsule of the shoulder.
As for speed, there’s no reason to pound out 30 fast ones. Proper form is much more important. Always move slowly and in control. Make it meditative, and focus on your breathing: breathe in when lowering; breathe out when pushing back up.
Once you’ve perfected your form, push-ups are an excellent way to warm up at the crag, and they’re great mixed into workouts for general conditioning. Plus, there are endless ways to modify them for your own specific needs. Here’s a guide to the classic push-up and our 12 favorite variations, in more or less ascending order of difficulty.
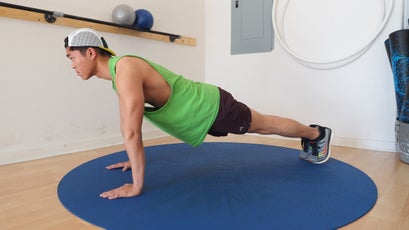
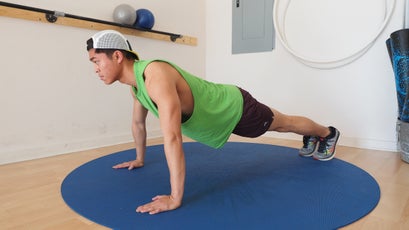
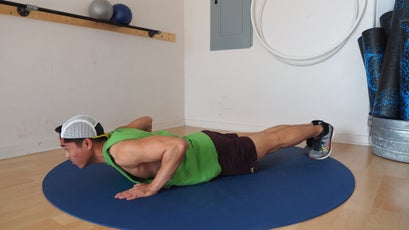
Strict (Military) Push-Up
What It Does
Strengthens the upper body—primarily the chest, shoulders, and triceps—as well as the core and back muscles.
How to Do It
Start in a standard push-up position (as described above), with your feet together or no more than 12 inches apart, hands flat on the ground below your shoulders, and arms straight. Breathe in as you bend your elbows—keep them tracking back alongside your body—to lower your chest to slightly below the level of your bent elbow, and then breathe out as you push back up to the starting position for one repetition.
Wide Hands Push-Up
What It Does
Strengthens the upper body and core, with more focus on the pectoral muscles.
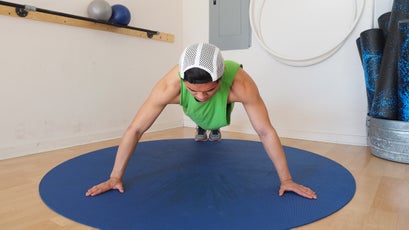
How to Do It
Do a strict push-up, as described above, but with your hands farther out to each side, roughly 2.5 to three feet apart (the farther apart, the more difficult). Keep your elbows tracking back throughout the movement.
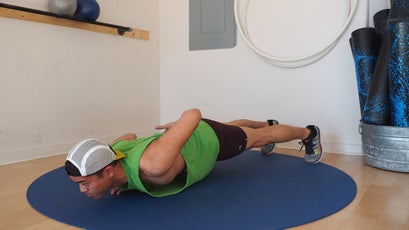
Triangle (Diamond) Push-Up
What It Does
Strengthens the upper body and core, with more focus on the triceps.
How to Do It
Begin in a plank position, with your hands together and angled inward at 45 degrees so that your index fingers and thumbs touch to form a triangle (or diamond). Keep your elbows tight to your body and bend them to lower your chest toward the triangle. Reverse the movement to the starting position for one repetition. Keep the triangle directly below your chest throughout the movement.
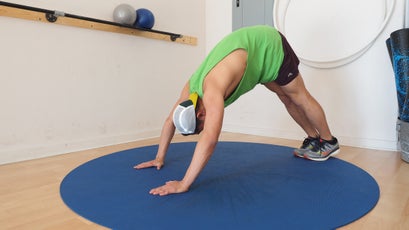
Pike Push-Up
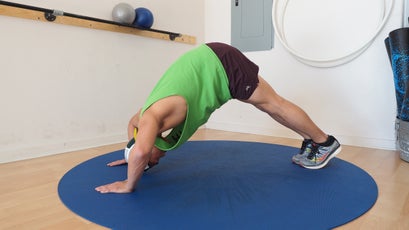
What It Does
Strengthens the upper body and core, with more focus on the shoulders.
How to Do It
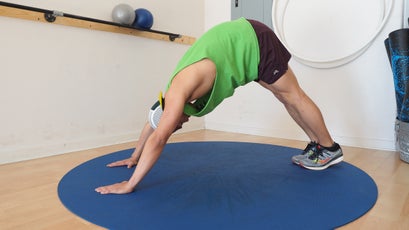
Begin in a downward dog yoga position, with your feet and hands just wider than shoulder width. Keep your hips high, heels low, and maintain the inverted-V position as you bend your elbows and lower your head toward the floor between your hands. Reverse the movement to the starting position for one repetition.
Super (Hindu) Push-Up
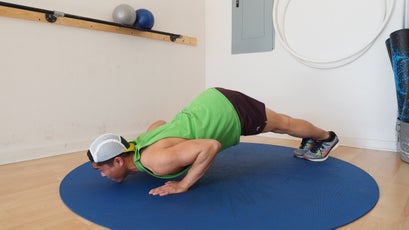
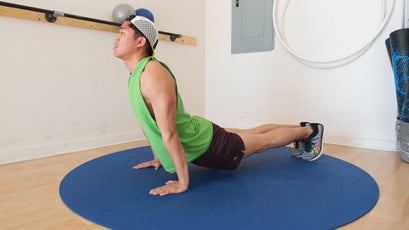
What It Does
Works the shoulders, triceps, and core and improves flexibility.
How to Do It
Slowly swoop from downward dog to cobra pose: from the downward dog position, bend your elbows and lower your nose to the floor between your hands, like a pike push-up, but then, without rising, continue moving your torso forward to slide your chin, chest, and then rib cage between your hands. As your ribs meet your hands, begin to arc your head and torso upward. Continue this upward arc until your arms are straight, hips are pressed toward the ground, and your back is hyperextended in cobra pose. Reverse the movement exactly until you’re back in downward dog.
Staggered Hands Push-Up
What It Does
Trains the push-up muscles asymmetrically across the body and requires more core activation for stability.
How to Do It
From a standard push-up position, move one hand forward and the other backward so they’re offset by about six to 12 inches (the farther, the more difficult). Bend your elbows to lower your chest until it is slightly below the level of your bent elbow, and then extend your elbows to push back up to the starting position. Keep your elbows tight to your body throughout the movement. After one or more repetitions, switch the fore and aft positions of your hands to work each side evenly.
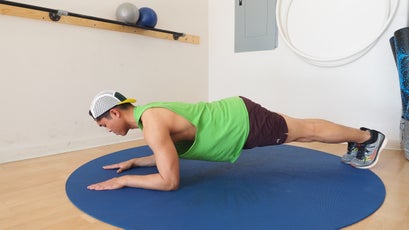
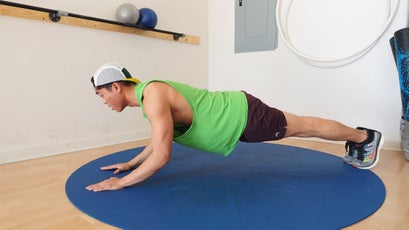
Sphinx Push-Up (Triceps Extension)
What It Does
Strengthens the upper body and core, with more focus on the triceps.
How to Do It
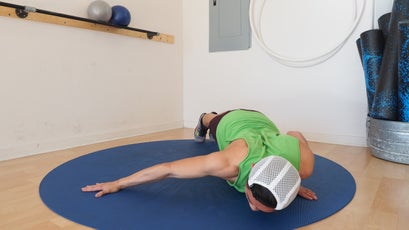
Start in a plank position, with your forearms flat on the ground, shoulder-width apart and parallel. Push up with your triceps to lift your elbows off the ground; continue until your arms are fully extended, then lower your elbows until just above the ground (don’t weight your forearms again) for one repetition. The farther forward you place your arms, the more difficult.
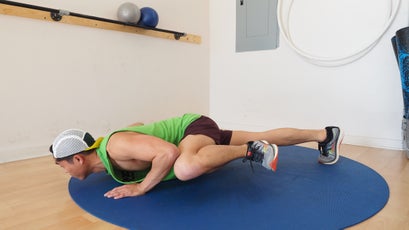
Spiderman (Side Kick) Push-Up
What It Does
Strengthens the core in addition to the typical push-up muscles.
How to Do It
Assume a standard push-up position. As you lower yourself toward the ground, simultaneously bring one knee out to the side and up to touch your elbow, with your leg parallel to the ground. Your knee should touch your elbow at the lowest point of the push-up. Reverse the movement to the starting position and repeat on the other side.
Cross-Body Push-Up
What It Does
Strengthens the upper body, with more focus on the core, hip flexors, and shoulders.
How to Do It
Assume a standard push-up position. As you lower yourself to the ground, simultaneously pick up one leg and cross it beneath your body as you rotate your hip toward the ground. Reverse the movement to the starting position and repeat on the other side.
Archer Push-Up
What It Does
Applies a higher percentage of body weight to a single arm, while the opposite arm assists (a good way to build up to a one-arm push-up).
How to Do It
Assume a push-up position, with wide hands angled outward at about 45 degrees. Lower yourself at an angle to one side so that you bring your shoulder down to your hand of the same side, while the other arm stretches to become fully extended. (It’s okay if your hands pivot during the movement.) Push back up to reverse the movement and return to the starting position. Repeat to the other side. It might help to keep your feet wider.
Typewriter Push-Up: This variation is similar to the archer, but instead of returning to the starting position between every push-up, move your chest from side to side horizontally along and just above the ground, while fully extending the opposite arm each time.
Power and Clap Push-Ups

What It Does
Develops power in the chest, triceps, and shoulders.
How to Do It
From a standard push-up position, lower your chest until it’s slightly below the level of your bent elbow, and then push upward with enough force so that your hands leave the ground by a few inches. Land with soft elbows in push-up form and continue the lowering motion toward the ground. Repeat. Make sure to keep your back flat and hips level throughout the movement.
Claps (Harder): Once you get a handle on power push-ups, you can progress the exercise by adding in claps, which require more power to achieve the necessary airtime. For regular clap push-ups, perform a power push-up but with even more upward force. While your hands are in the air, clap below your chest. Like before, land with soft elbows in push-up form and continue lowering until your chest is slightly below the level of your bent elbow. Repeat.
Behind-the-Back Claps (Even Harder): Do the same exercise, but clap behind your back instead of below your chest. Be careful not to bend at the hips (cheating), and watch your face on this one.
Triple Claps (Hardest): Do the same exercise, but clap under your chest, then behind your back, and then under your chest again, all before touching the ground.
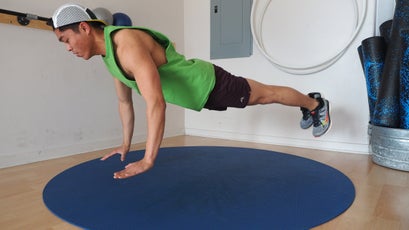
Flying Push-Ups
What It Does
Develops even more dynamic power.
How to Do It
Like with claps, start in a standard push-up position and lower your chest until it’s slightly below the level of your bent elbow. Then explode upwards and lift both your hands and feet off the ground. Try to keep your back as flat as possible, but you may need to lift your hips slightly to generate momentum. It also helps to keep your feet wider. Land with soft elbows in push-up form and continue lowering toward the ground. Repeat.
Clapping Jacks (Harder): Do the same exercise, but clap your hands and feet together while in the air. Requires more airtime and power.
Superman Push-Up (hardest): Do the same exercise, but while in the air, fully extend your arms in front of you so that your body is in a single plane, parallel to the ground, like a flying Superman. Requires even more airtime and power.
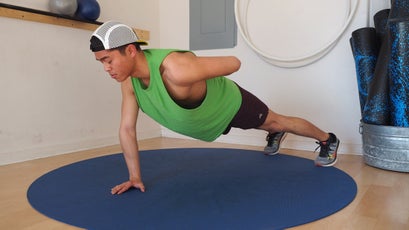
One-Arm Push-Up
What It Does
Doubles the weight on a single arm and further activates the core for stability.
How to Do It
Just like it sounds—perform a push-up with one arm centered below your chest and the unweighted arm behind your pack. This one takes a bit more balance; it helps to keep your feet wider. Maintain a flat back and level hips (don’t let them twist one way or the other) throughout the movement. If you want an added challenge, opt for a two-point push-up: assume a standard push-up position with wide feet, then raise the opposite hand and leg to form a two-point plank. While maintaining a rigid plank, perform a push-up. Keep your back flat and hips level throughout the movement.
Even More Modifications
Many of these moves can be made easier or harder with these modifications, although not every modification will work with every type of push-up.
Make It Easier
- Knees: Perform push-ups on your knees instead of your feet to ease the difficulty on your upper body. This is a great way to build up to more difficult variations.
- Incline: Elevate your hands on a bench, chair, or table—the higher above your feet, the easier.
- Negatives: Utilize the lowering phase of a push-up (when muscle fibers elongate under load). “Muscles can handle a heavier load under eccentric contraction than they can under concentric contraction,” says Scott Johnston, a master coach at Uphill Athlete and the co-author of Training for the New Alpinism and Training for the Uphill Athlete. Therefore, he says, “[Negatives] are able to stress the muscle to a much higher degree, so you get a bigger strength-training effect.” In other words, if you’re not yet strong enough to do some of these push-up variations with proper form, perform only the eccentric phase (the lowering half) to build up strength for the concentric phase (the pushing-back-up half), when muscles shorten under load.
Make It Harder
- Feet Stacked: Cross one ankle over the other so only one foot is on the ground. This requires more core activation for stability.
- Decline: Elevate your feet on a box, bench, or step to increase the activation of the upper chest muscles and the front of the shoulders (anterior deltoids). The higher your feet, the more difficult.
- Weighted: Wear a weight vest or have a friend place a weight plate on your back for an added strength challenge.
- Eccentric Push-Ups: The benefits of the eccentric muscle phase are twofold. First, as stated above, negatives are a good way to build up to more difficult exercises. But because you can handle a heavier load under eccentric contraction, you can lower yourself slowly (over three to five seconds) to milk the eccentric phase for added training effect.
- Weighted Negatives: You can also add external weight during the eccentric phase for a greater strength-training effect. Start in a standard push-up position and have a friend place plate weights on your back. Lower yourself until your chest almost touches the floor (eccentric phase), and then have your friend remove the weight (or some of it) before you push back up (concentric phase).
- Plyometric Combinations: Transition between different types of push-ups. For example, go back and forth between narrow and wide hands or the fore and aft positions of staggered hands. Get creative.
Get the best of Outside’s health and fitness coverage in your inbox: sign up for the Bodywork newsletter.