
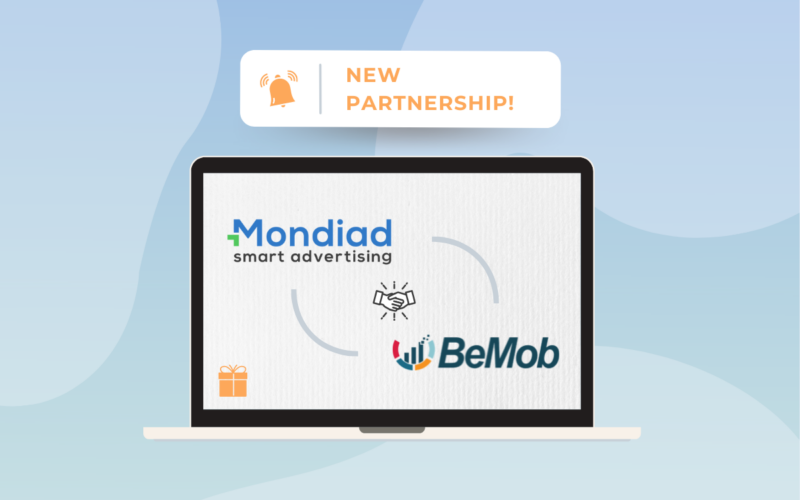
Say hi to our new partner!
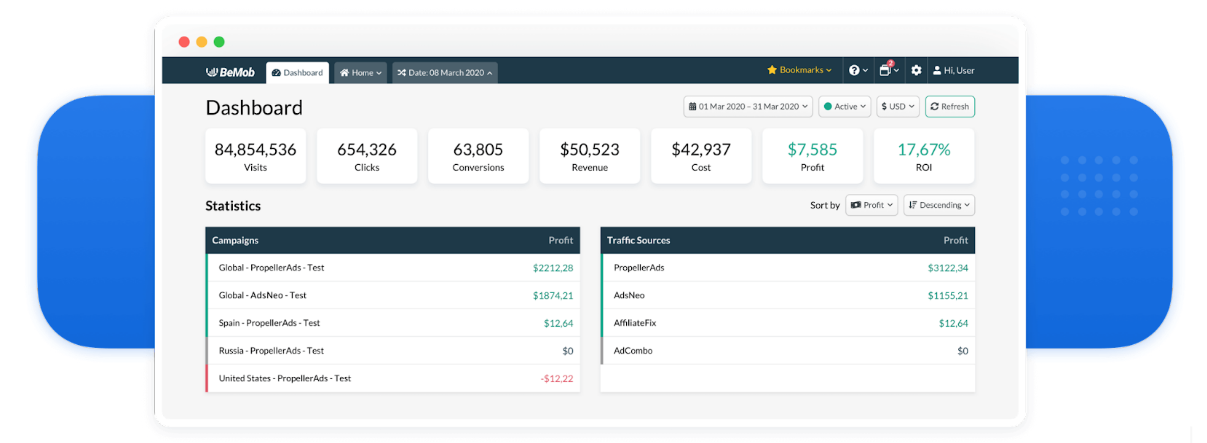
In need to track data of incoming traffic, analyze real-time reports and optimize the performance of your ad campaigns? Use BeMob, a cloud-based tracking platform that allows you to control all traffic that is reaching your ad campaigns. Try Mondiad x BeMob!
We are always doing our best to help you increase your performance, so we are happy to announce our collaboration with BeMob, one of the most popular ad tracking software for media buyers and affiliate marketers!
BeMob top features:
☑️ Multi-cost and Payout Tracking: With BeMob it is possible to set the required cost model (CPA, CPM, CPV or Revshare) and choose the convenient payout method (auto or manual) to see the most detailed data on profit-based metrics.
☑️ Advanced Rules & Targeting: Create rule-based paths to route your traffic according to the required conditions: proxy, crawler, WebView, visits cap etc.
☑️ Seamless Redirects: BeMob uses Amazon servers located all over the world to allow the fastest redirect to your offers.
☑️ Convenient and Detailed Reporting System: Dig deeper with Drill-down reports. Combine reports data using 3 groupings. Watch the reports in the view of a table, tree or chart.
☑️ Landing Page Security: Protect your landing page from being stolen by your competitors through spy tools.
☑️ Smart Rotations: Distribute your traffic wisely by showing different landing pages/offer pages or fix the visitor on a certain landing page/offer page.
☑️ Team Access: Work with your team by adding users to your account and setting up permissions to the required elements. Manage your teamwork in workspaces, distribute the workload between members and share the reports with interested parties without giving them access to your BeMob account.
***
Try Mondiad x BeMob! Track your Mondiad ad campaigns with BeMob!
STEP 1: Select Mondiad as your Traffic Source in BeMob:
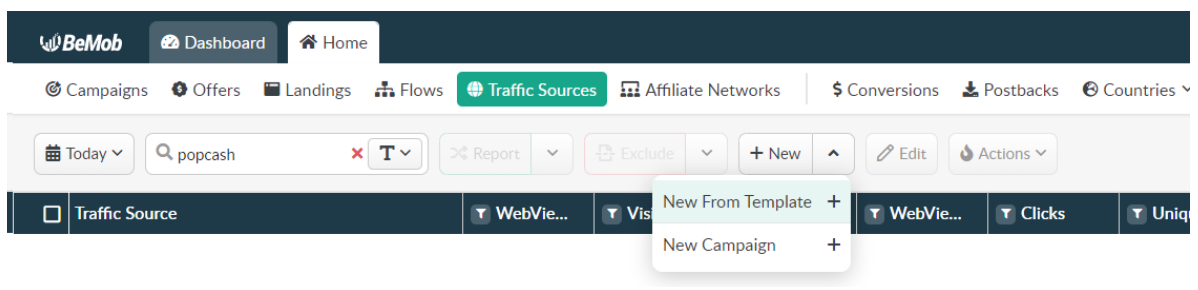
After you log in to BeMob, go to the Home tab -> select Traffic Sources tab -> click on the New Button -> choose New From Template / New Campaign.
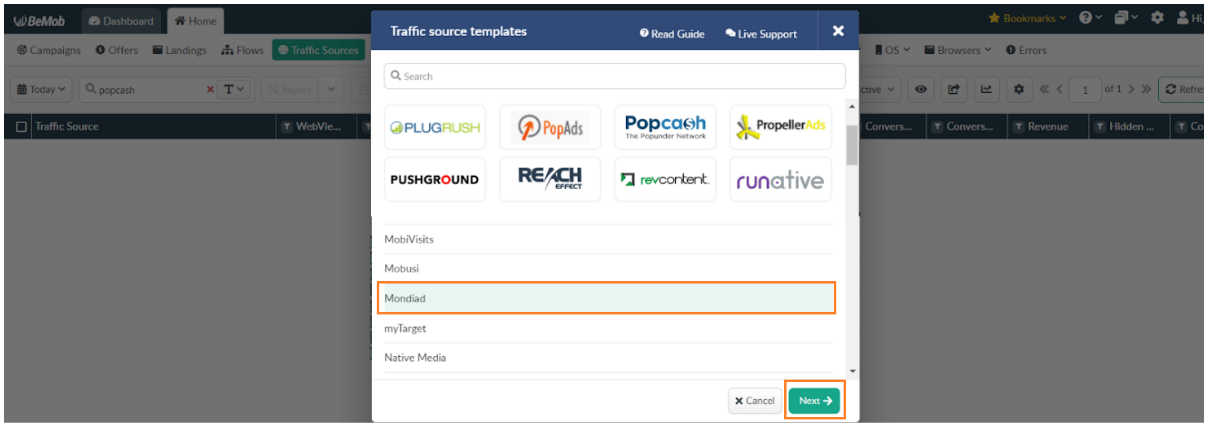
As Mondiad is already listed in BeMob`s templates, all the required fields will be automatically filled in after selection. Here, select Mondiad as your traffic source and click on the Next button at the end of the pop-up, to set up the Traffic Source Details and Parameters.
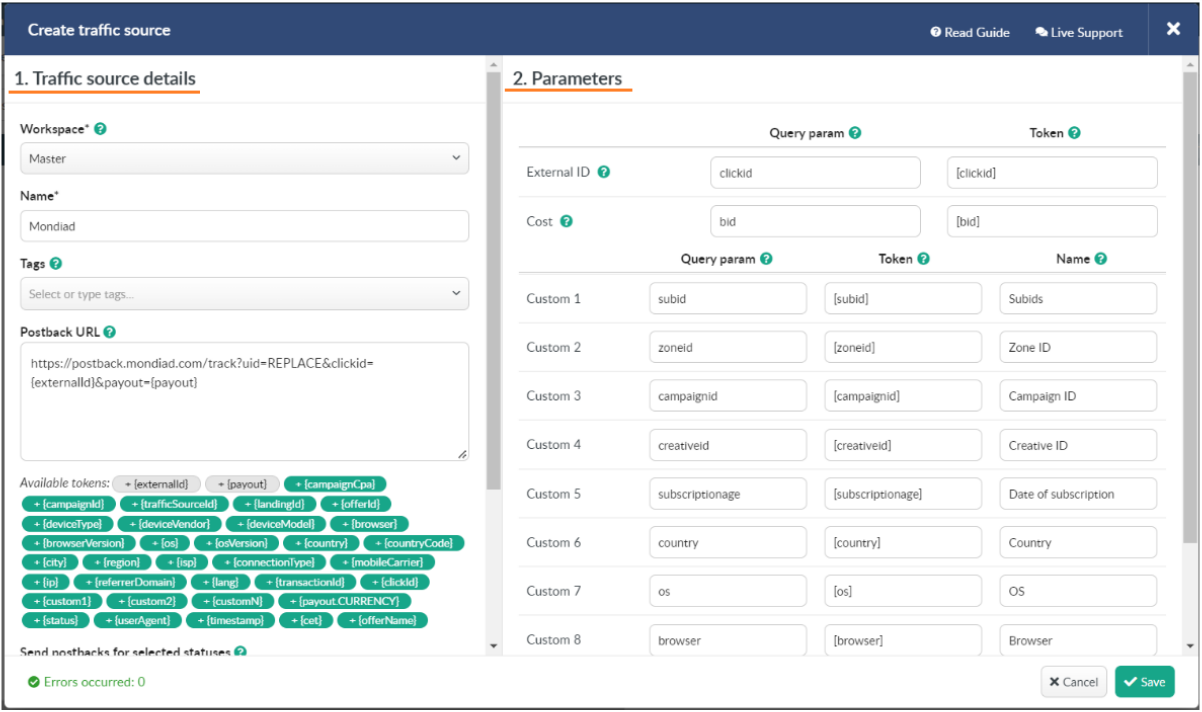 1. Set up your traffic source details: workspace; the name of traffic source; tags; postback URL field; list of available tokens; checkboxes with statuses; postback %; integration (available if the integration is enabled for you by our manager); traffic loss % settings; impressions tracking.
2. Set up your parameters:
Optimize your ad campaign in the Parameters section, by using a list of preconfigured tokens with your traffic source to pass the site ID, campaign ID, banner ID and other details about the incoming traffic purchased from your traffic source.
All parameters and tokens in the 1 – 10 Custom fields will be added at the end of the Сampaign URL, Impression pixel and Impression URL in the format &p1={p1}&p2={p2}…&p10={p10}.
To add other parameters, add them manually in any of the empty fields. If there is no space left, add your parameter/token by replacing it with a less important parameter or token.
3. Copy the Postback URL generated by Mondiad.
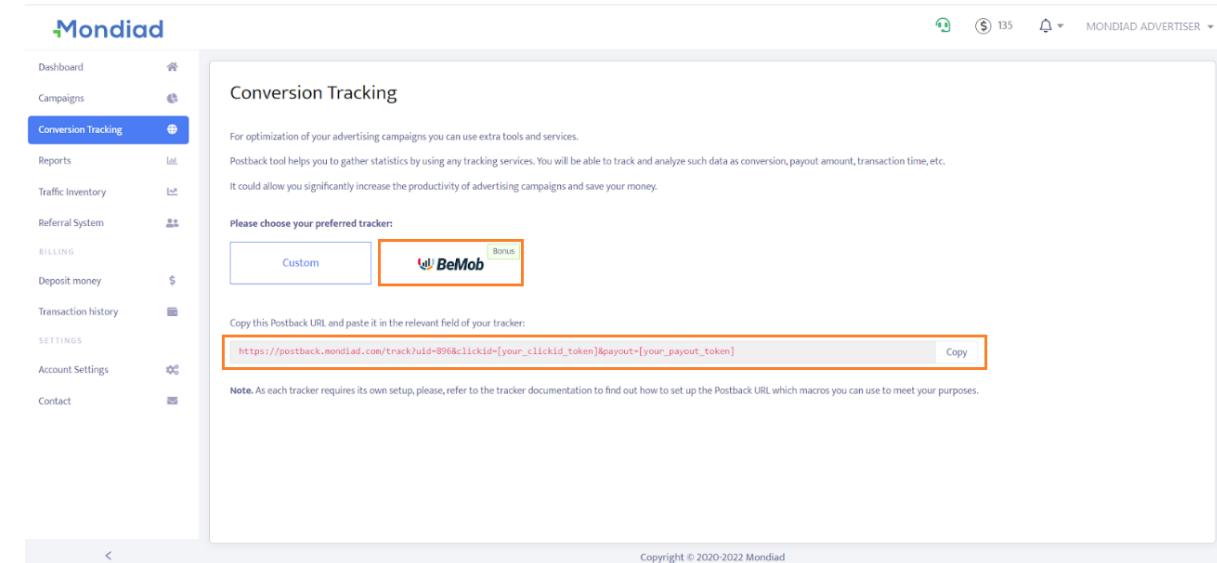
Sign into your Mondiad advertiser account and go to the Conversion Tracking tab:
- Select BeMob as your ad tracker;
- Copy the generated Postback URL;
Return to the Traffic Source pop-up in BeMob, to paste it into the BeMob Postback URL field.

- Tick the APPROVED button to select the status of your Postbacks.
- After the desired configuration is all finished, click on the Save button to remember your traffic source settings for your future campaigns.
STEP 2: Start a campaign with BeMob:
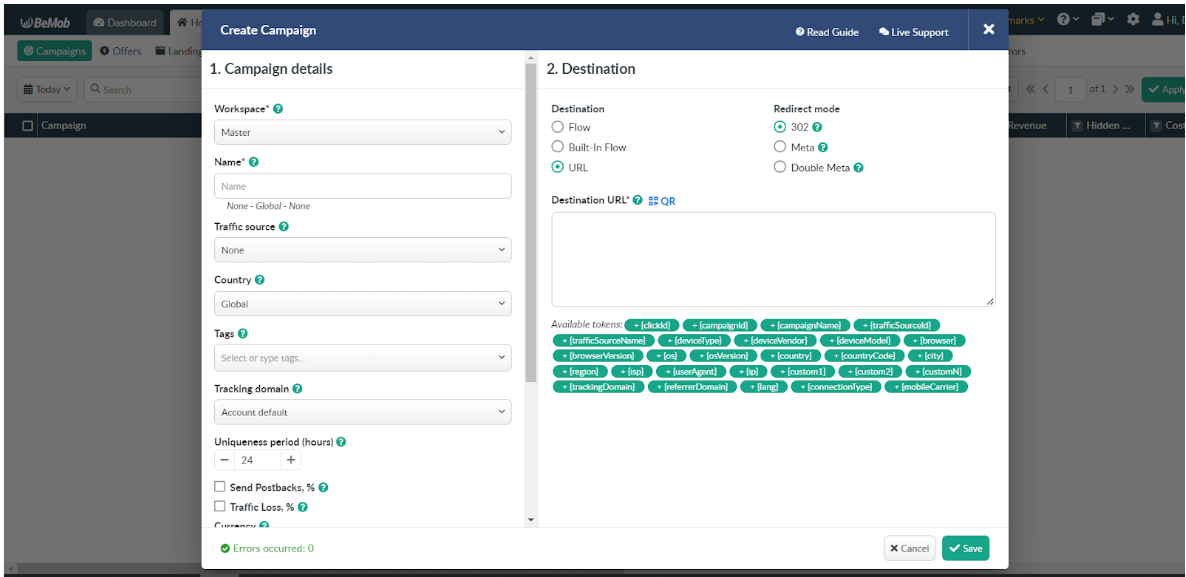
Once you’ve added and configured Mondiad as your traffic source, go to the Campaigns tab -> click New.
Here, enter all the Campaign Details (Workspace, Name, Traffic Source, Country, Tags, Tracking domain, etc) and its Destination (URL, etc), then click Save to store your campaign settings.
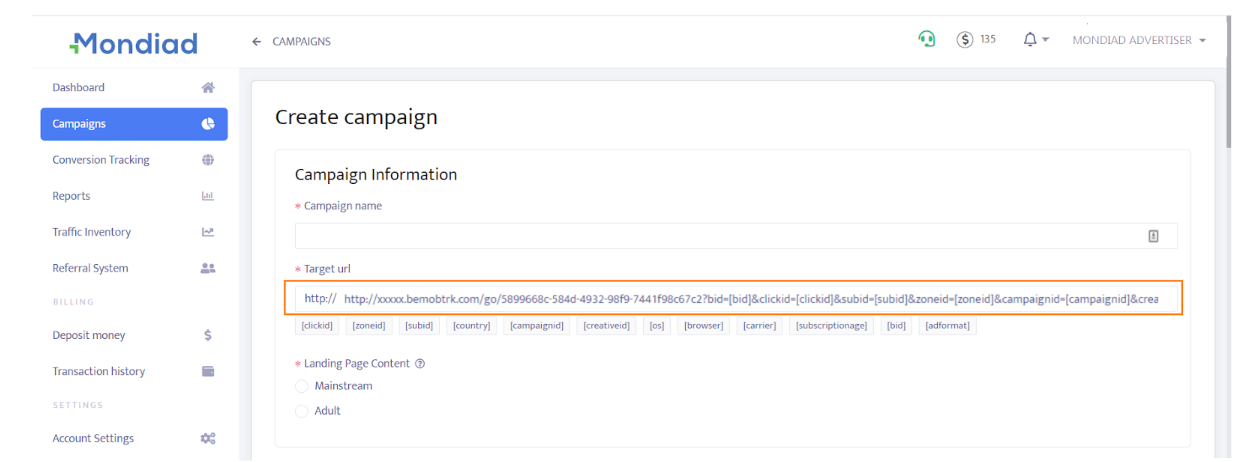
STEP 3: Start a campaign with Mondiad:
Next, copy the Campaign URL link that pops up and go to Mondiad -> Campaigns -> Create Campaign -> paste the link the Target URL.
*For a detailed guide on how to create a campaign with Mondiad as well as other surprises, subscribe to our newsletter to be notified about our updates.
*For a more detailed guide on how to set Mondiad campaigns with BeMob, check out BeMob`s official article or just refer to BeMob`s Help Center for further overall guidance.
***
Ready? Try Mondiad x BeMob!
Sign up now to not miss out on an EXCLUSIVE BONUS for @Mondiad users!
👉 Register with BeMob now using promocode MONDIAD25 and get a 25% discount on any paid plan for 1 month!