
Data synchronization between platforms is a real challenge for different teams but also presents an opportunity. Connecting your teams can be a bump in the road, or it can be a business multiplier. If you’re setting up a new integration like a Jira Salesforce integration, then making the right decisions will help determine which.
What’s covered in this article:
- Why Integrate Jira and Salesforce?
- Jira Salesforce Integration Use Cases
- How to Choose the Right Integration Tool
- How to Set up a Jira Salesforce Integration (the Step-by-Step Process)
- Advanced Salesforce Jira Integration Use Cases
- Frequently Asked Questions
Get the Jira Salesforce Integration Guide
Learn how to achieve seamless integration between Jira and Salesforce, step-by-step.
Why Integrate Jira and Salesforce?
Jira was originally a bug and issue tracker and is hugely popular with software development teams. It is highly configurable and can also be used for other kinds of projects.
Salesforce is an all-in-one solution for sales teams that allows them to track every detail of their interaction with customers. Like Jira, it is highly customizable.
Teams use Jira and Salesforce for different reasons, but they can often benefit from each other’s information. A Jira Salesforce integration can connect the platforms and control data exchange automatically, filtering it as required.
That lets both teams stay connected, sharing knowledge and working towards the same goals.
Integrating Jira and Salesforce can offer a lot of benefits:
- Improved Collaboration: A Jira Salesforce integration can improve collaboration between sales and development teams. Sales teams can log customer issues and feature requests in Salesforce, and these can automatically flow to Jira for development teams to work on.
- Streamlined Workflows: Integration between Jira and Salesforce allows you to automate information flow between the systems, reducing manual data entry and potential errors. This streamlines processes and workflows, and ensures data is consistent across teams.
- Better Reporting and Analytics: By combining data from Salesforce and Jira, you can generate comprehensive reports and analytics that provide useful insights into customer needs, issue resolution times, and project progress. This shared data can lead to informed business decisions.
- Real-time Updates: Connecting Jira and Salesforce will ensure changes made in one system are reflected in the other in real time, keeping teams informed about latest developments and customer interactions.
- Increased Efficiency: A Jira Salesforce integration reduces the need for manual data entry and eliminates the risk of duplicate data, resulting in increased operational efficiency and reduced administrative overhead.
Though there are many benefits of integrating Jira and Salesforce, the success of this integration depends on careful planning, configuration and ongoing maintenance.
To give you an idea of the potential of such an integration, let’s have a look at a few use cases.
Jira Salesforce Integration Use Cases
There are many scenarios where you might want to integrate these platforms. Salesforce is used by sales teams, but Jira is more versatile, so in most cases, you’ll be connecting your sales team to another department.
Sales and Development Teams
If your developers use Jira to plan their work, they can benefit from the information the sales team has about what customers like and what they are requesting. The sales team can benefit from knowing what is in the pipeline and how far away new features and products are.
For instance, Jira issues are created automatically from Salesforce cases or vice versa. This ensures customer support cases are seamlessly transferred to the development team for resolution.
You can even create a link between Sales opportunity and a development request. When a sales team identifies a potential opportunity in Salesforce, they can initiate a development request in Jira.
Integrating their systems allows you to share this data regularly, and automatically, enabling them both to benefit from each other’s knowledge.
Sales and Project Management Teams
Project management teams can integrate with sales in a similar way. In their case, information on new ideas can be shared between them.
Project managers can learn whether their ideas are a hit with customers, and the sales team can keep up to date with what’s being planned. With everybody in the loop, both departments can be more responsive, and make more informed choices about what will play well with customers.
For instance, you can link Salesforce opportunities or accounts with Jira projects or issues. The sales team can also automatically be notified of real-time status updates on Jira issues.
Sales and Customer Support Teams
You can gather customer feedback and feature requests in Salesforce and use the integration to create Jira issues or user stories. This enables a more informed and personalized customer engagement.
Front-end and Back-end Teams
A Jira Salesforce integration can also be used to connect front-end and back-end teams. For instance, use Jira to track billable hours or services delivered and integrate with Salesforce to generate accurate invoices and billing statements for customers.
These use cases can be tailored to your organization’s specific needs, and the integration can be configured to ensure a seamless and efficient flow of data and information between Salesforce and Jira.

How to Choose the Right Integration Tool
There are native ways to integrate Jira and Salesforce, but they come with their own sets of limitations.
Often companies opt for third-party integration solution providers to implement a Jira Salesforce integration.
However, there are several things to consider when choosing an integration solution. Every team’s requirements are obviously quite unique, but here is a list of the most important factors that can help you go for the best-suited solution:
Decentralized Integration
You want your teams to decide what they share independently. Sharing information shouldn’t mean losing control of your data. A tool should allow you to grant or limit access without having to compromise on security or privacy.
Security
It is important to secure your Jira Salesforce integration through a tool that provides appropriate security measures.
A solution providing role-based access control, encrypted data in transit and at rest, proper authentication and authorization mechanisms, single-tenant architecture can be a starting point.
Reliability
An integration solution should be robust enough to recover after problems. If either side of the connection is down, it should be able to detect when it becomes available again and restart work without user intervention.
Flexibility
Teams’ needs evolve over time, so it’s important the integration can change to accommodate that. Being able to adapt to different use cases, and being easy to edit at any time are both crucial.

To meet these goals, I’ll use an integration solution called Exalate. Exalate is the only cross-company integration solution that enables you to integrate multiple work management systems. It allows you to set up an integration using a simple visual interface, with the option to use code to take further control and customize your sync however you want.
It offers the ideal balance between ease of use and power, and lets you share data between your teams quickly, safely, and reliably without compromising your team’s data autonomy.
So let’s get started and see how A Jira Salesforce integration is set up in practice.
How to Set up a Jira Salesforce Integration (the Step-by-Step Process)
We’ll get to the step-by-step process of the integration, but if you prefer videos over articles, you can go ahead and watch this tutorial instead.
To start, you’ll need access to your Jira and Salesforce instances.
Note: Exalate has a free trial, so you can get started with it right away. There’s also a free plan available when the 30-day trial expires.
Step 1: Install Exalate on Salesforce
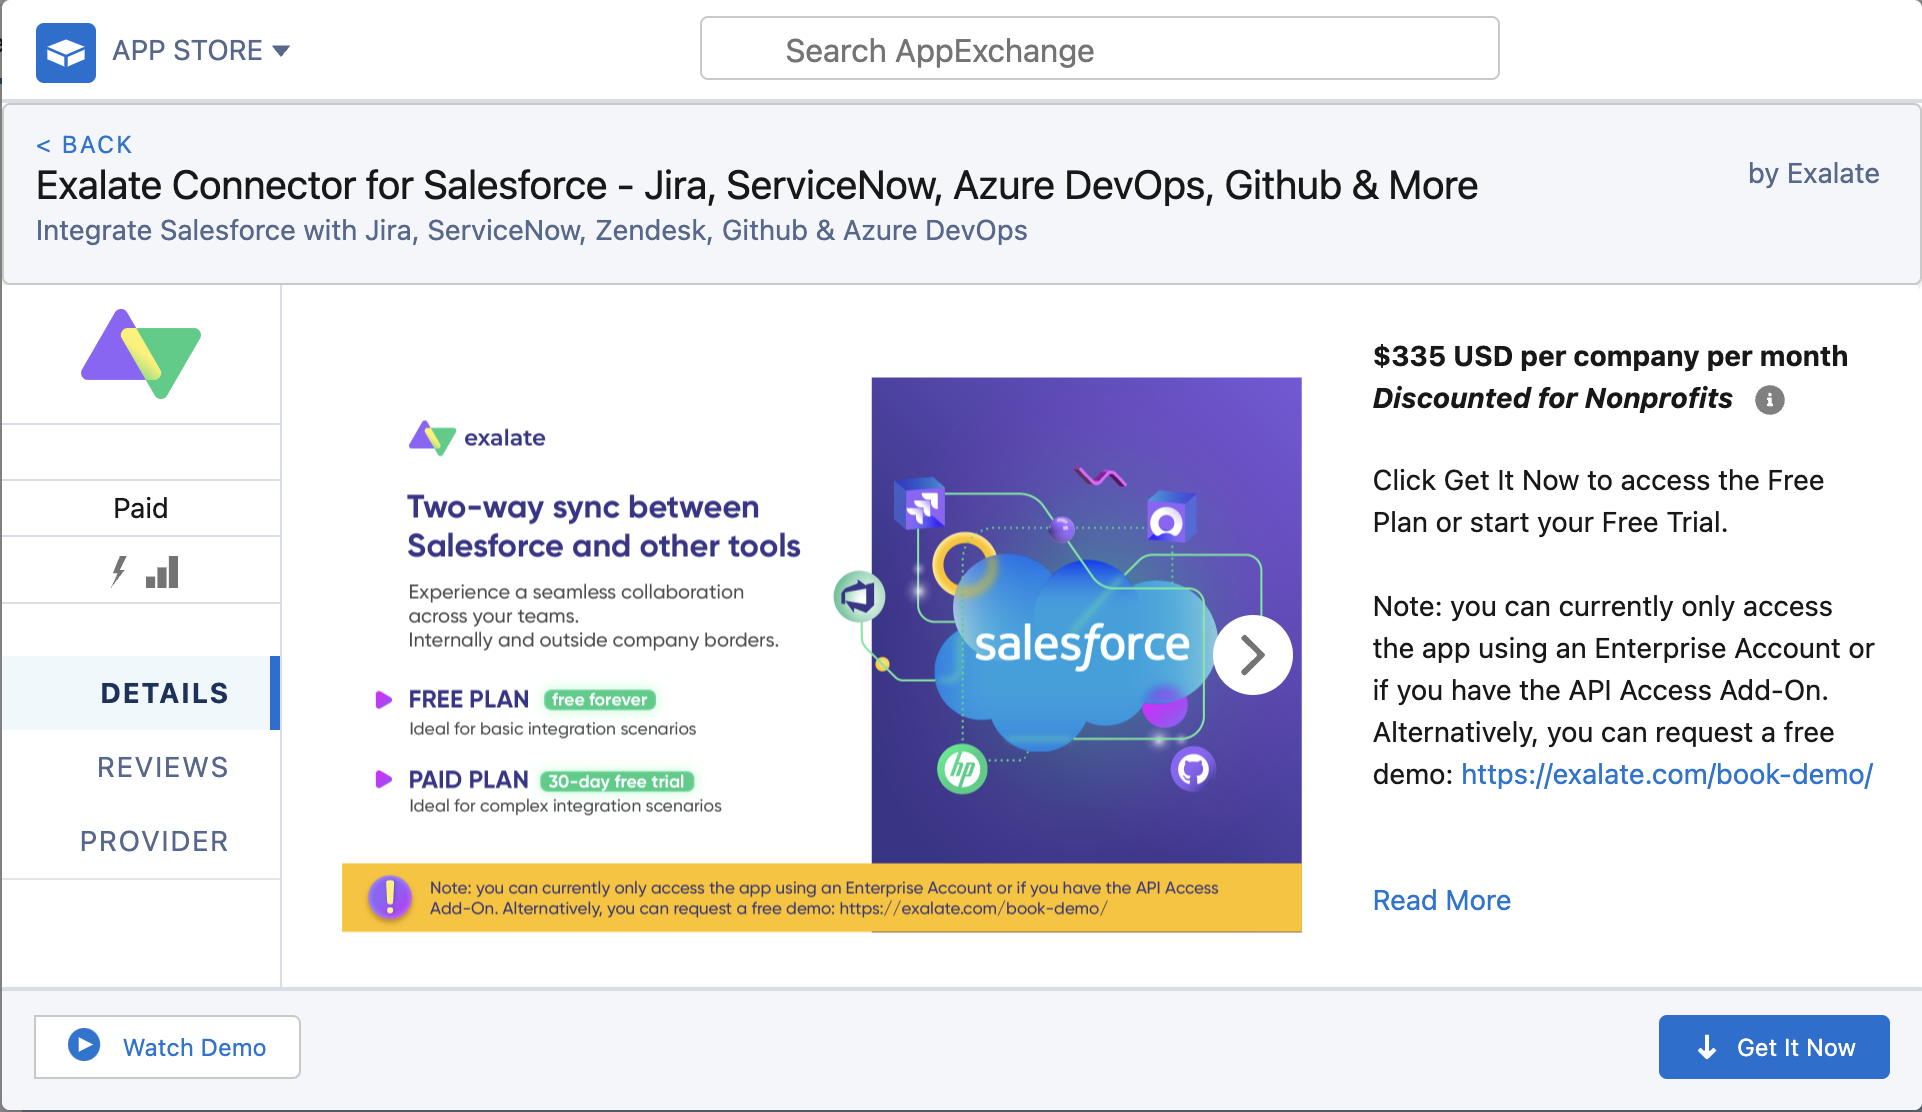
To initiate the installation of Exalate on Salesforce, visit Salesforce AppExchange and search for Exalate. Locate the “Get it Now” button and proceed to click on it.
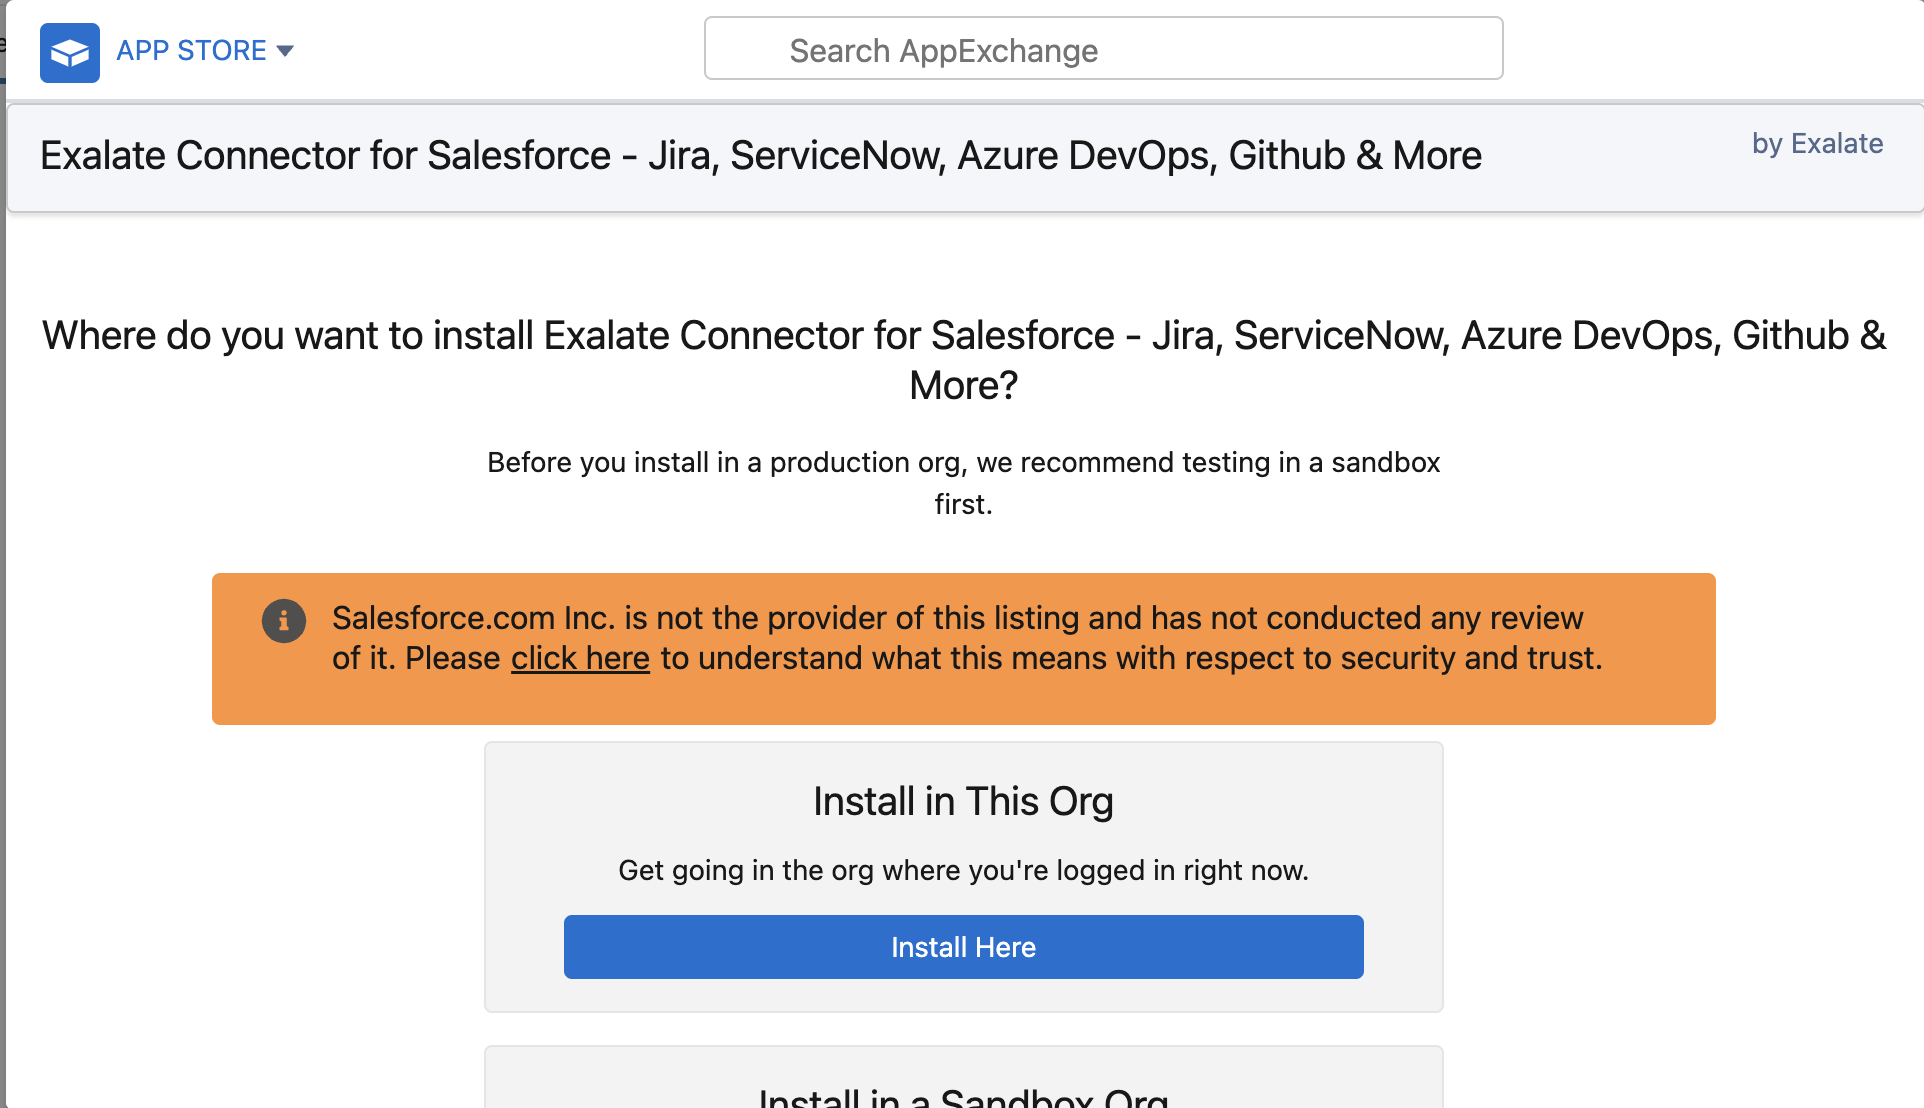
At this stage, you’ll be prompted to choose where you want to install Salesforce: either “Install in This Org” or in a Sandbox org. For my installation, I opted to go with “Install in This Org”.
Once you’ve made your selection, scroll down to the bottom of the screen, and then agree to the terms and conditions. After agreeing, click “Confirm and Install”.
Next, you’ll need to specify the users for whom you want to install Salesforce. Keep in mind that you can modify this later if necessary. In my case, I selected “Install for All Users” and then clicked “Install”.

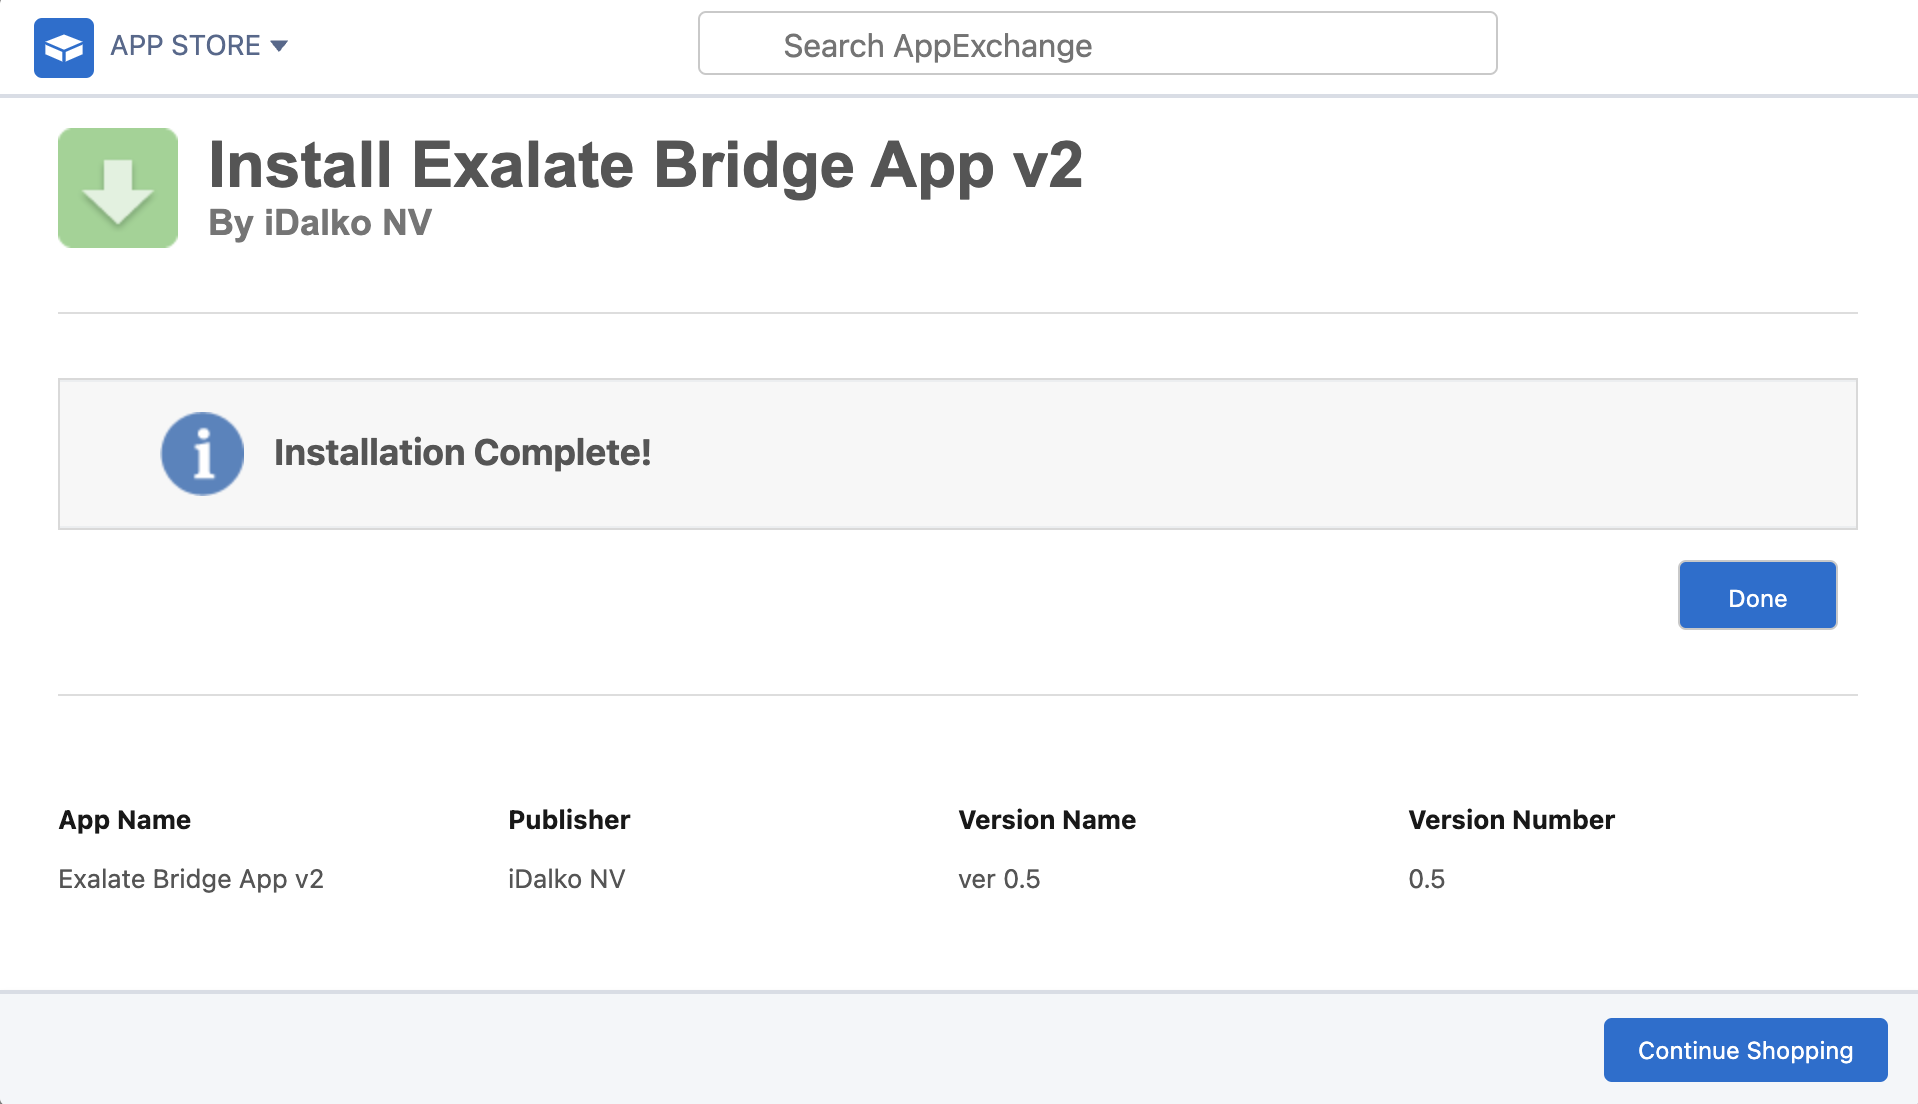
Proceed by “Approving Third-party Access” and click “Continue” to proceed with the installation process. Once the installation is complete, click “Done” to finish the setup.
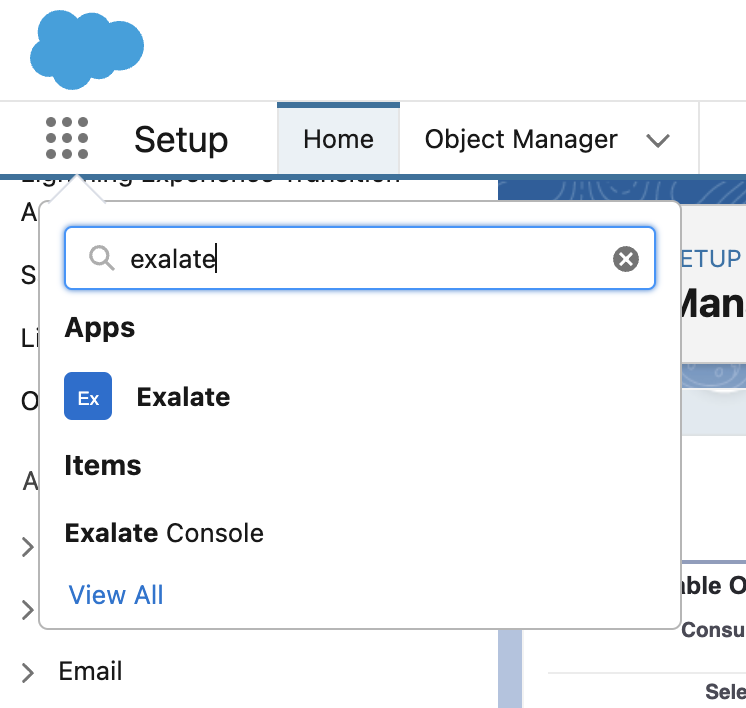
Now, navigate to your Salesforce instance and create a connected app. Be sure to save the “Consumer Secret” and “Consumer Key” that are generated during this process. Return to your Salesforce instance, access “Apps,” and search for “Exalate”.
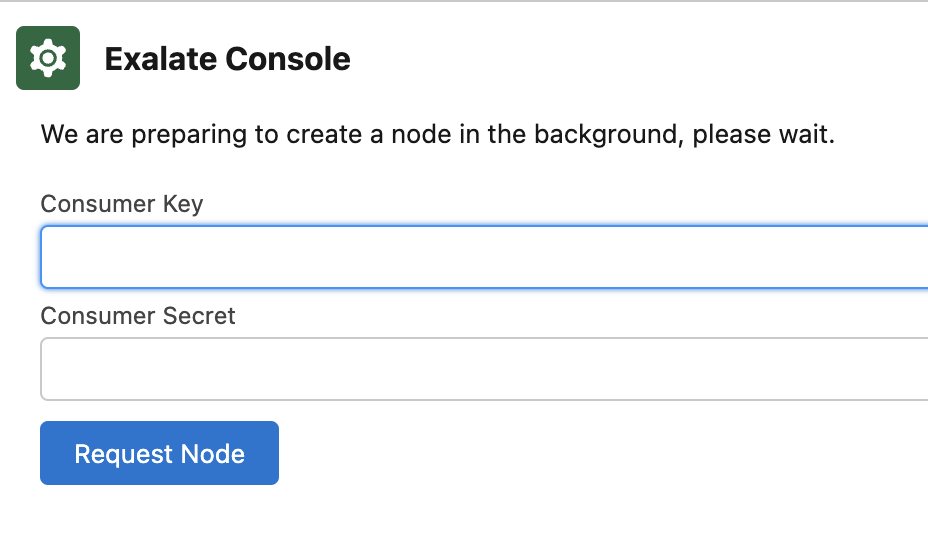
For requesting an Exalate node, use the previously saved “Consumer Secret” and “Consumer Key”, and then click “Request Node”.
You’ll be prompted to click “Allow” to grant access permissions to Exalate.
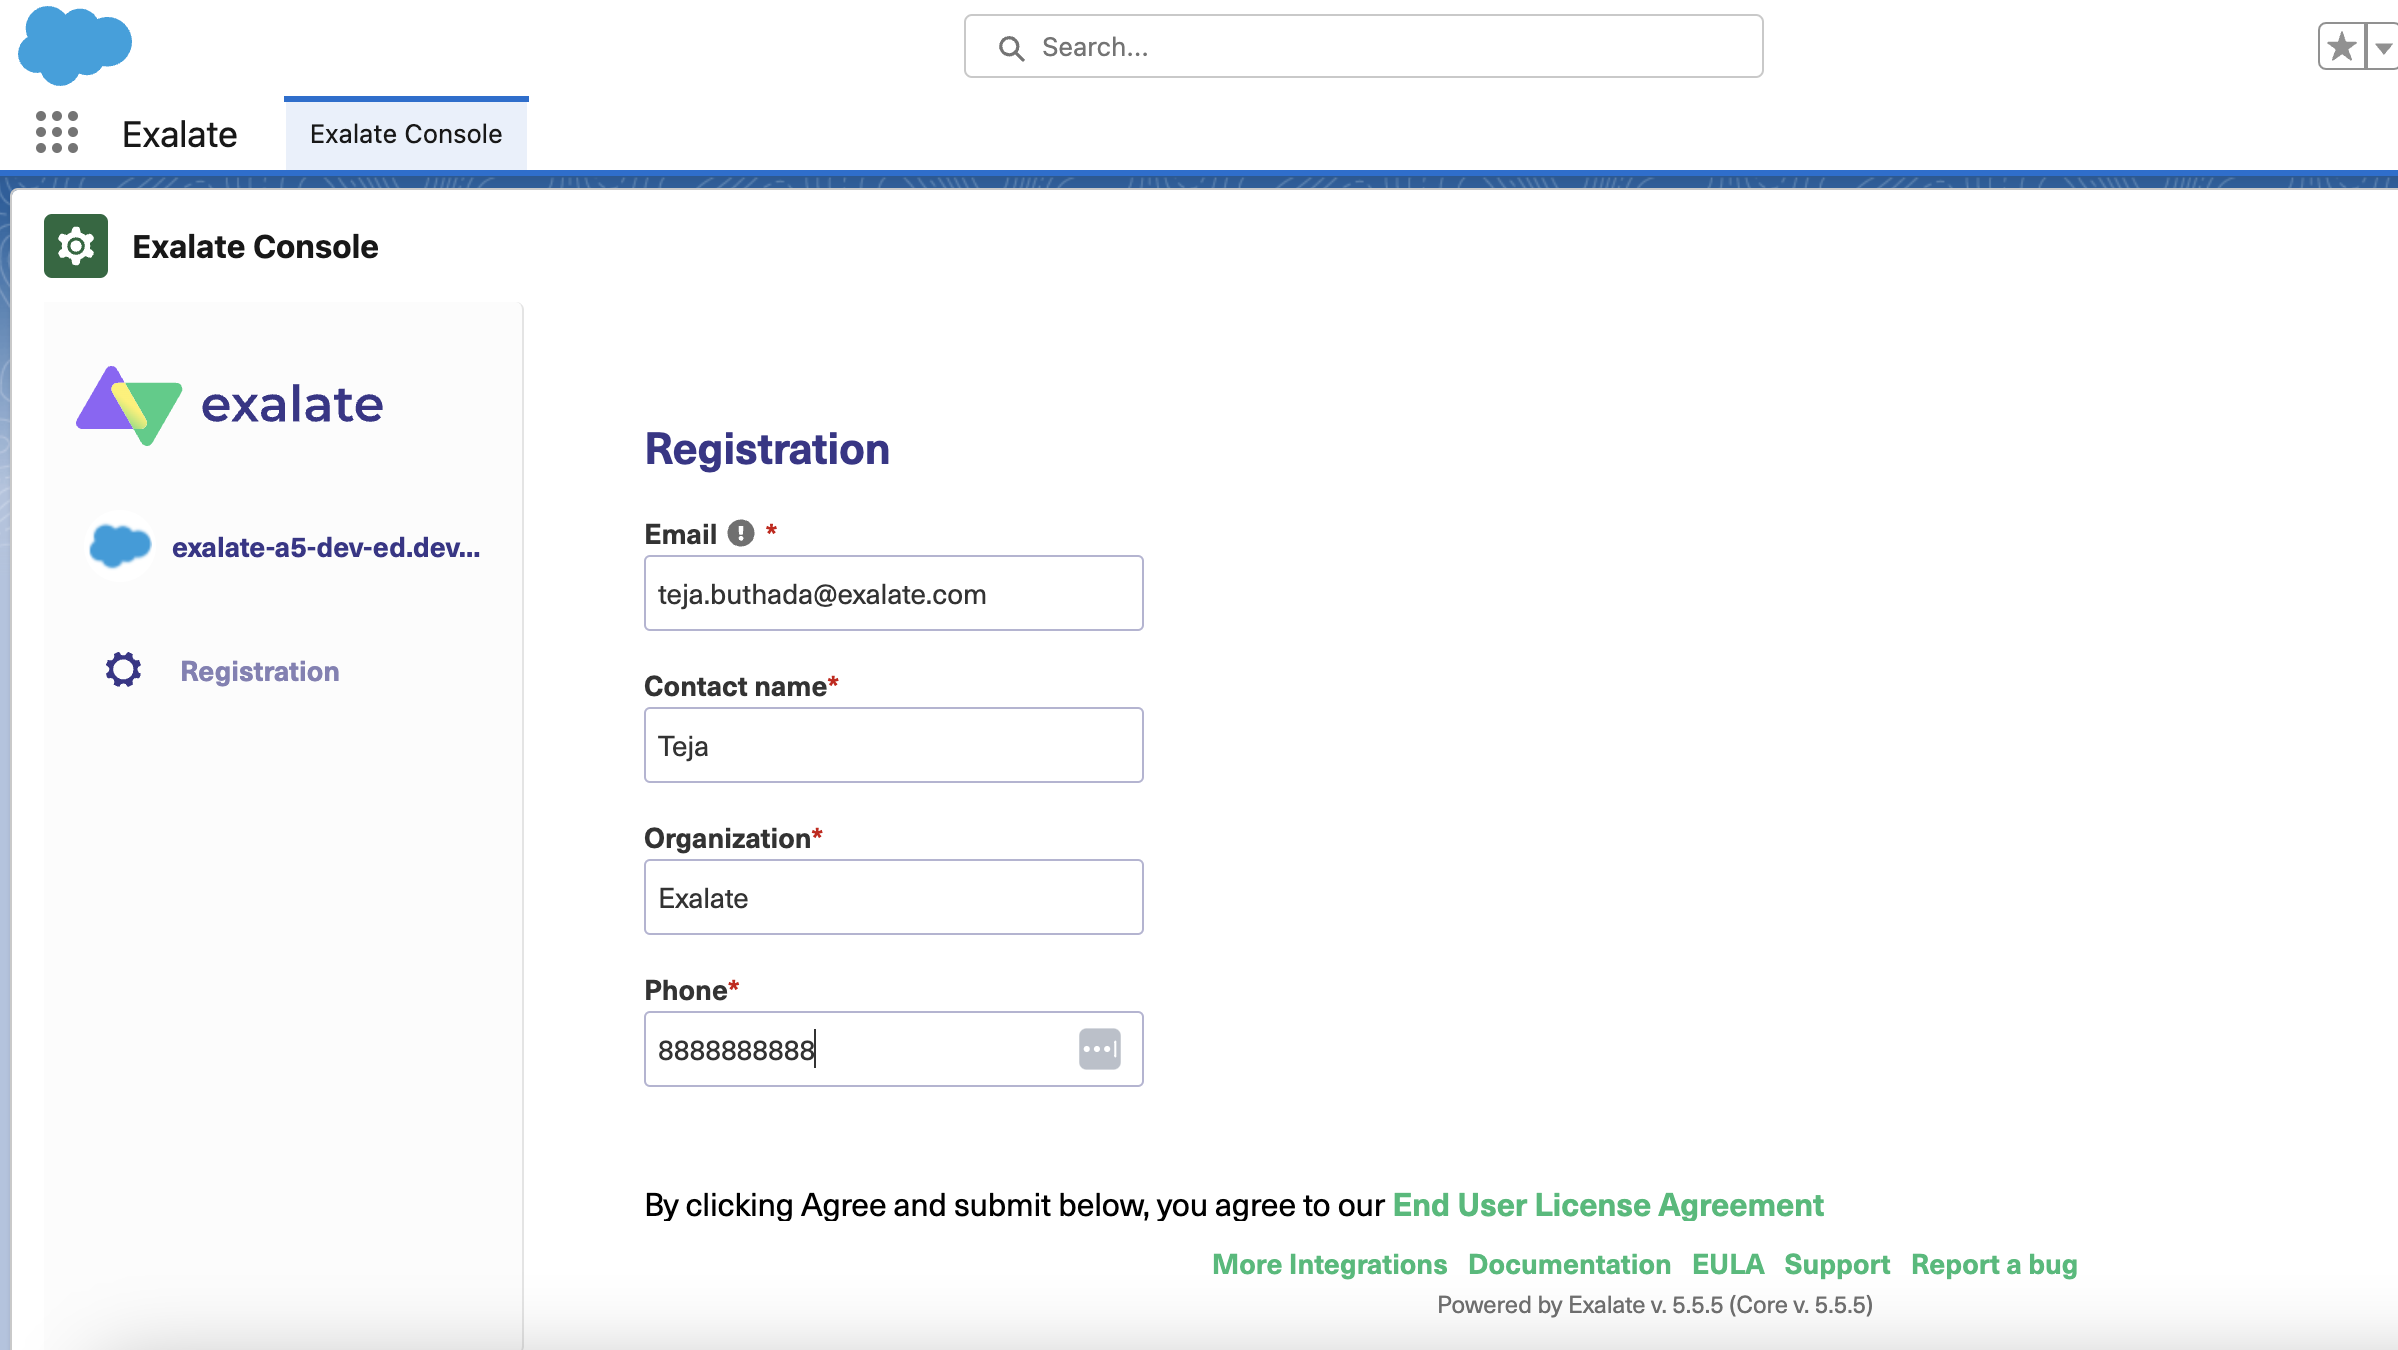
Afterward, provide your personal details and click “Agree and Submit”. Now, await an email from the Exalate License Manager.
Once you receive the email, click “Verify Exalate instance” to be redirected to the Exalate admin console.
If you ever find yourself logged out of your Salesforce instance, simply refer back to these steps to log in again.

Note: You can also find Exalate’s Salesforce connector for Jira on the Atlassian Marketplace.
Step 2: Install Exalate on Jira
Next, let’s install Exalate on Jira. This guide covers Jira Cloud, which you can read more about here.
If you’re using Jira on-premise, follow this instead.
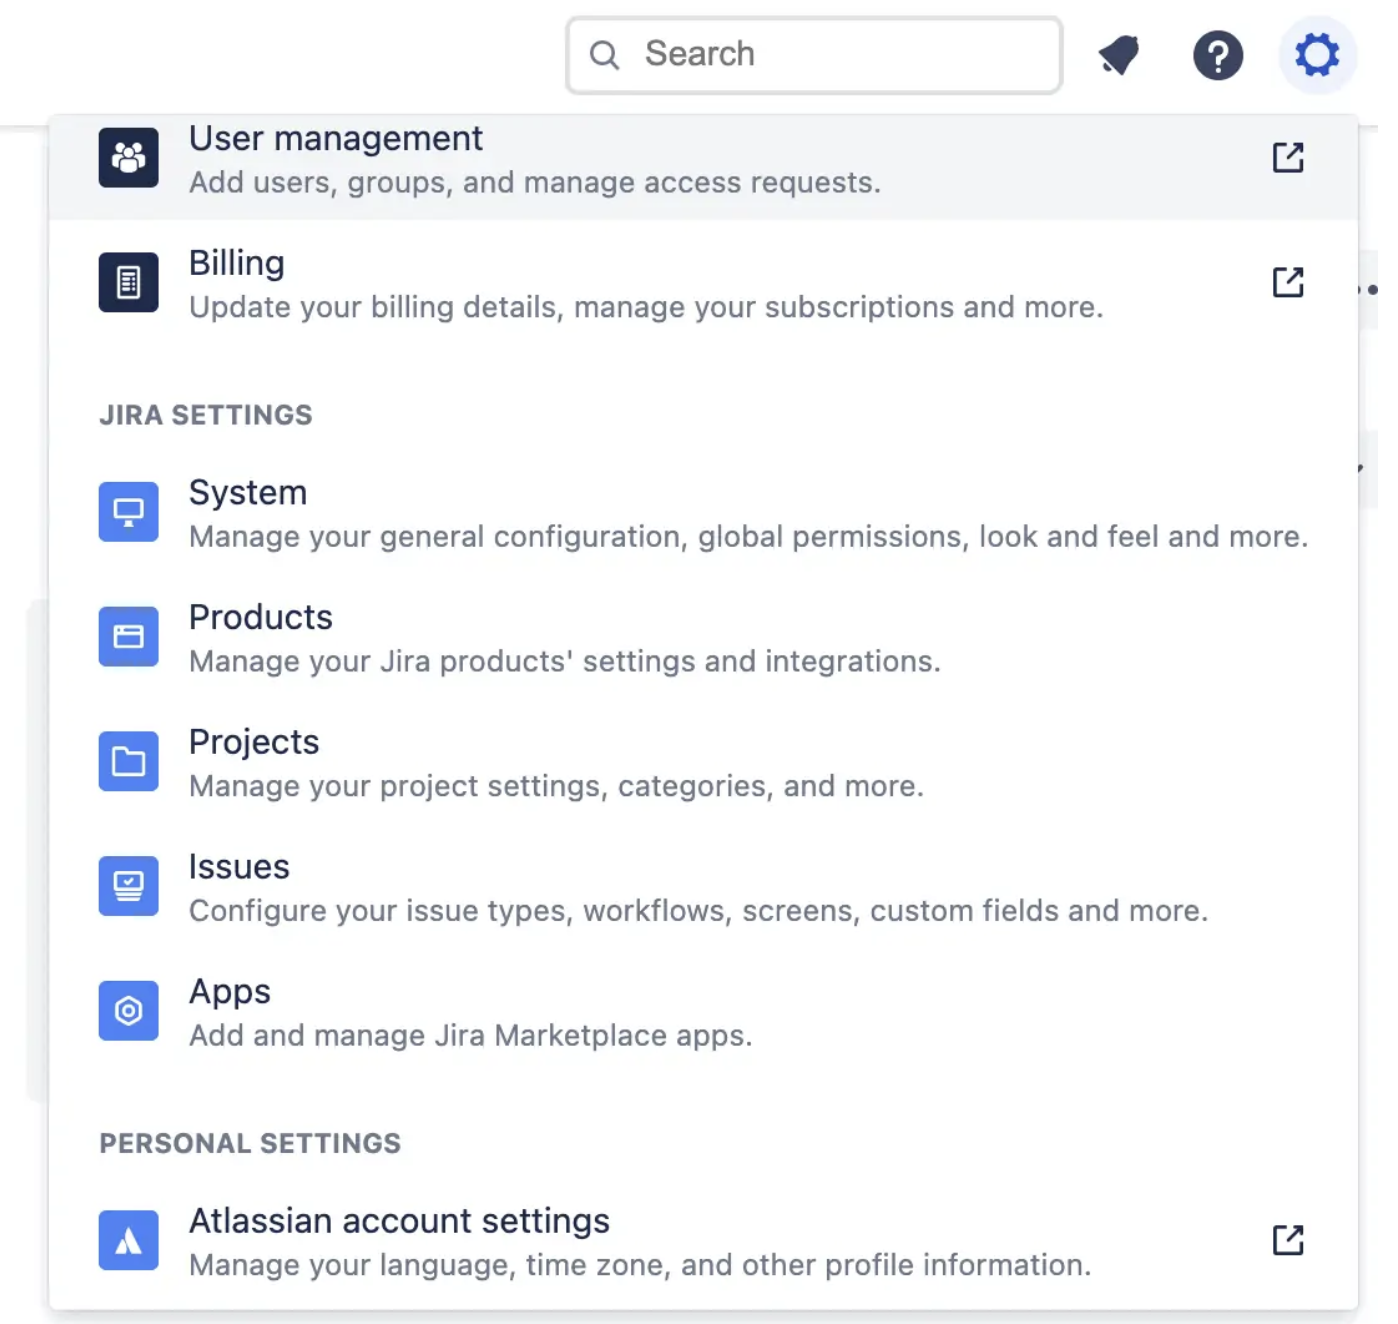
Jira is available on the Atlassian Marketplace, which you can find in Jira by clicking the “Settings” icon at the top right and then selecting “Apps” from the menu.
Click “Find new apps” in the left-hand menu and then search for “Exalate”. You should see several patches.
Select “Exalate Jira Issue Sync & more”, then click the “Try it free” button on the right. Then click “Start free trial”.
Wait for Exalate’s install process to complete, then click “Get Started”.

Step 3: Connect Jira and Salesforce
Now you need to connect your instances. You need to create the connection on one side and have the other side accept it.
You can start from either platform as the process is almost the same. I’ll use Salesforce here.
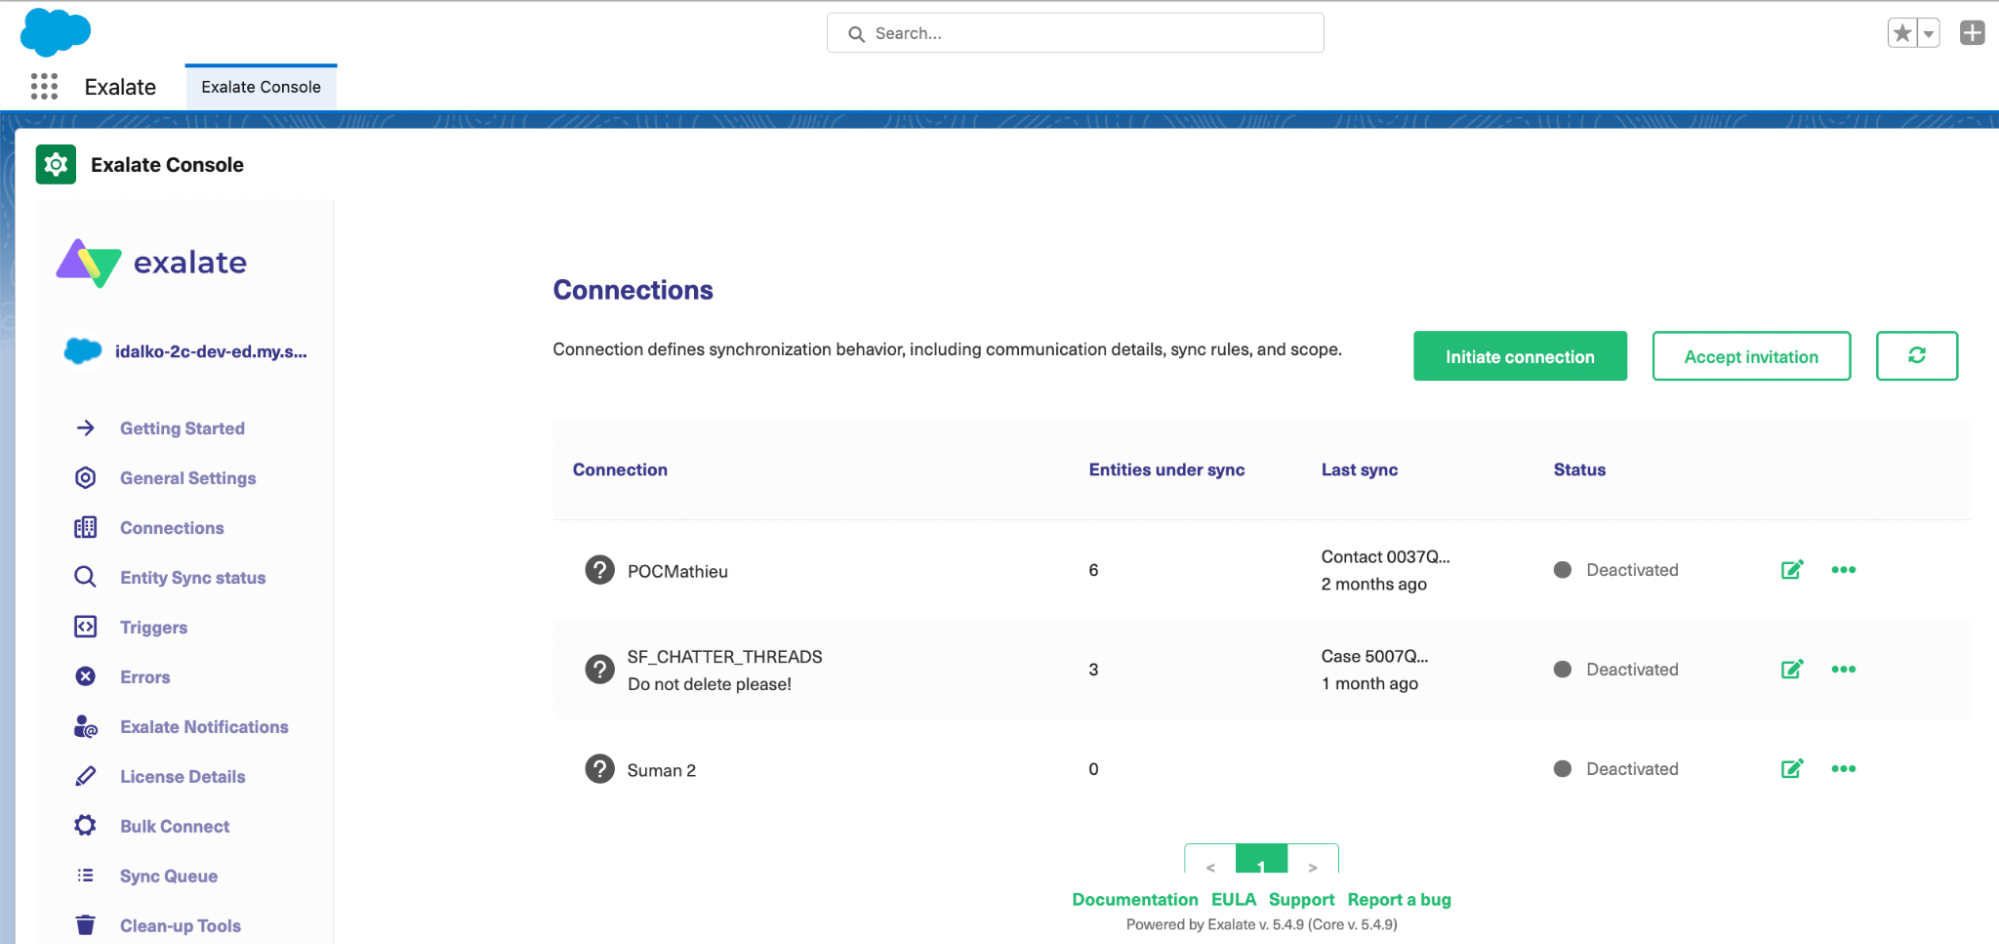
Navigate to Exalate in Salesforce, then select “Connections” from the left-hand menu. Click the green “Initiate connection” button.
Next, enter the address of the other instance (Jira in this case) in the “Destination instance URL” box. Exalate will verify that it is installed on the other instance.

Then you have to choose between the Basic mode, which configures things automatically for you, or the Script mode, which allows you to configure and customize your integration using the Groovy scripting language.
Continue with the Basic Mode
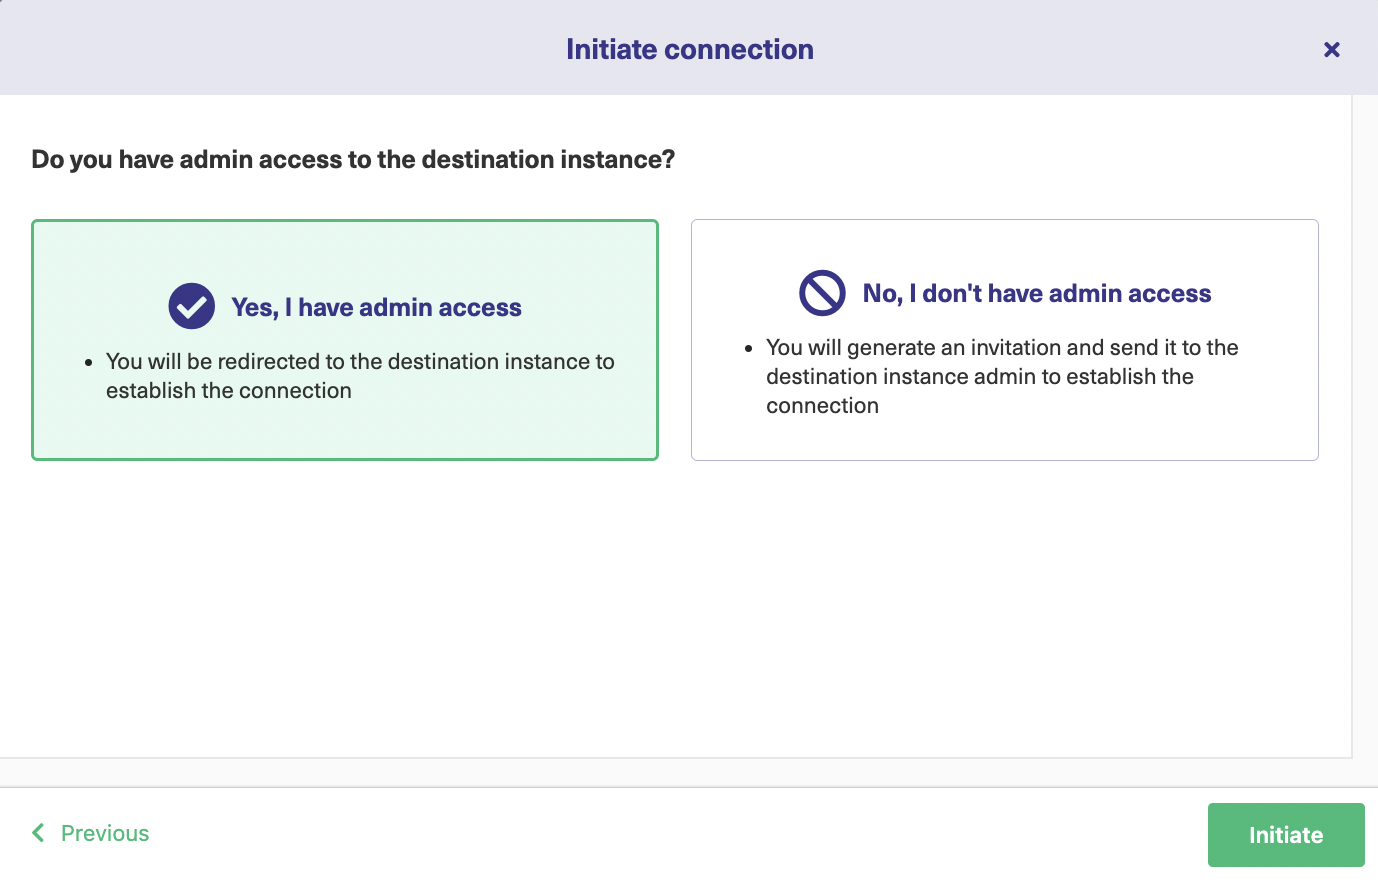
With Basic mode, you have the option to automatically head to the other instance if you have admin access. If you don’t have admin access, then you can follow the steps in the Script mode. After granting admin access, choose a project to sync, and when you click the “Confirm” button, the connection will be created.
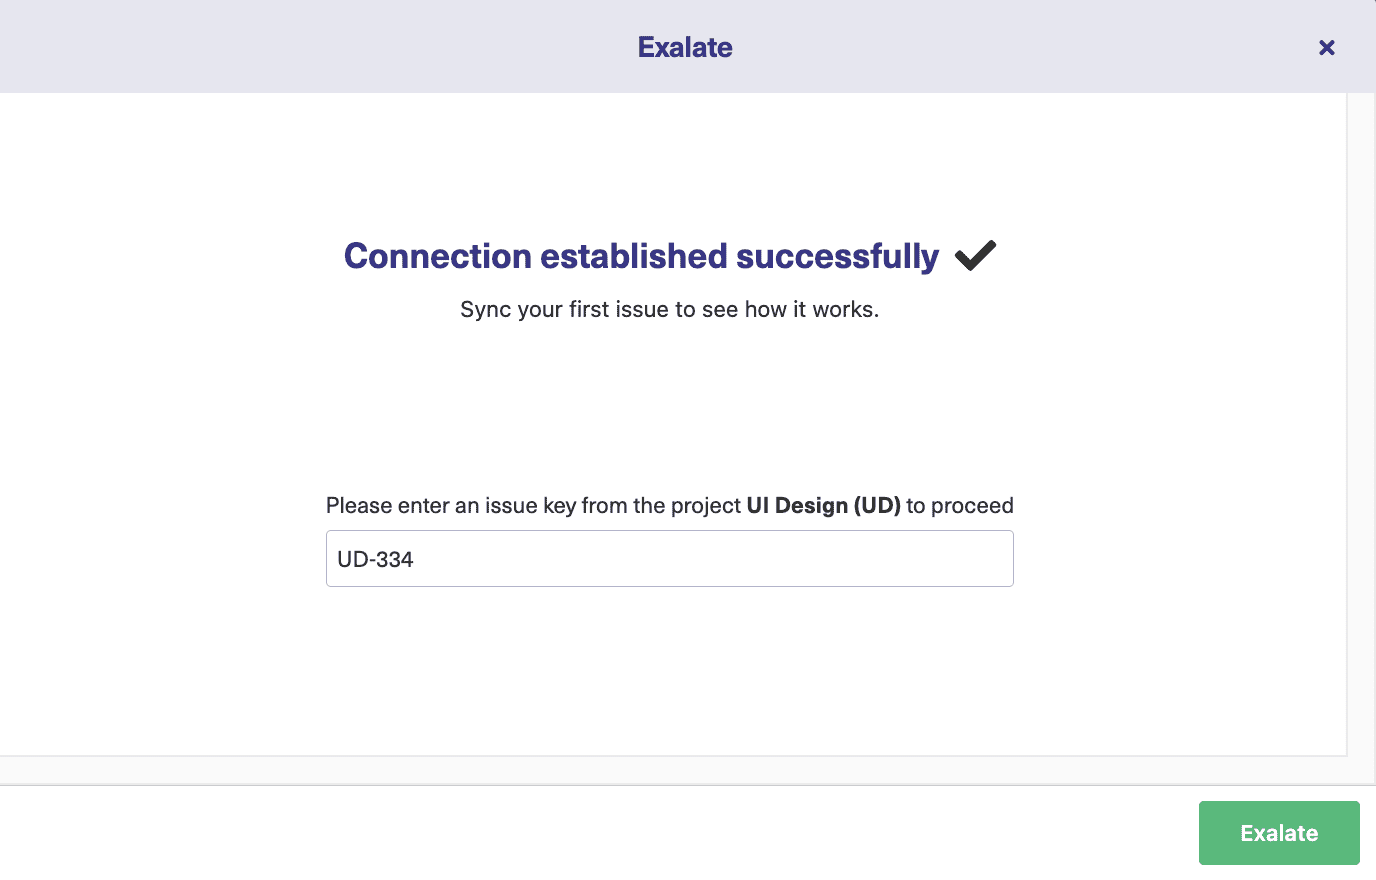
You can then, optionally, test the connection by entering an issue or a case key to sync.
You can create triggers, sync entities in bulk in the Basic mode.
Continue with the Script Mode
The first thing you do in Script mode is name your connection and add a description. Those are both helpful if you have multiple connections performing different functions.
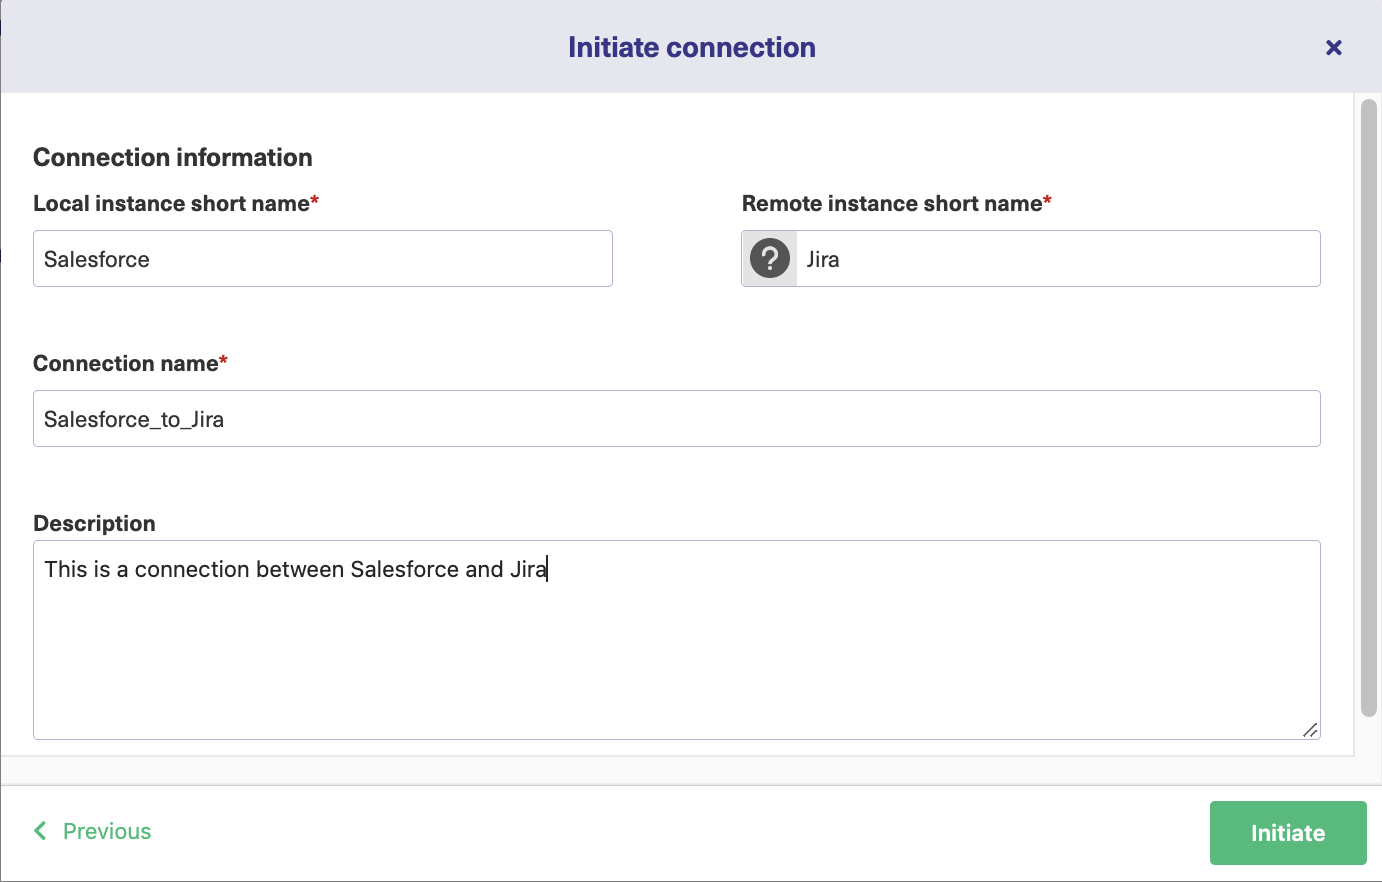
Click the “Initiate” button. Exalate creates an invitation for you, which you can copy to the clipboard by clicking the button. Switch over to your Jira instance.
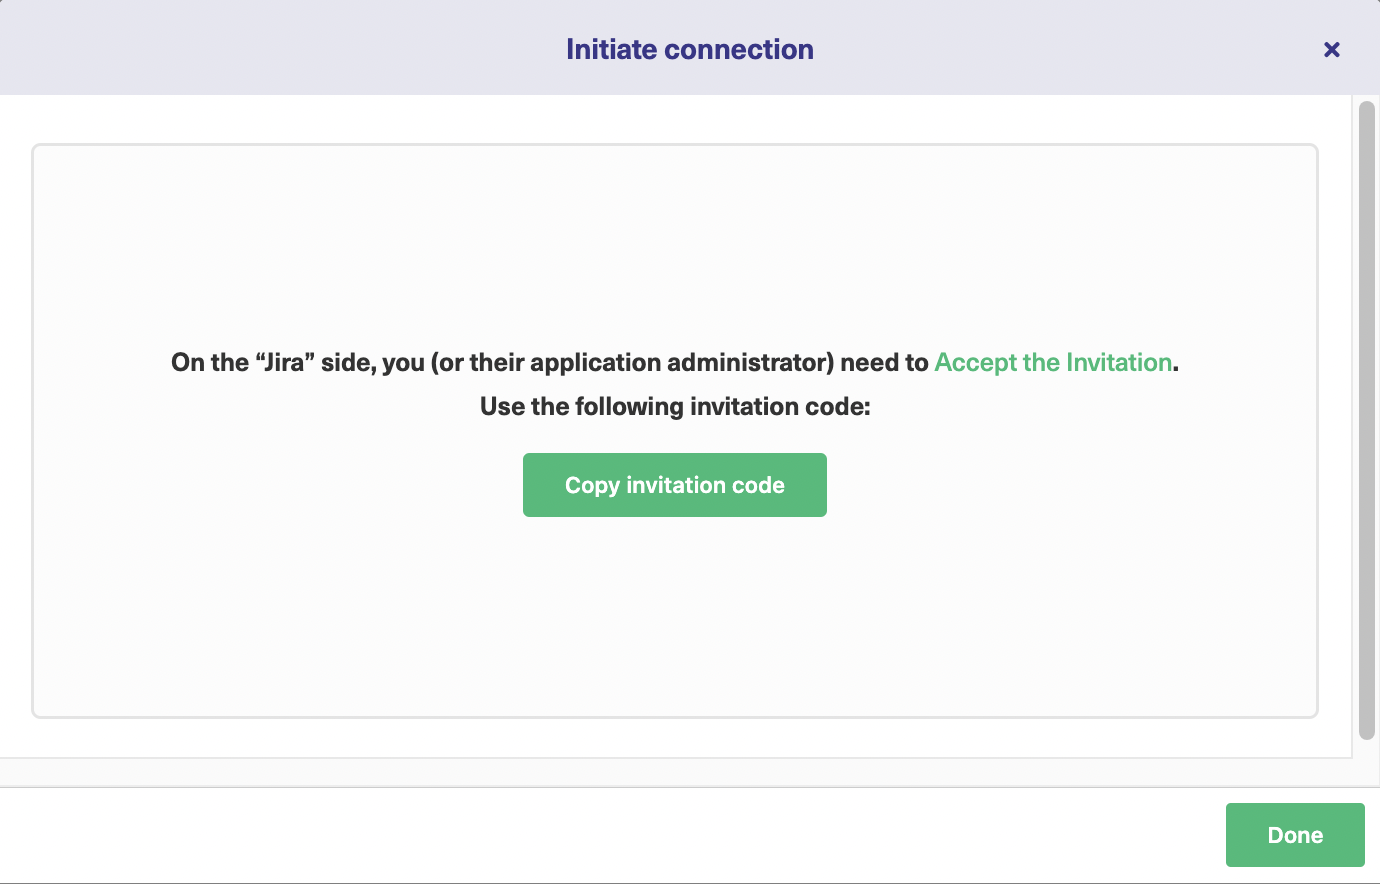
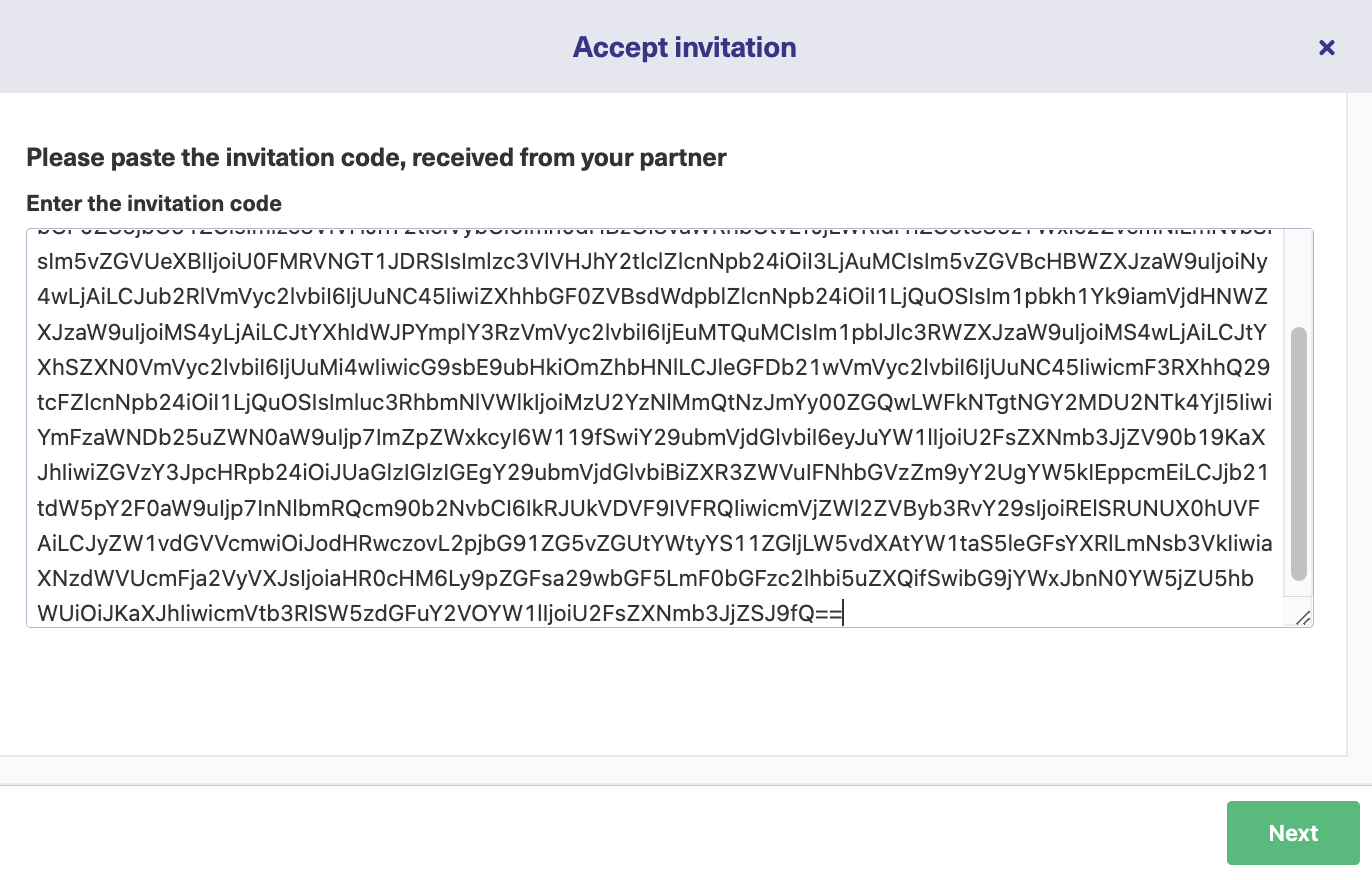
Navigate to Jira’s Exalate connections screen and click “Accept invitation.”
You’ll see a text field to paste in the invitation code you just copied to the clipboard. After that, click “Next” and configure your connection as in the basic mode.
Now your connection is ready.
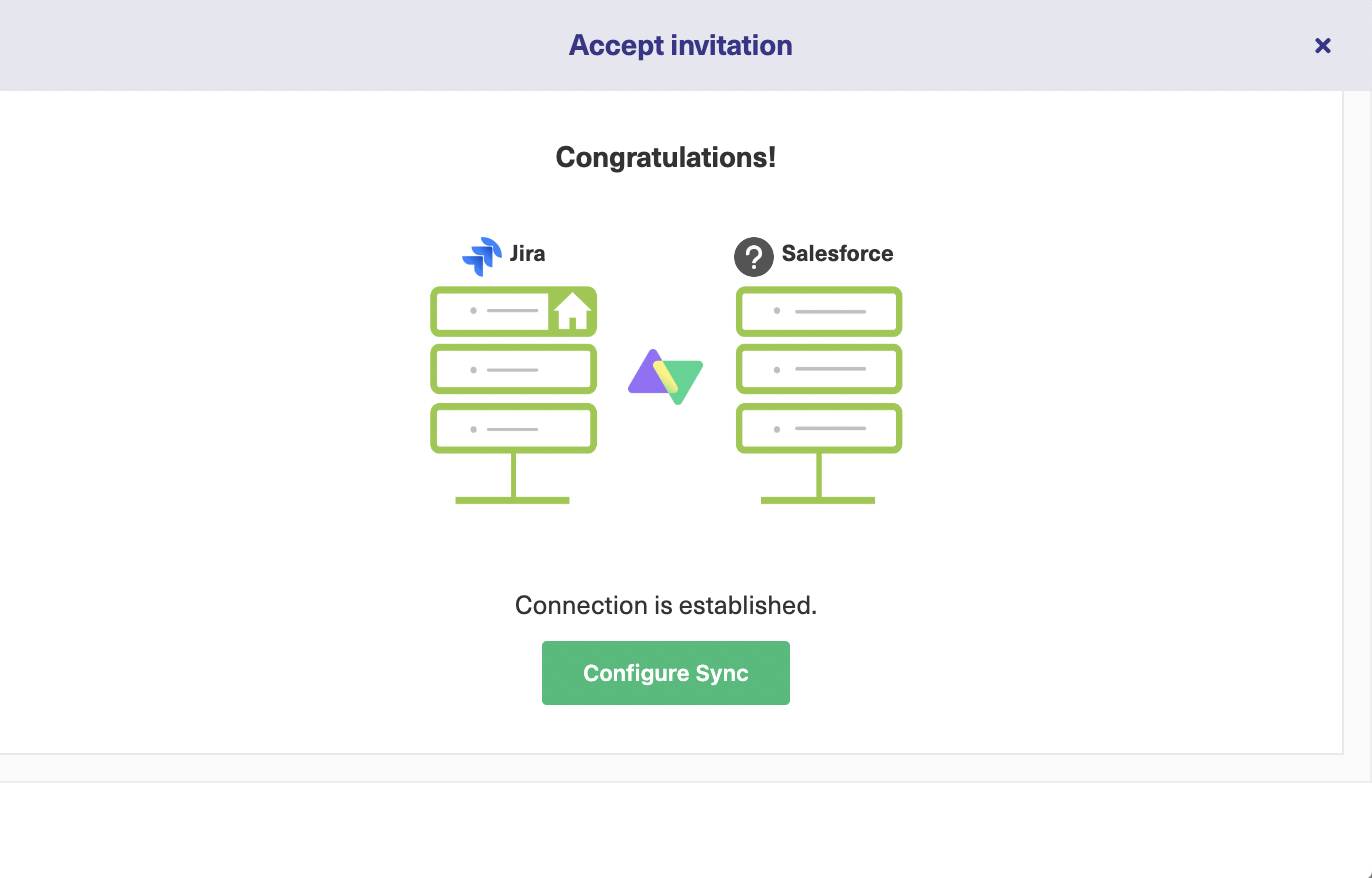
From here, there are some optional configuration steps. These are described below. You can return to these at any time by finding your connection on the connections screen and clicking the edit button.
Step 4: Configure the Connection
The edit connection screen has several tabs. For this step, click the “Rules” tab. These rules let us choose what gets shared, how fields map to one another, and create advanced conditions for filtering them.
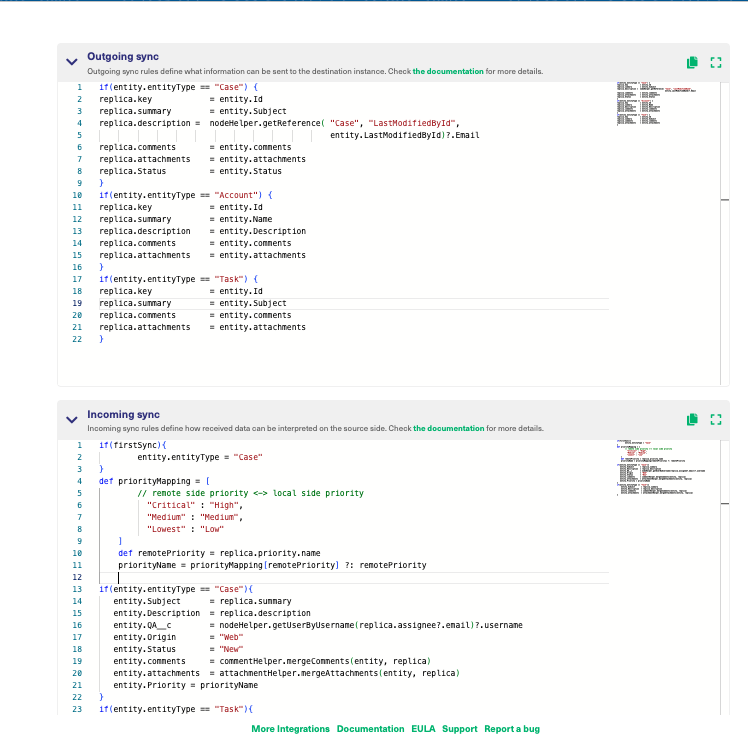
The outgoing sync controls how items in the platform we’re looking at are shared with the other platform.
The incoming sync refers to the incoming data from the other platform and defines how that data is mapped to items on the current system.
If you don’t want a field to be shared, delete it, or comment it out.
If you want to map fields to other fields, change the description accordingly. For example, perhaps you want the description field to contain the status of the incoming object.
In that case, you could change the incoming rule entity.Description = replica.description to read entity.Description = replica.status. Alternatively, you could add specific text, like entity.Description = “synced from Salesforce”.
You can also explore advanced ‘script helpers’ that can help you with complex processing.
If you’re used to coding, you can probably think of more advanced ways to control data. If not, have a go at making basic changes, and go from there.
Step 5: Set Up Triggers
Triggers control when items are synchronized.
Click the “Triggers” tab on the edit connection screen to work with them. You can create multiple triggers for each connection.
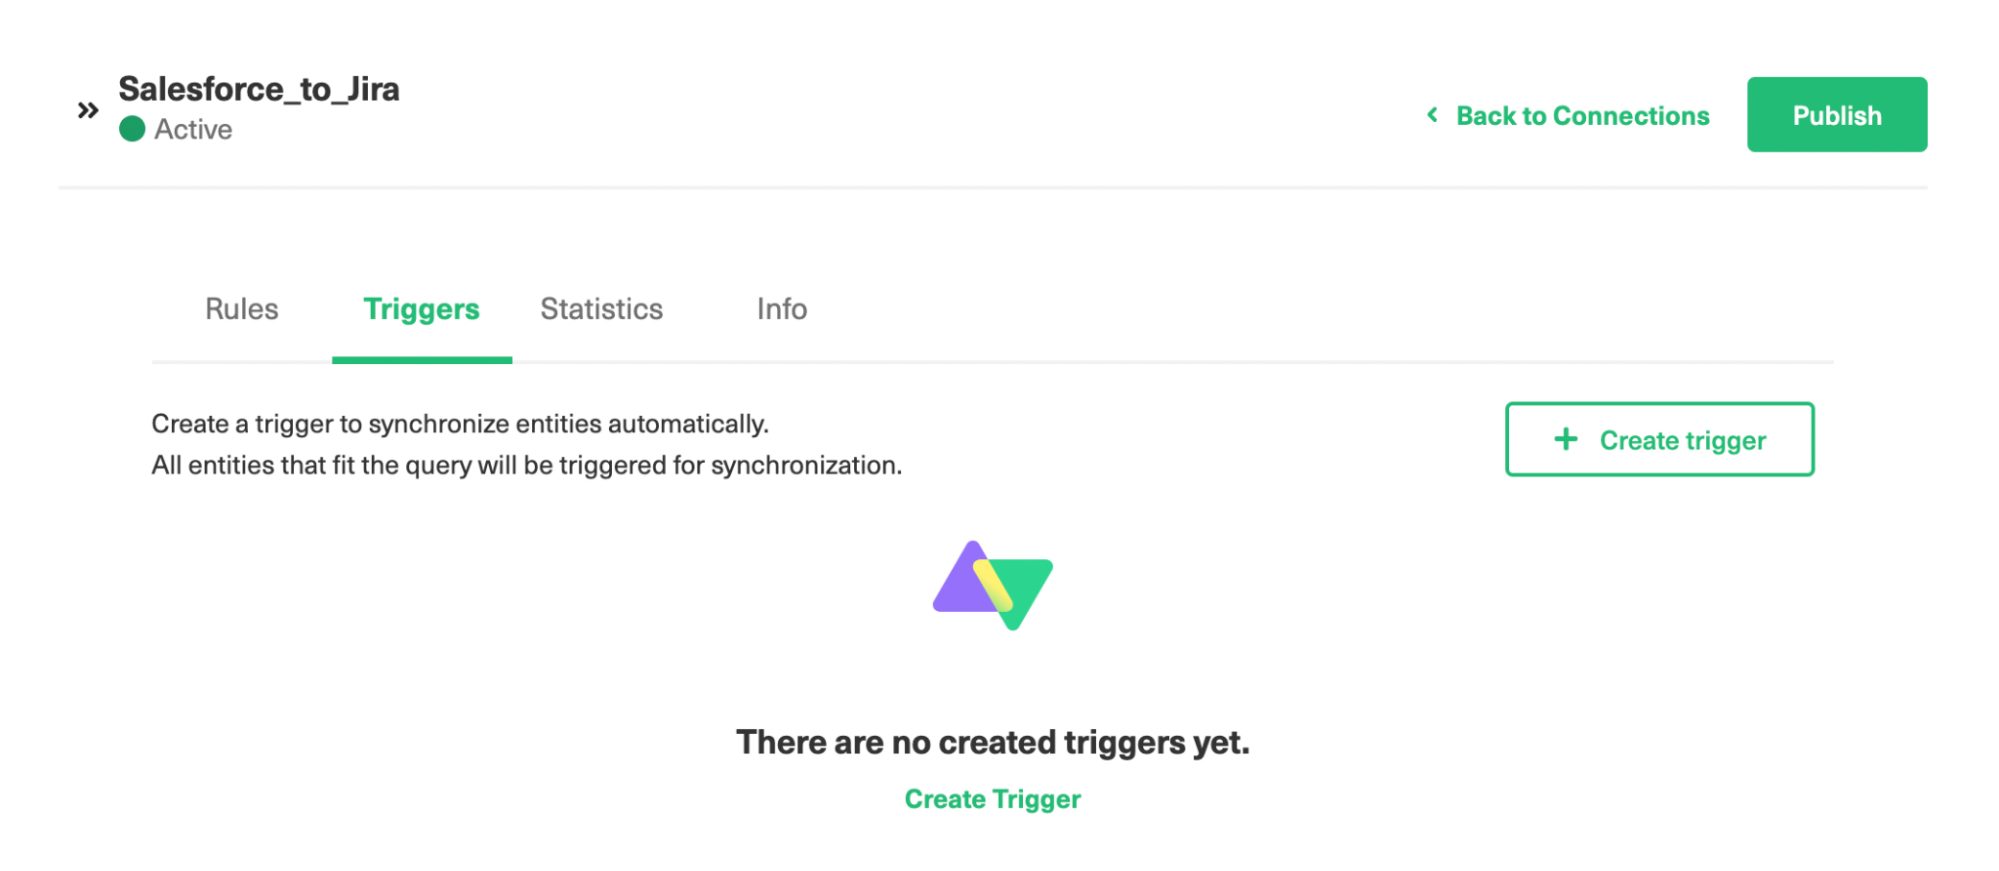
Click the “Create trigger” button to begin. On the next screen, you select the type of entity the trigger applies to. You can also choose whether to use a search query or not.

If not, you enter values into specific fields in order to find matching items. That’s the simple way to do things.
Search queries are more complicated. Here, each platform uses a different language. JQL (Jira Query Language) for Jira, and SOQL (Salesforce Object Query Language) for Salesforce.
You enter code into the “If*” field that is used to filter matching queries. You should be familiar with basic programming concepts to do this.
There’s also a notes section here to help explain your code to others (or yourself if you forget!)
Finally, there’s a checkbox to turn your trigger on and off. Click the green “Add” button when you’re done.
Note: Creating triggers is pretty straightforward and intuitive. You can always learn more about how to set triggers in Jira and Salesforce.
Step 6: Start Synchronizing Your Platforms
Now your platforms are connected and information will be synchronized automatically. Synchronization takes place regularly, but not instantly.
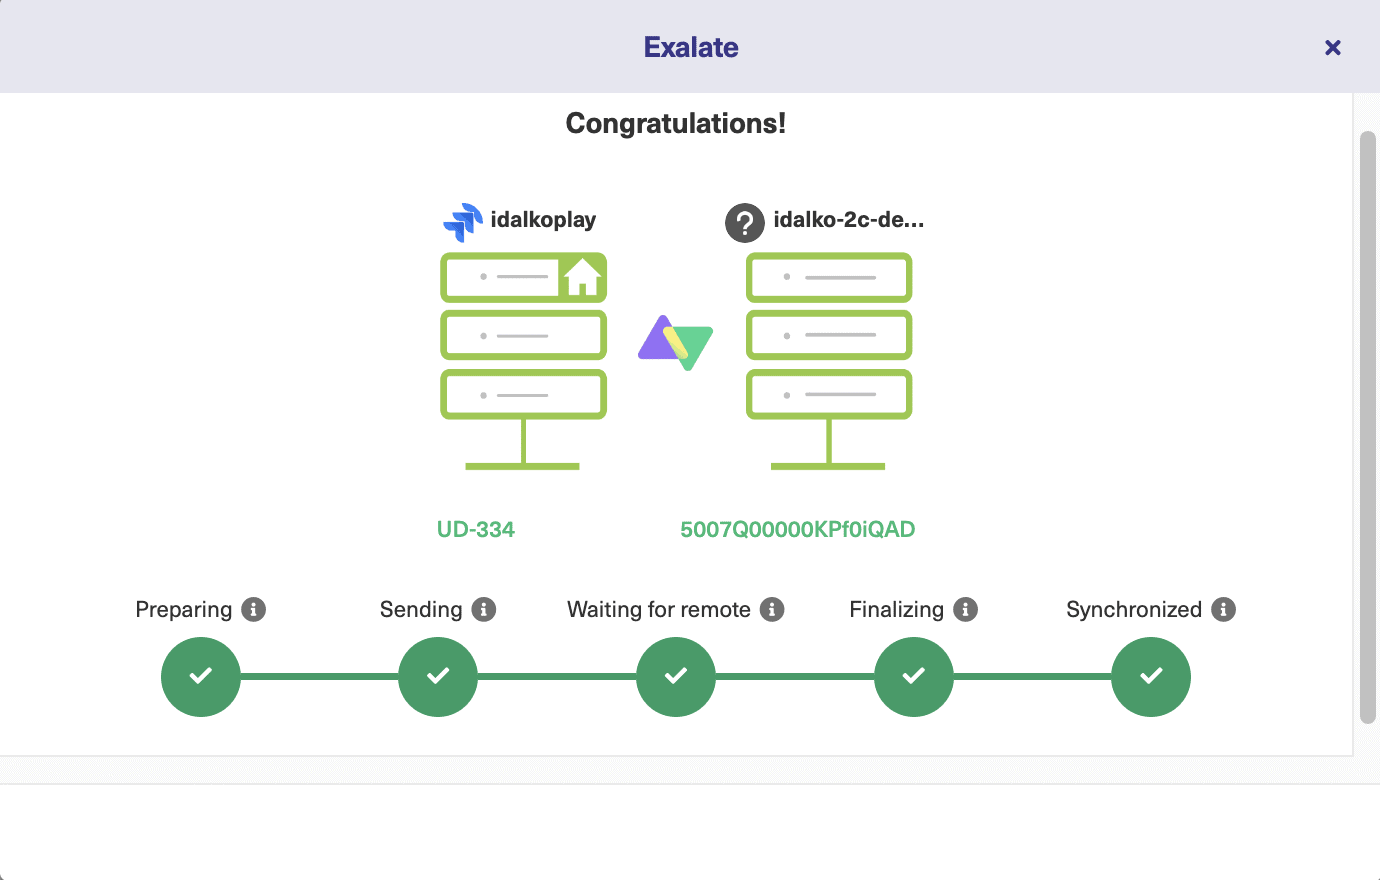
To test the synchronization, create a test issue that meets the criteria you set up in step 5, the triggers step. Wait a while, or trigger synchronization manually, and verify that the issue is shared, and shared correctly.
After that, you can start working with your regular data. It’s a good idea to monitor things closely at first to check everything works as expected. You can also tune your sync rules as you develop an understanding of the software and its more advanced features.
Advanced Salesforce Jira Integration Use Cases
We’ve seen how to implement a Jira Salesforce integration. It’s time to explore a few advanced use cases companies have implemented with Exalate.
Exalate’s Script mode offers numerous opportunities for implementing advanced scenarios.
- Synchronizing comment threads and user mentions in comments between Jira and Salesforce.
- Synchronizing any Salesforce entity.
- Updating a Salesforce account using a custom field in Jira.
- Synchronizing multiple interconnected Salesforce objects, such as contacts and accounts associated with a case, with Jira.
Conclusion
A Jira Salesforce integration can bring benefits to your individual teams and your company as a whole. Taking advantage of each other’s data gives you greater insights into what the business is doing and helps you act collaboratively to work towards the same goals.
By using Exalate, you can make your integration seamless, letting the software do the hard work for you. You can trust it to move and filter data using the rules you create. Both teams retain their autonomy and can change the connection at any time.
It’s the perfect way to improve information flow, and it isn’t hard to do. So what are you waiting for?
Frequently Asked Questions
Can I integrate Jira with Salesforce?
Yes, you can integrate Jira with Salesforce using native integrations like Mulesoft Anypoint or third-party solutions like Exalate. These tools allow you to sync data between mapped fields, sometimes using automated triggers.
Why integrate Jira and Salesforce?
Businesses integrate data between Jira and Salesforce in order to unify project-relevant data under a single source of truth. The development team using Jira can integrate data with the marketers working with Salesforce.
Is Jira owned by Salesforce?
No, Salesforce does not own Jira. They are different work management systems that serve different purposes. Atlassian owns and manages Jira, while Salesforce owns other products like Customer 360 and Heroku.
Can I use Exalate to sync data between Jira and Salesforce?
Yes, you can use Exalate to sync data between Jira and Salesforce. Exalate makes it possible for teams to internally or externally share comments, descriptions, account owners, and custom fields.
How can I customize my Jira to Salesforce connection?
You can customize your Jira to Salesforce connection using triggers and scripting engines. Exalate provides a scripting engine that allows users to write custom code for configuring their connections.
Recommended Reads:
- Jira to Jira Integration
- Salesforce to Salesforce Integration: Sync Multiple Salesforce Instances Bidirectionally
- Jira ServiceNow Integration: How to Set up an Integration in 6 Steps
- Jira Integrations: Integrate Jira and Other Systems Bidirectionally
- Salesforce Integrations: Integrate Salesforce and other Tools
- Jira Azure DevOps Integration
- How to Set up a Jira GitHub Integration
- Jira Zendesk Integration: The Complete Guide