Hello developers, welcome back to my blog today, I am sharing a highly interesting article “how to integrate the Razorpay payment gateway in the flutter app” in iOS/Android. This topic is highly needed by every app for payment received by our client(customer) paid service with the help of the mobile app. So I am briefly describing this article for Razorpay integration on your flutter app.

This topic covers –
- Which payment gateway is best for flutter?
- How do you integrate with Razorpay?
- How to integrate a payment gateway in flutter?
- Master Razorpay integration in flutter?
- Flutter app payment gateway integration?
- Topmost payment gateway In flutter?
- Integration – Razorpay with Order API?
- Create an order Id in the flutter app with integration in Razorpay.
Let’s Start intgration
Step No-1
Create a flutter app with help of the terminal you want to create an app with more help
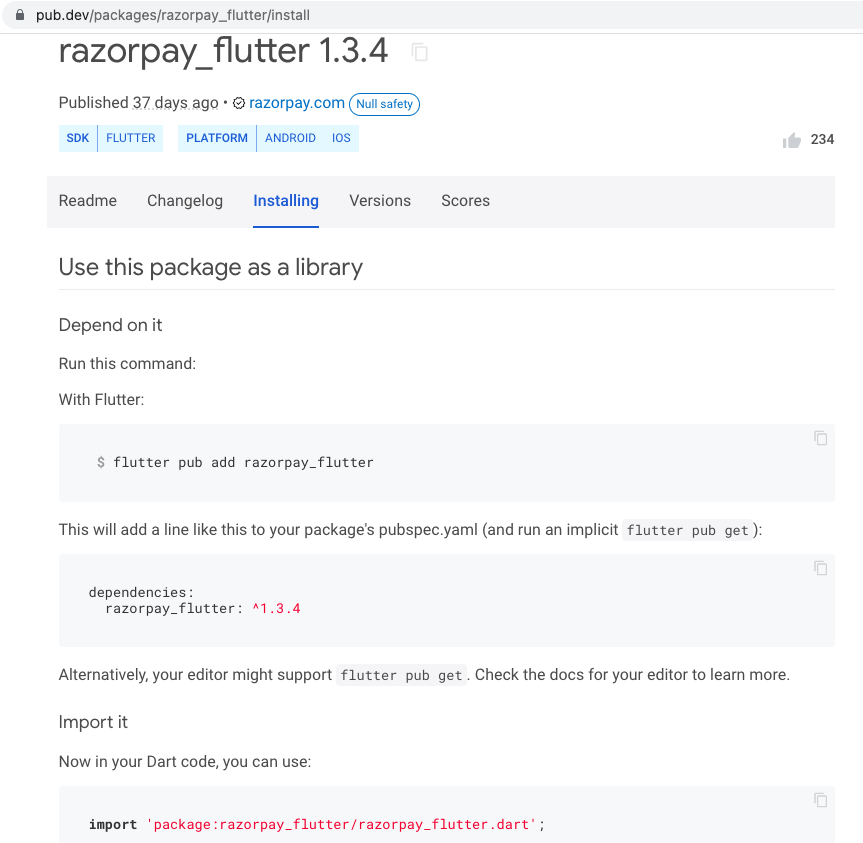
Install a pub library (pub. dev)
The help of the Razorpay pub library
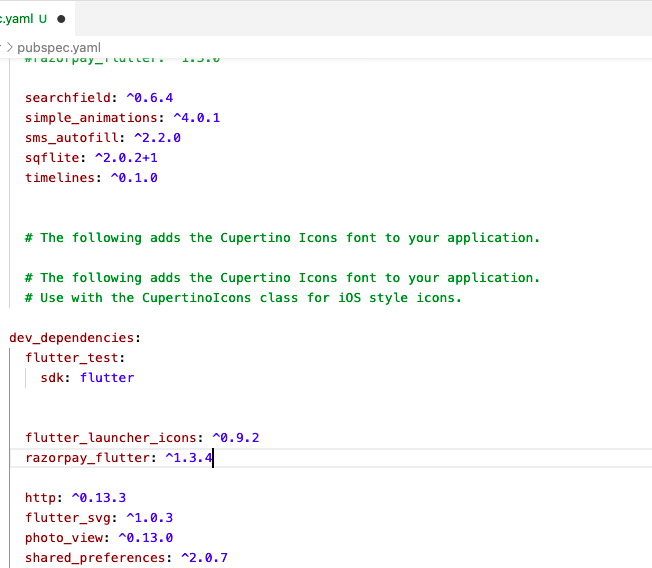
Add manually Razorpay Library
Step No -1

Step No -2
import 'package:razorpay_flutter/razorpay_flutter.dart';Step No -3
  String? urlGateway = 'https://api.razorpay.com/v1/orders';
  Razorpay razorpay = Razorpay();

  @override
  void initState() {
    super.initState();
    razorpay = Razorpay();
    razorpay.on(Razorpay.EVENT_PAYMENT_SUCCESS, _handlePaymentSuccess);
    razorpay.on(Razorpay.EVENT_PAYMENT_ERROR, _handlePaymentError);
    razorpay.on(Razorpay.EVENT_EXTERNAL_WALLET, _handleExternalWallet);
  }

  @override
  void dispose() {
    super.dispose();
    razorpay.clear();
  }

  void _handlePaymentSuccess(PaymentSuccessResponse response) {
    print('Success Response: $response');
    Fluttertoast.showToast(
        msg: "SUCCESS: " + response.paymentId!,
        toastLength: Toast.LENGTH_SHORT);
    setState(() {
      finalSavePaymentInDB(
          response.paymentId!, response.orderId!, response.signature!);
    });
  }

  void _handlePaymentError(PaymentFailureResponse response) {
    print('Error Response: $response');
    Fluttertoast.showToast(
        msg: "ERROR: " + response.code.toString() + " - " + response.message!,
        toastLength: Toast.LENGTH_SHORT);
  }

  void _handleExternalWallet(ExternalWalletResponse response) {
    print('External SDK Response: $response');
    /* Fluttertoast.showToast(
        msg: "EXTERNAL_WALLET: " + response.walletName!,
        toastLength: Toast.LENGTH_SHORT); */
  }
Step No -4 – create an order id for server-side
Map<String, dynamic> requestGenratePaymentIdBodyM() {
    final Map<String, dynamic> data1 = <String, dynamic>{};
    var now = DateTime.now();
    var formatter = DateFormat('ddMMyyyyhhmmss');
    String formattedDate = formatter.format(now);
    var myRecipte = formattedDate;

    data1['amount'] = widget.lblTotalFee.toString();
    data1['currency'] = "INR";
    data1['receipt'] = widget.policyId.toString() + '_' + myRecipte;
    return data1;
  }
Step No 5 – Create an order Id in the flutter app with integration in Razorpay
HTTP Method for API access in a flutter
  Future<void> requestGenratePaymentIdRazarPay() async {
    String url = urlGatway.toString();
    prg.show();
    await ApiClient.createOrderIdPaymentGetway(
            url, requestGenratePaymentIdBodyM())
        .then((orderIdInfo) {
      setState(() {
        orderIdArray = orderIdInfo;

        if (orderIdArray!.status == 'created') {
          setState(() {
            //-- api for send the  : payment_initiate API
            requestPaymentInitiate(
                orderIdArray!.id.toString(), orderIdArray!.receipt.toString());

            payment(
                1000,
                orderIdArray!.id.toString(),
                widget.assetName.toString(),
                widget.coverName.toString(),
                '',
                vEmail.toString());
          });

          prg.hide();
        } else {
          prg.hide();
          Fluttertoast.showToast(
              msg: orderIdArray!.status.toString(),
              toastLength: Toast.LENGTH_SHORT,
              gravity: ToastGravity.BOTTOM,
              timeInSecForIosWeb: 1,
              backgroundColor: Colors.red,
              textColor: Colors.white,
              fontSize: 16.0);
        }

        prg.hide();
      });
    });
  }
This is a major part of the basic authorization of your API header.
This API is used for the HTTP post method to send the basic authorization key to add for the Razorpay Integration part help of the postman for Razorpay.
Step No -6
static Future<OrderIdGenrateRespo> createOrderIdPaymentGetway(
      String url, Map bodyx) async {
    try {
      final response = await http.post(
        Uri.parse(url),
        headers: <String, String>{
          'Authorization':
              'Basic xxxxxxxxxxxxxxxx--x-x-x-x-x-x-x-x-x-x-x-x-XZCTxxx',
          'Accept': 'application/json',
        },
        body: bodyx,
      );

      if (200 == response.statusCode) {
        var jsonString = response.body;

        var jsonMap = json.decode(jsonString);
        var orderIdInfo = OrderIdGenrateRespo();
        orderIdInfo = OrderIdGenrateRespo.fromJson(jsonMap);

        return orderIdInfo;
      } else {
        return OrderIdGenrateRespo();
      }
    } catch (e) {
      //  print(e);

      return OrderIdGenrateRespo();
    }
  }
void payment(int amt, String orderId, String coverName, String policyName,
String mobile, String email) {
var options = {
'key': 'your Razorpay key',
'amount': amount,
'name': coverName,
'order_id': orderId, // Generate order_id using Orders API
'description': policyName,
//'timeout': 60, // in seconds
'send_sms_hash': true,
'retry': {'enabled': true, 'max_count': 1},
'prefill': {'contact': mobile, 'email': email}
};
try {
razorpay.open(options);
} catch (e) {
debugPrint('Error: e');
}
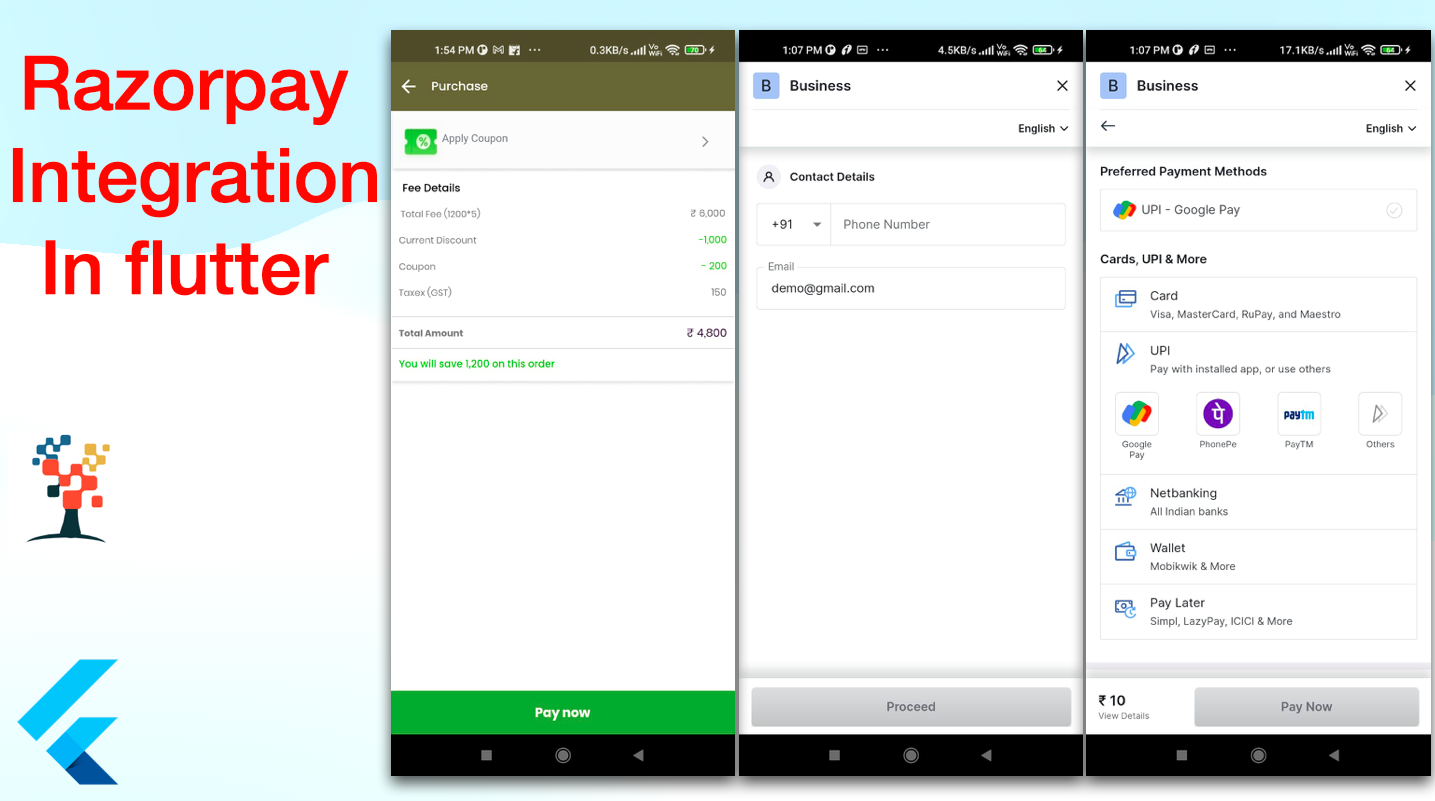
}You can use one of the test cards to make transactions in the Test Mode. Use any valid expiration date in the future and any random CVV to create a successful payment demo card in Razorpay.
Conclusion:
In this article, we discussed the most beneficial part of the How to Integrate Razorpay Payment Gateway In Flutter? , to make our development life easier In future parts, I will share some important code of How to Integrate Razorpay Payment Gateway In Flutter? to make your Flutter Development journey a bit faster and many tips related to Flutter and Dart.
I hope it was a useful article, please share and subscribe to my channel, You have enjoyed the most. Thanks for reading and if you have any questions or comments, See you soon.