
How do you make cabochon jewelry?
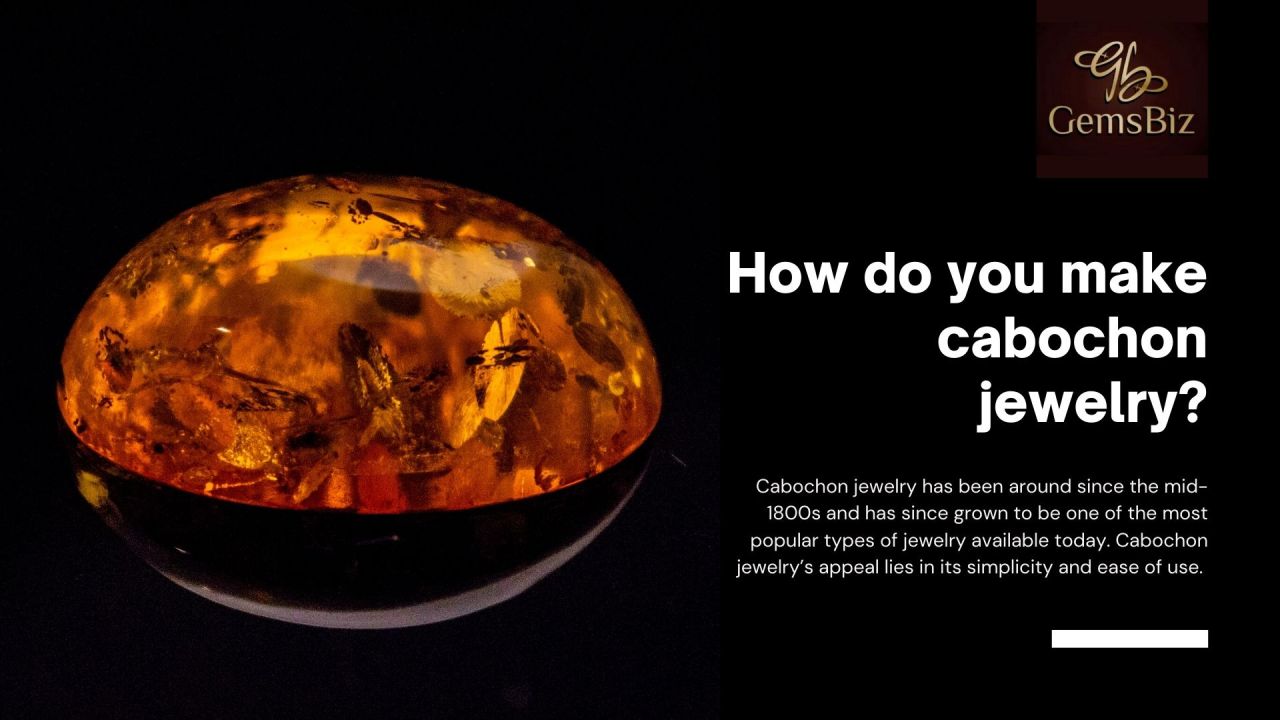
Cabochon jewelry has been around since the mid-1800s and has since grown to be one of the most popular types of jewelry available today. Cabochon jewelry’s appeal lies in its simplicity and ease of use. If you’re interested in learning how to make cabochon jewelry, keep reading to learn all about the process from start to finish!
Step 1: Gather all your materials
To make your jewelry with bulk cabochons, start by gathering all your materials: two sheets of glass or mirror (one for backing, one for polishing), a cup to place on top of your finished stone to hold it in place, round-headed pliers, straight-edged pliers (or vice grips), and your stone. You’ll also need paper towels and some sort of abrasive compound like cerium oxide or corundum.
Step 2: Glue the mat onto the stone
When cutting, the stone is placed on a thin piece of cardboard called a mat. You will place glue onto the mat using an eyedropper, taking care to avoid getting any glue on the face of the stone. Place the stone onto the mat with either sharp-tipped pointed tweezers or by gently touching it with your fingers. Once in place, hold both sides of the mat firmly for about 30 seconds until dry.
Step 3: Cut out your stone shape
Use a dremel to cut out your stone shape and clean it up by hand. For cut, set your cutting bit’s depth at 1/8 of an inch, then run it around your stone shape’s edges to score it. Then flip over and run your dremel at high speed along all four sides of your scored line to remove material in one fell swoop. Take care not to cut too deep; if you go too far into your stone, any remaining material can be dangerous.
Step 4: File down your shape
When it’s time to make your rough rock into a jewel, take your shape out of its mold and place it on a flat surface. File down any uneven edges with medium-grit sandpaper, making sure to only take off small amounts at a time so that your stone remains relatively even in size. The smoother your piece is now, the better it will look when polished later.
An oval stone should be shaped like an egg or a teardrop: oval shapes are one of those shapes that can either be simple or tricky to get right depending on how skilled you are with tools like files and buffers.
Step 5: Polish
Polish your pendant with a polishing cloth to give it a nice shine and keep it from turning dull. To prevent scratches, only rub in one direction. If you’re going for an antique look, then skip polish altogether. If you want a shinier finish on your piece, however, feel free to use regular polish—just be sure not to get any on top of your cabochon or inside of its setting. Also remember that different types of stones require different types of polish; there are special stone polishes available for use with each type. For example, citrine requires a specific kind of polish because it is especially sensitive to chemicals.
Step 6: Make earrings!
To finish off your earrings, string a chain of beads (optional) through one of your loops and tie a knot on both sides. Then attach your charm to one side of your earring using an eye pin and clasp. If you have earring hooks, simply attach those to both sides. Make sure they’re not too loose, though—they shouldn’t fall out when you put them on!
Conclusion
Keep a well-stocked studio and have fun! I hope that you’ll take what I’ve shared here today to heart, and maybe even consider adding some of these techniques to your own repertoire. Now, it’s time for me to sign off and get back to work—I have a lidded casserole dish full of marbles waiting for me! Good luck and happy beading.


 gemsbiz