
The technology world changes daily and the demands for computer vision, artificial intelligence, and machine learning are increasing. The technology that allows computers and mobile phones to see their surroundings is called computer vision. Work on re-creating a human eye started in the 50s. Since then, computer vision technology has come a long way. Computer vision has already made its way to our mobile phones via different applications. This article will introduce OpenCV on Fedora Linux.
What is OpenCV?
OpenCV (Open Source Computer Vision Library) is an open-source computer vision and machine learning software library. OpenCV was built to provide a common infrastructure for computer vision applications and to accelerate the use of machine perception in the commercial products. It has more than 2500 optimized algorithms, which includes a comprehensive set of both classic and state-of-the-art computer vision and machine learning algorithms. These algorithms can be used to detect and recognize faces, identify objects, classify human actions in videos and establish markers to overlay it with augmented reality and much more.
opencv.org – about
Install OpenCV on Fedora Linux
To get started with OpenCV, install it from the Fedora Linux repositories.
$ sudo dnf install opencv opencv-contrib opencv-doc python3-opencv python3-matplotlib python3-numpy
Note: On Fedora Silverblue or CoreOs, Python 3.9 is part of the core commit. Layer OpenCV and required tools with: rpm-ostree install opencv opencv-doc python3-opencv python3-matplotlib python3-numpy.
Next, enter the following commands in a terminal to verify that OpenCV is installed (user input shown in bold).
$ python
Python 3.9.6 (default, Jul 16 2021, 00:00:00)
[GCC 11.1.1 20210531 (Red Hat 11.1.1-3)] on linux
Type "help", "copyright", "credits" or "license" for more information.
>>> import cv2 as cv
>>> print( cv.__version__ )
4.5.2
>>> exit()
The current OpenCV version should be displayed when you enter the print command as shown above. This indicates that OpenCV and the Python-OpenCV libraries have been installed successfully.
Additionally, if you want to take notes and write code with Jupyter Notebook and learn more about data science tools, check out the earlier Fedora Magazine article: Jupyter and Data Science in Fedora.
Get started with OpenCV
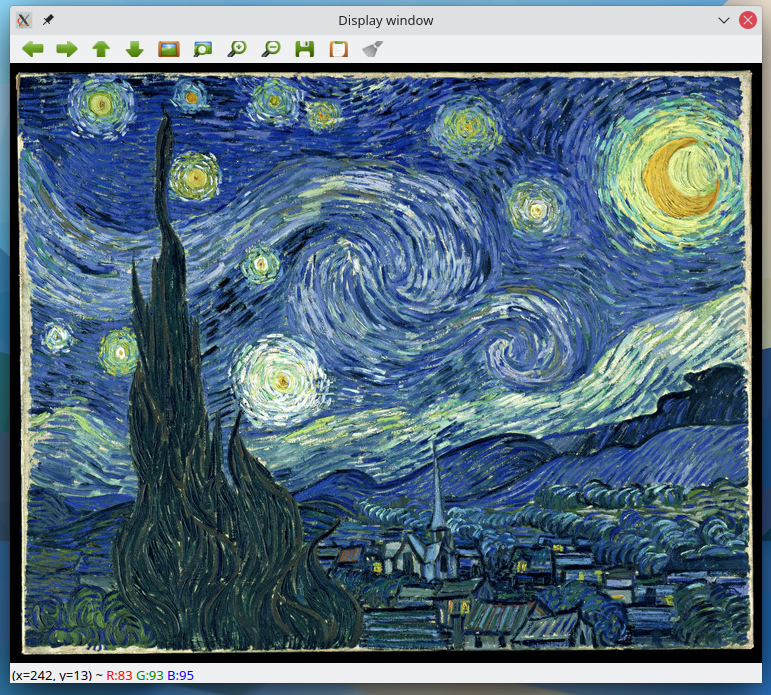
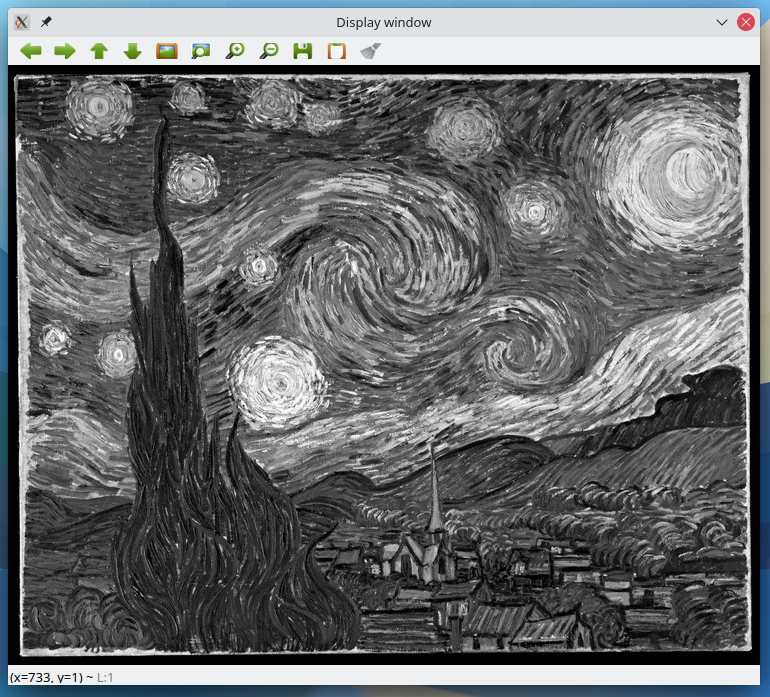
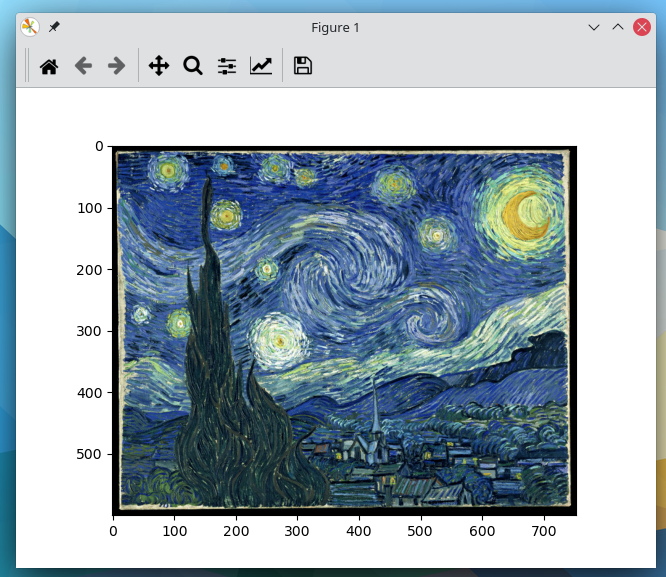
After installation is complete, load a sample image using Python and the OpenCV libraries (press the S key to save a copy of the image in png format and finish the program):
Contents of starry_night.py:
import cv2 as cv
import sys
img = cv.imread(cv.samples.findFile("starry_night.jpg"))
if img is None:
    sys.exit("Could not read the image.")
cv.imshow("Display window", img)
k = cv.waitKey(0)
if k == ord("s"):
    cv.imwrite("starry_night.png", img)
$ python starry_night.py
Gray-scale the image by adding the parameter 0 to the cv.imread function as shown below.
img = cv.imread(cv.samples.findFile("starry_night.jpg"),0)
These are some alternative values that can be used for the second parameter of the cv.imread function.
- cv2.IMREAD_GRAYSCALE or 0: Load the image in grayscale mode.
- cv2.IMREAD_COLOR or 1: Load the image in color mode. Any transparency in the image will be removed. This is the default.
- cv2.IMREAD_UNCHANGED or -1: Load the image unaltered; including alpha channel.
Display image attributes using OpenCV
Image attributes include the number of rows, columns, and channels; the type of image data; the number of pixels; etc. Suppose you wanted to access the image’s shape and its datatype. This is how you would do it:
import cv2 as cv

img = cv.imread(cv.samples.findFile("starry_night.jpg"))
print("Image size is", img.shape)
print("Data type of image is", img.dtype)
Image size is (600, 752, 3)
Data type of image is uint8
print(f"Image 2D numpy array \n {img}")
Image 2D numpy array
 [[[0 0 0]
  [0 0 0]
  [0 0 0]
  ...
  [0 0 0]
  [0 0 0]
  [0 0 0]]

 [[0 0 0]
  [0 0 0]
  [0 0 0]
  ...
- img.shape: return a tuple of the number of rows, columns, and channels (if it is a color image)
- img.dtype: return the datatype of the image
Next display image with Matplotlib:
import cv2 as cv
import matplotlib.pyplot as plt
img = cv.imread(cv.samples.findFile("starry_night.jpg"),0)
plt.imshow(img)
plt.show()
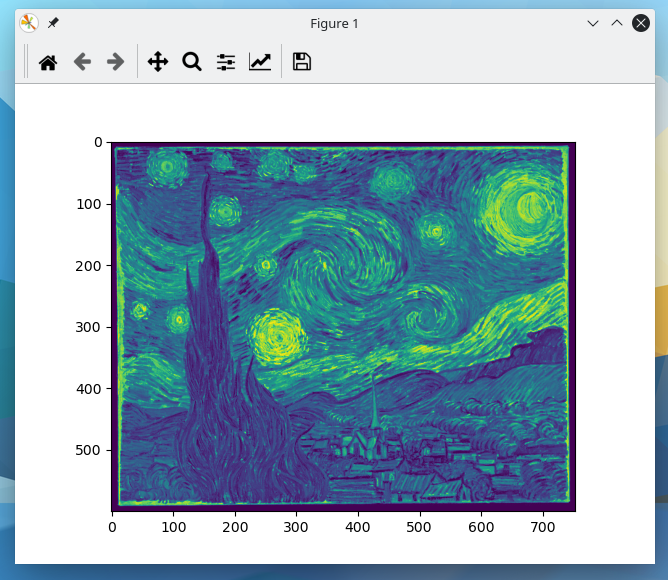
What happened?
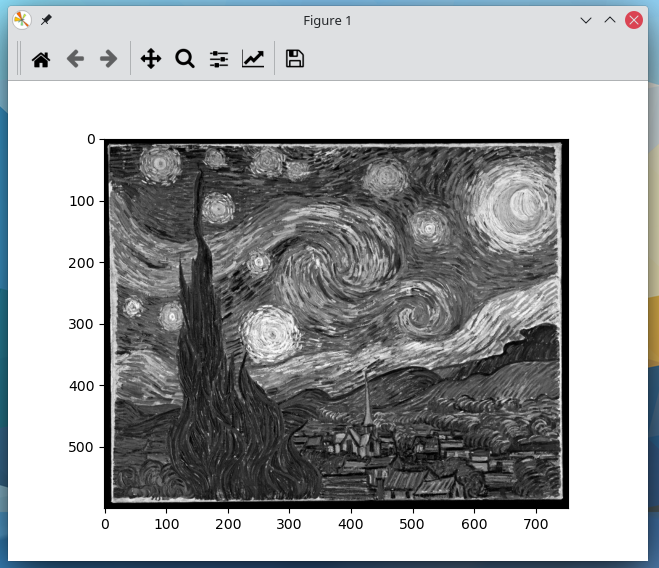
The image was read in as a gray-scale image, however it won’t necessarily display in gray-scale when using Matplotlib’s imshow fucntion. This is because the imshow function uses a different color map by default. To specify that a gray-scale color map should be used, set the second parameter of the imshow function to cmap=’gray’ as shown below.
plt.imshow(img,cmap='gray')
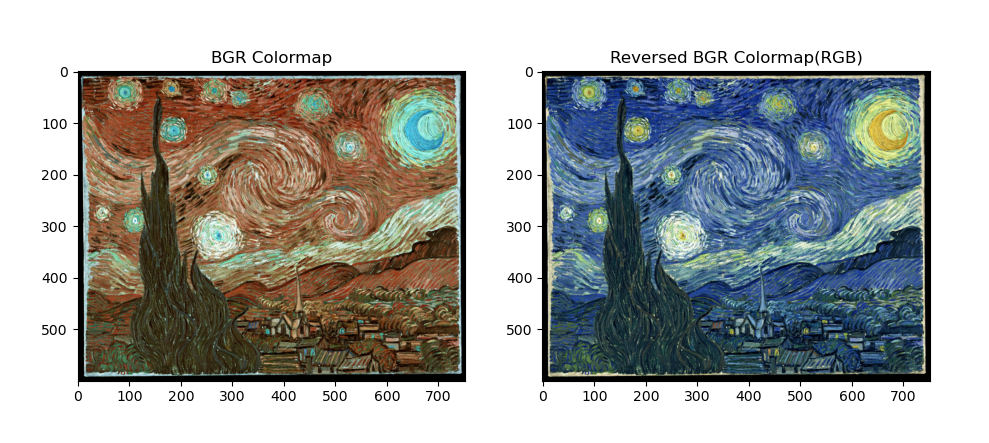
This problem is also going to happen when opening a picture in color mode because Matplotlib expects the image in RGB (red, green, blue) format whereas OpenCV stores images in BGR (blue, green, red) format. For correct display, you need to reverse the channels of the BGR image.
import cv2 as cv
import matplotlib.pyplot as plt
img = cv.imread(cv.samples.findFile("starry_night.jpg"),cv.IMREAD_COLOR)
fig, (ax1, ax2) = plt.subplots(1,2)
ax1.imshow(img)
ax1.set_title('BGR Colormap')
ax2.imshow(img[:,:,::-1])
ax2.set_title('Reversed BGR Colormap(RGB)')
plt.show()
Splitting and merging color channels
import cv2 as cv
import matplotlib.pyplot as plt

img = cv.imread(cv.samples.findFile("starry_night.jpg"),cv.IMREAD_COLOR)
b,g,r = cv.split(img)

fig,ax = plt.subplots(2,2)

ax[0,0].imshow(r,cmap='gray')
ax[0,0].set_title("Red Channel");
ax[0,1].imshow(g,cmap='gray')
ax[0,1].set_title("Green Channel");
ax[1,0].imshow(b,cmap='gray')
ax[1,0].set_title("Blue Channel");

# Merge the individual channels into a BGR image
imgMerged = cv.merge((b,g,r))
# Show the merged output
ax[1,1].imshow(imgMerged[:,:,::-1])
ax[1,1].set_title("Merged Output");
plt.show()
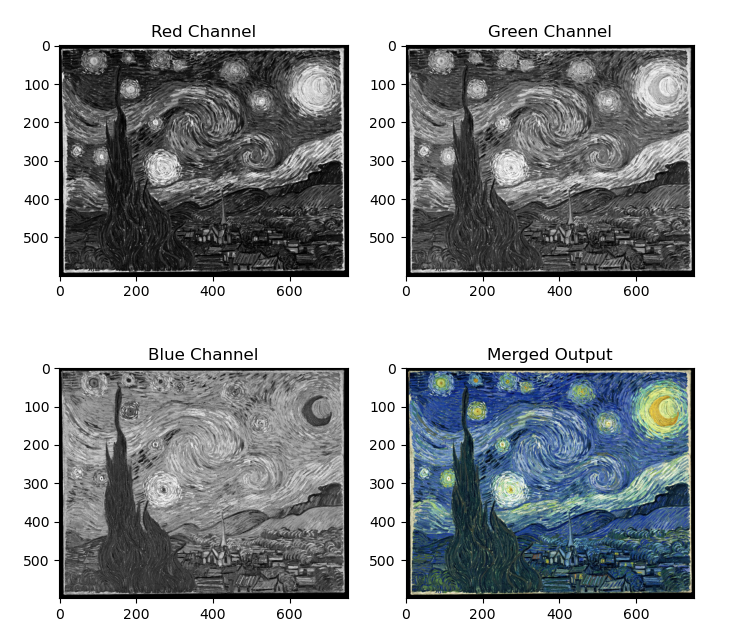
- cv2.split: Divide a multi-channel array into several single-channel arrays.
- cv2.merge: Merge several arrays to make a single multi-channel array. All the input matrices must have the same size.
Note: Images with more white have a higher density of color. Contrarily, images with more black have a lower density of color. In the above example the red color has the lowest density.
Converting to different color spaces
The cv2.cvtColor function converts an input image from one color space to another. When transforming between the RGB and BGR color spaces, the order of the channels should be specified explicitly (RGB2BGR or BGR2RGB). Note that the default color format in OpenCV is often referred to as RGB but it is actually BGR (the bytes are reversed). So the first byte in a standard (24-bit) color image will be an 8-bit blue component, the second byte will be green, and the third byte will be red. The fourth, fifth, and sixth bytes would then be the second pixel (blue, then green, then red), and so on.
import cv2 as cv
import matplotlib.pyplot as plt
img = cv.imread(cv.samples.findFile("starry_night.jpg"),cv.IMREAD_COLOR)
img_rgb = cv.cvtColor(img, cv.COLOR_BGR2RGB)
plt.imshow(img_rgb)
plt.show()
Further information
More details on OpenCV are available in the online documentation.
Thank you.

Samyak Jain
This is so perfectly written. It will surely help me in getting things done with OpenCV.
Waiting for part 2! 😀
Awesome work :O
Onuralp SEZER
Thank you so much ! 🙂
y0umu
I have always been struggling that should I build OpenCV myself, or just accept the precompiled binaries. By building it myself it is possible to have some advantages of fully exploiting CPU features, or use CUDA, or parallel traincascade (that module won’t work in multi-thread mode using precompiled binaries in most cases). On the other hand building requires too much caution between different OpenCV versions. Using precompiled binaries just help me learn the new features in new versions instantly.
Onuralp SEZER
Our spec file already has “bcond” options such as “cuda” or “ffmpeg” etc. If you check spec file and rebuild rpm again, it will be easier to have functionality you like to have it. Also I agree since Fedora repository updates frequently it is easy to have latest version by doing “dnf update” and we have it.
Chris
Thanks so much for sharing this astonishing guideline. Everything was working flawlessly and made starting with CV really easy.
Waiting for part 2.
Onuralp SEZER
I’m glad It helps you a lot as well thank you 🙂
Peter Braet
Did I miss something here?
Please explain.
Onuralp SEZER
You forget the create “starry_night.py” and for that reason, I changed the page a little bit for avoid confusion so first please create file and write the content into it. It will work. You can see the “Contents of starry_night.py:” title and please check it out.
ossama
Nice intro. will sure encourage me to get back to openCV.
Karatek
Really nice article. Now I have another thing I really want to play around with when I have time for it 😂
Kader Miyanyedi
Awesome work. Thank you.
Kader Miyanyedi
Thank you for this article. This is perfect.