Modern Weaving Workshop - the online guide
Hi there, modern weaver!
Welcome to the online guide of the Modern Weaving basics. I hope you have fun learning and exploring the art of weaving!

In this guide, you'll find the following video tutorials with written key steps to help you get started.
- Ready your yarns!
- Warping and preparations
- The Plain Weave
- The Rya Knots
- The Soumak
- Off the Loom
- Cleaning the ends
- Hanging on the dowel
Good luck, and I hope you can share your finished piece with me or tag me on Instagram/Facebook to help spread the joy of weaving to more people. Enjoy!
-------
READY YOUR YARNS
Save yourself the hassle and be guided on how to properly use your fiber packs to turn them into yarn skeins, ready for weaving. Here's a quick tutorial for it:
WARPING & PREPARATIONS
The yarn threads wrapped vertically on the loom is collectively called the warp. It serves as the base of your weaving and tells the size of your finished project, at least width-wise.
KEY STEPS
- Tie the end of your yarn on the first nail at the bottom left of your loom. You can use a slip knot to have a more secured first knot.
- Pull the longer end of your yarn and bring it to the opposite nail at the upper left of your loom and wrap it around.
- Bring your yarn down to the opposite nail at the bottom left of your loom and wrap it around.
- You will continue with this motion top-to-bottom, left-to-right, until you reach the last nail or your preferred project size.
- IMPT: Watch out for the tension. Find the right balance that the threads are not too loose or too tight. Try to run your fingers on them.
- Cut the yarn from the ball and tie it on your last nail to finish warping.
BEST YARN TO USE FOR WARPING
The kit comes with the Monaco Mercerized Cotton and I've been using this for years with a lot of my project because of how versatile it is. However, you can use any yarn as warp and feel free to explore your options! It's important to use a warp thread that's sturdy and can accept all the textures you're weaving without breaking.
WARP TENSION
I learned that there are weavers who prefer tight tension for warping, but I believe it's important to start with a tension that has the right balance of tension. Tight warp will give you a hard time weaving thick threads while loose warp will be difficult to maintain because the threads are most likely going to slack and will give you a curvy fabric. I suggest exploring your preferred warp as well and see which works best!
WARP'S DONE, WHAT'S NEXT?
For beginners, I suggest adding a cardboard or ruler at the bottom of the loom, and a stick that goes through the same space as the cardboard or ruler. They act as separator of the upper and lower threads so weaving will be easier, especially when doing the plain weave. When you get used to the rhythm of weaving, you won't need them eventually.
Another thing is to cut your weaving yarn! We don't weave with the yarn coming from the ball. To practice estimation for yarns, you may use your arm or elbow as length reference. Watch the tutorial below:
THE PLAIN WEAVE
The Plain or Tabby Weave is done by passing over one thread and passing under the next thread. It is the most versatile technique for me and it helps correct the tension of your fabric.
KEY STEPS
- First row: when you're coming from the left side, use the space opened by the stick to pass through to the other side. Pull your threads to the right side and watch out for the side to keep it straight.
- Second row: now that you're coming from the right side, weave manually by passing the opposite row from your first.
- When you finish all your yarn, weave until you have at least 2-3cm of yarn tail to leave underneath.
IMPT: We need to lock our yarn before we start weaving. This will allow us to leave a tail underneath the loom every time we add a new yarn to weave. Your first row should be how you will lock your yarn. Watch how I start by weaving the opposite space from how the stick/ruler were inserted.
THE TENSION MOUNTAIN
I am a fan of the tension mountains and I think they should not be skipped! It helps you keep your sides straight and distribute the yarn well as you add your every row. As seen in the tutorial above, you can add the tension mountain by creating an arc or mountain as you pull the thread to the other side.
JOINING THE YARN
When you run out of your yarn, here's how you can continue especially when you ended mid-way.
- Identify the row where your last yarn was inserted.
- With your new yarn, pass through the same row.
- Leave a tail right next to the space from where you left your last yarn.
- Continue weaving with your new yarn!
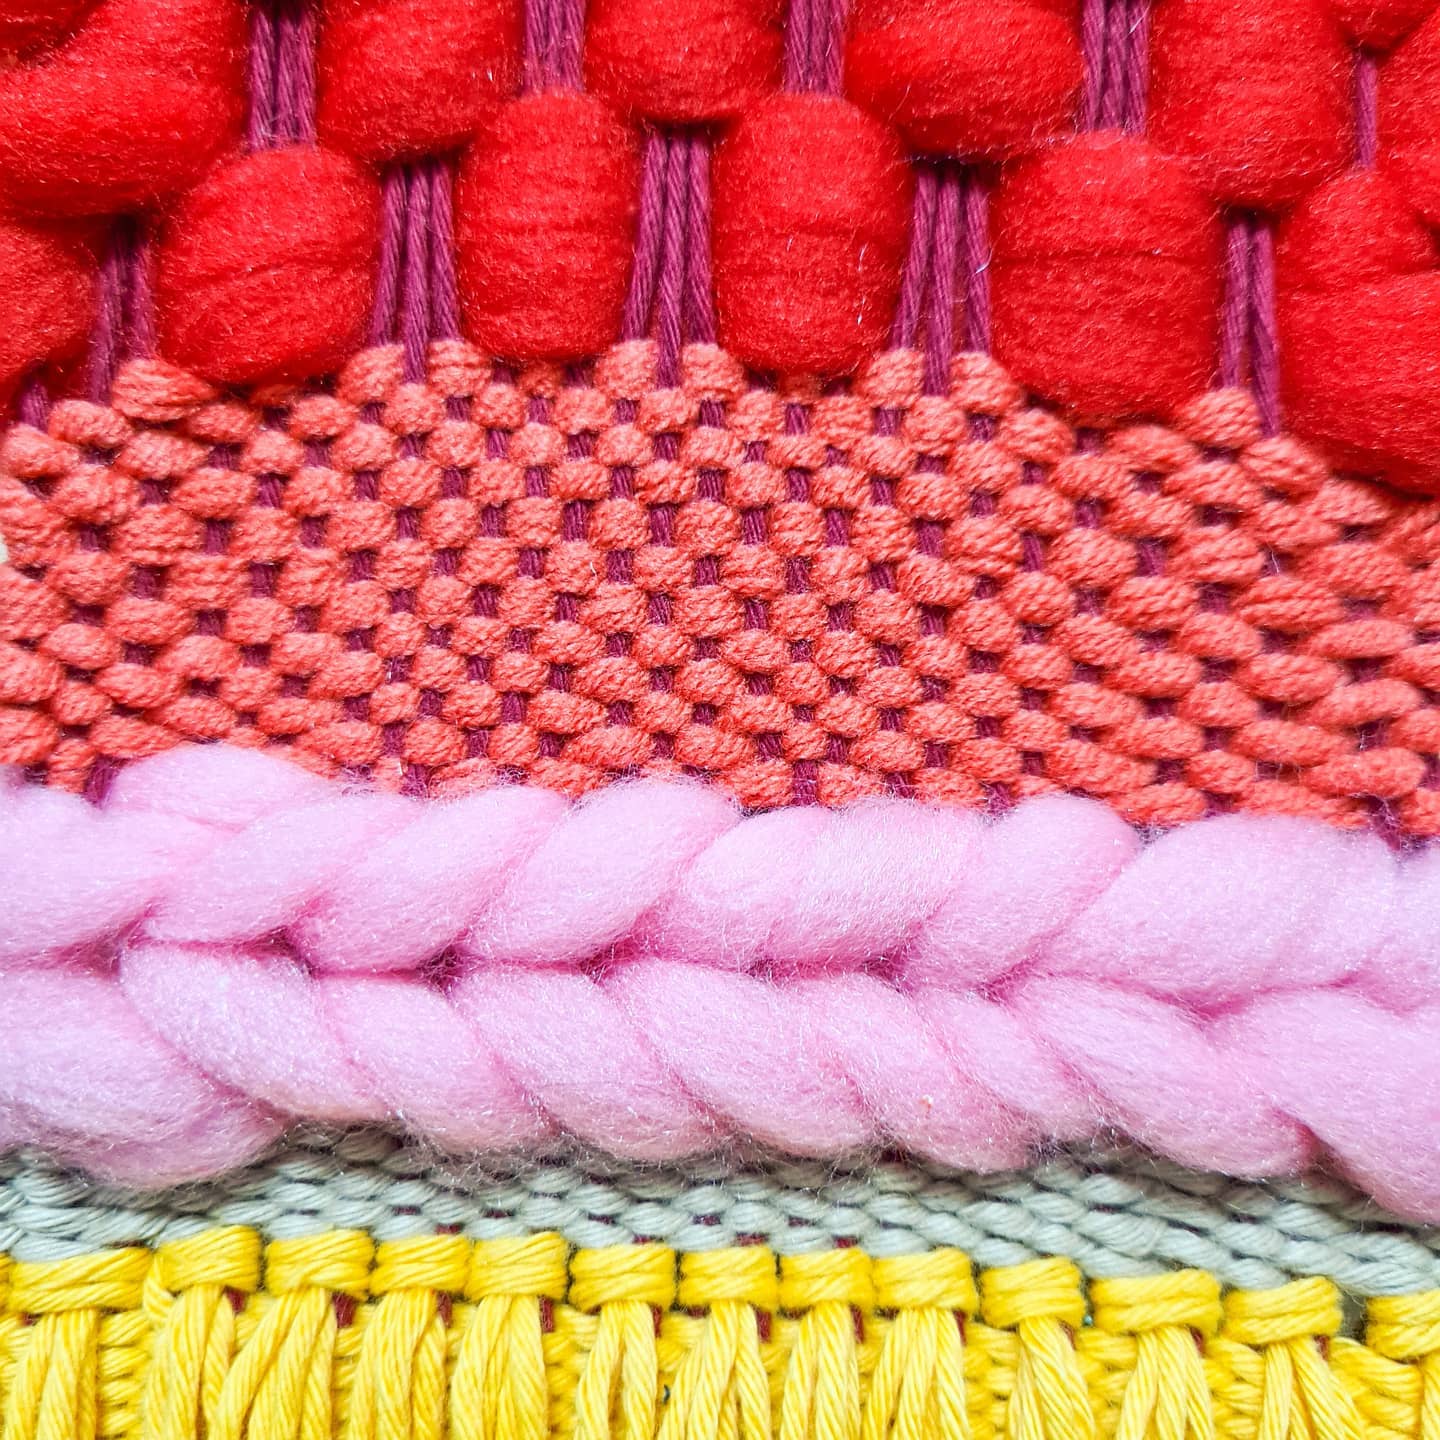
THE RYA KNOTS
The Rya Knots help add a tassel section to your project for more texture. It's important to add this on top of a plain weave to secure the row in place.
KEY STEPS:
- Cut your yarns and get a number of strands to use. You can use two (2) strands for practice.
- Hold the strands and fold them in half so you can find the middle.
- Take the middle of the strands and place it on top of your two
(2) warp threads. - One by one, place each of the left and right tails of the strands in the middle of the warp threads from underneath.
- Hold them together, then pull downwards.
CAN I USE ANY YARN FOR RYA KNOTS?
Yes! Explore different yarn weights because it can create a tassel or a nice texture, who knows! You can use more than two (2) strands to make your tassels thicker and trim the ends to the length that you like.
THE SOUMAK
Soumak is a special technique that adds a braided section to your piece and also serves as a nice border or divide for texture. Explore using different yarns because they can create different textures and looks too!
KEY STEPS:
- Wrap the yarn around your first two (2) warp threads. Leave a short tail on top as you pull the rest of your yarn underneath.
- Using the long end of your yarn, wrap it around the next pair of warp threads, right side going left, coming from underneath. This should produce a slanting line.
- Repeat this step to the next pair of threads, until you reach the end of the row.
- After completing the row, make two (2) more wraps so that the last pair of the row will have three (3) wraps in total.
- For your next row, wrap your yarn around the pair of warp threads the opposite way--coming from the left side going right.
- With every wraps you make, you're creating another row of slanting lines opposite to your first row.
I'M DONE, WHAT'S NEXT?
To clearly see the visuals of the soumak technique, you can control the tension when pulling your yarn so you can create equal sizes for all the slanting lines.
OFF THE LOOM
It's time to take our weave off the loom. We're almost done!
KEY STEPS
- Start by removing the Sword or Dowel and the cardboard that we placed at the bottom (feel free to lift up your Rya Knots if needed)
- Cut off the knots/loops on each nail one-by-one. Tie two (2) knots to secure the weaves.
CLEANING THE ENDS
We're done weaving so it's time to clean the tails we made at the back. Different yarns require different methods but feel free to explore what works best for your project!
- You may use your tapestry needles that come in different sizes for different types of yarns.
- Find the stitches next to the tails and weave them inside to hide.
- Cut the excess yarn.
HANGING ON THE DOWEL
Yay, it's time to finally hang your first woven project! There are tons of ways to hang your project that you will learn along the way. You can even just hang this on your dowel right away (after securing the top stitches, of course). But here's another method that helps your threads cling tighter on the dowel.
KEY STEPS
- Hold 2-3 loops of your remaining top warp threads.
- Open them together to form a single loop.
- Insert both of your pointing fingers inside and twist.
- Hold both loops created together and insert the end of the dowel inside.
Yay, you just finished making your first woven wall hanging!
Below are some more resources for your learning (tap the titles for links):
- WEAVING SUPPLIES - You may purchase additional dowels, warping yarns, combs, and more through the website! If you also see making bigger projects in the future, you might want to invest to bigger looms or have something custom-made to your preferred size (just send me a dm on Instagram!)
- FIBER PACKS - If you're looking to try out different yarn textures but wouldn't want to spend a lot on purchasing yarns right away, you can get the weaving fiber pack I have here in the webshop! It comes in curated colors and textures so you can sample a yarn before purchasing them.
- ADVANCED LESSONS: I'm producing an online video courses for beginners! The first one will focus on more flat designs & more techniques just by using Plain or Tabby Weave. It's set to launch early February so I hope you look forward to that!
- SAMPLE PROJECTS - Check out the projects made by your fellow Filipino modern weavers! If you'd like to be featured, just use the hashtag #ModernWeavingPH so I can also post yours there!
- JOIN THE COMMUNITY - We host some online (for now!) gatherings once in a while so join the community to be updated and meet fellow weavers!
IMPORTANT: If you enjoyed the workshop or any of my online guides, please show your support by honoring my copyright over my creative work. If you made a project out of the lessons and patterns you learned and would like to sell it, you're welcome to do so (because you made it!) and I would love to help you share it! However, I would very much appreciate if you can send my way someone interested to learn this as well, instead of sharing them this guide. Thank you so much!
join the upcoming scheduled workshops
-
2024 Summer Workshops
Spend a meaningful back-to-back weekend learning something new with The Art of...
-
Weaving Workshops
Weaving is one of the oldest methods of fabric production and celebrated...