Showing posts with label Blogging Tips and Tricks. Show all posts

8 Tips to Help Your Blogging Blast Off

I've been getting a lesson ready for ACFW's stay-at-home conference--it's on blogging and I've had so much fun working on it! I've been doing some digging, asking questions on my agent's loop, and relishing this dive back into a topic I love.

Here's a nugget from my digging...


8 Tips to Help Your Blogging Blast Off:


1. Design impacting blog posts that someone can read in 60 seconds or less.

2. Use paragraph headlines on longer posts so a person can skip / scan to relevant info.

3. Tell stories from your personal life. Make a point.

4. Choose the perfect picture that goes along with your writing.

5. Don't let perfectionism paralyze you from publishing. Nobody's perfect.

6. Even the best bloggers run out of ideas. The difference? They don't quit.

7. Turn your blog post into a podcast, video, slideshow, infographic, etc. "Recycle" via other technologies.

8. Don't neglect social media platforms. Get your blog post in front of as many eyes as possible.

Source: Infographic courtesy of Sugar Pine Realty

The At Home Writer's Conference is September 25 - 27 and the class line-up is a good one! We'd love for you to join us!

So tell me, what would you add to this list?

How to Use Labels to Make Blog Navigation Tabs

Blogging Tips and Tricks at Ordinary Lives

Organization keeps your archives available
instead of being lost in the dust bunnies.

To use labels for you navbar tabs:

  • First, make sure that the layout you’re using supports a navbar. To do this go to Layout (Design in the Old Interface) and see if there's a navbar above or below the header. If there isn't one, look for "Add a Gadget" in the header area. Either of those options will work. 
  • Decide what you want for labels. Normally you can do 6-8. It all depends on the width of your work area.
  • Make sure you have posts labeled with the labels you want to use for your tabs.

Instructions for using labels to make blog tabs for navigation:

Click on the pictures to see them better.
  1. Go to a published post with a label you want to use for a tab.
  2. Click the particular label you want to us.
  3. Copy the url for that label.
  4. Go to your Dashboard (open it in a separate browser window to make it easier) then Layout (Design in the Old Interface).
  5. In the header area, click Add a Gadget.
  6. Select a Link List Gadget.
  7. Paste in the url of that label and then name it.
  8. If you have more tabs you’d like to make, click “Add Link” and repeat steps 2, 3 and 7.
  9. When you’re done, click Save.
  10. On the Layout/Page Elements page (New/Old Interface), make sure the Link List is either above or below the header and click Save.
  11. Check your work.
By using your labels as topics, you can organize your site so it’s functional with info that’s easily accessible all the time. Careful use of labels will save your sanity. Really. I’m a co-owner of a site where the labels are totally out of control. There’s no hope of organization nor or having the archives accessible, which is really too bad.

Another idea for labels is to use them for buttons/links in the sidebar like I’ve done at the Book Loft.  The buttons allow for easy searching, with our readers in mind—they help us become a resource, something you want to be.

Here are instructions on how to label your posts, in bulk on your Dashboard.
Labeling posts can be done from your Dashboard, either the Updated or Old Interface, but if you want to remove labels, it's easier to move back to the Old Interface of the Dashboard and do it from there.

Making the Most of Blog Memes

Blogging Tips and Tricks at Ordinary Lives

Meme, rhymes with cream. It's a collection of like-minded posts, all linked together in one location so others can go from site-to-site visiting. Kind of like a church potluck or, more accurately, a progressive dinner. Often the name will give you a pretty good idea of what the meme is about.

General rules for participating in a meme:
  • Find and read the intro post that gives specifics for that meme. Generally, the meme buttons link to that important post.
  • Check out a few others posts to ensure you get the gist of things.
  • When you link your site using the linky gadget, be SURE to use the specific link to that particular post, not just to your blog in general. (So, when I want to join a meme, I click on the post title and use the url it brings up. It will look something like this: http://www.pattywysong.com/2011/05/2-z-4u-me.html and will take you to only that one post.)
  • When you participate in a meme, go around and visit others, leaving comments. You don't have to visit everyone, but the more the merrier.
Benefits of joining a meme:
  • A great post starter for you.
  • They're often easy posts to write.
  • They can be creativity boosters and help you think outside the box.
  • You meet new friends and widen your circle.
  • If you join fairly consistently and interact with others, your site will gradual grow.
  • Often the traffic to your blog will increase.
  • If you usually only post occasionally the more frequent posting translates into growth.
Some hints for getting the most from the meme:
  • Arrive early! The sooner you get your post linked with the others, the more hits and comments you'll likely garner. If you link up late, you could easily miss most, if not all of the visitors.
  • Visit those linking up near you. At least a few before and a few after, then any that catch your attention.
  • Stop by late in the day or even the next day and visit those on the end of the list. They appreciate your comment even more. ;-)
  • Reply to those commenting. Some reply in the comments section, others email a reply and a 'thank you for visiting'. Do what works for you.
  • Remember, it's like a progressive dinner. Visit the other participants and leave comments. I know, I said this earlier. It's important. Fly by linking (linking with a meme without interacting with others) isn't appreciated and can easily earn you black marks instead of brownie points. You want brownie points.

Good memes are abundant, but here's a few favorites:
    Ordinary Lives. From a 2 z 4 u & me
  • a2z - Yes, it's one that's hosted here, but it's fun. And easy. ;-) A weekly alphabet game. Post ANYthing about the letter we're on--a picture of something that starts with that letter, a list, an article, ANYthing. It's been a terrific post starter and creativity booster.
  • Monday Manna - hosted by Joanne and Yvonne. They post a verse on Thursday and you post your thought on that verse and link up on Monday. A great way to meditate on Scripture.
  • Fiction Friday - a traveling meme hosted on different blogs and currently run by Sara. Each Friday participants post their own, original fiction on their blogs and then link up. For posting info and to see who's hosting that week, check out the Fiction Friday Facebook page.
  • Word Filled Wednesday -This is a fast, yet meaningful post in my opinion. You select a picture, put a verse on it (I use Picasa or Paint.net) and post it on your blog. You can write about the verse if you wish--as little or much as you like. Here's my WFW posts here if you want to see it in action.
  • Thankful Thursday - This is one I've never participated in but is an old faithful and well-loved by many. Each Thursday write out things you're thankful for. What a great way to stay grateful for big things and small things too.


 There you have it. Probably more than you wanted to know about memes, rhymes with creams.

So tell me, what memes do you enjoy the most?
Confused? Let me know and I'll clarify for you.  =)

How to Best Use Blog Labels

Blogging Tips and Tricks at Ordinary Lives

Blog labels are tools. In my blogging arsenal, they aren't optional. They're necessary and even vital. But why?

Labels are used for organizing.

Not an organizer? Try this one:
Labels help make your blog posts available for reading, long after they were first published, giving them more mileage instead of gathering dust in your archives.
Some things to remember about blog labels:
  • Blog labels are not just key words mentioned in your post.
  • Another way to think of labels: it's your blog's filing system. Just like you want your filing cabinet organized so you can find things easily, you want your posts filed so they're easily accessible. Or how about thinking of labels as storage boxes? If they're labeled well, it's easy to find what you're looking for. ;-)  You get the idea...
  • You don't want 100 different labels. I've heard no more than 25 labels, which makes sense, even if it can be hard impossible to do. Limit yourself to some well chosen labels.
  • Choose your labels based on the things you blog about. Think TOPICS when you label your posts. A side benefit will be that it helps you find a focus to your blog, if you don't know it already.
  • Labels, done correctly, will enable your readers to click on a label they see and find more posts on that topic, which blows the dust off your archives and gets more mileage from your blog articles.

Here's a quick and easy way to add labels to your posts:

  • Go to your Dashboard. 
  •  Click to Edit Posts.
  • Check the box next to the post that you'd like to add a label to.
  • Under the Search box, click the drop down menu for Label Actions. That will give you a list of all the labels you currently have published on your blog.
  • Click the label you'd like applied to that post.
You can only add one label at a time, but if there are multiple posts you'd like to add that label to, simply check the box for each post you want it added to.

To remove labels from posts:
  • Go to your Dashboard. 
  •  Click to Edit Posts.
  • Check the box next to the post that you'd like to remove a label from.
  • Under the Search box, click the drop down menu for Label Actions. At the very bottom of the labels it offers, you'll find "Remove label" followed by a list of labels applied to that post.
  • Click the label you'd like removed from that post.
Once again, you can only remove one label at a time, but you can remove it from multiple posts at the same time by checking the posts that you want it removed from.

Many bloggers have a list of their labels in the sidebar, others of us use our labels in our navbars/linkbars (tabs, above or below the blog header), a great way to display your blog features and main topics. Later I'll tell you how to use your labels in your navbar/linkbar.

To have a label list in your sidebar:
  • Go to your Dashboard.
  • Click Design.
  • There on your Page Elements, in the sidebar area, click Add a Gadget.
  • In the pop up menu list, select Labels.
  • Select how you'd like your labels to appear, and click Save.
  • It will automatically add it to the top of your sidebar area, but you can position it anywhere you'd like by clicking and dragging it.
  • Save your work.

And there you have--why and how to use labels on your blog posts. Later I'll show you how to use them with your linkbar/navbar. =)

How to Put Text on Pictures Using Picasa

Blogging Tips and Tricks at Ordinary Lives

How to put text on a picture (like I do for my memory verses and my Word Filled Wednesday posts) is a question that's come in. My favorite way is to use Paint.net--a free tool that's like Photoshop and you work in layers, giving you tremendous flexibility to move and rearrange and change things long after you've done them. But that's far more than a blog post. I DO have a tutorial on how to use Paint.net and you can order it here for $5. You'll have it in your hands fairly quickly. Email me for it.

Another free tool I use--the one I started with, is Picasa. My sister, the photographer behind SeaLevel 320,Picasa is the one who got me started with Picasa and now I use it as my photo management program. It's wonderful.

To use Picasa:
  • Download Picasa and let it catalog/import your pictures.
  • To view your pictures, look on the left side of the screen. You’ll see your picture files listed there. Click on a file to have it displayed in the central area.
  • You can scroll through those photos using the slide bars/arrow on the right side, just like your Word program.
  • Want to rearrange or organize? Just click, drag and drop the picture into different folders.
To put text on a picture using Picasa:
  • Double click the picture you’d like to put text on.
  • On the left side of the screen, you’ll see a menu. Click Text, it’s in the 3rd row, middle.
  • Select the font you want to try along with font size. All of these things can be tweaked as you’re working on that line of text.
  • To select font color, Click the circle to the right of the T, just below the font size and alignment.
  • Click on the picture and begin typing the line you want added.
  • To move the text, click and drag it to where you’d like it.
  • To set the text on an angle, mouse over the text so the circle with the pointer appears on the right side of the circle. Click and drag that pointer to the angle you want it.
  • Clicking and dragging that pointer on the circle will also allow you to enlarge or shrink the text.
  • Want the text outlined? Go to the menu area on the left and click the circle between the T and the slide bar to select your outlining color.
  • As long as you are working on that particular line of text you can tweak it and change it. Once you start a new line (by clicking outside the text box area on the picture) the only way to go back and change what you’ve done is to use the Clear All button, which is where it can become very frustrating because it clears everything you’ve done since your last save. That’s what pushed me to learn Paint.net. I was tired of losing all the work because something wasn’t lining up right.
Be sure to save your work!!
Here’s how:
  • In the menu area on the left, click Apply. It will apply (stick) your text to the photo.
  • Then click File (upper left hand corner of screen) and select Save As so you can keep an original of your unaltered picture.
  • Name your new file and select the folder you want it stored in.
  • Click Save.
  • Save different variations or save in stages so if you have to clear your work you’ve got something saved with the part you liked.
To lighten the text, like you would for a copyright stamp on a photo:
  • Put the text on the picture.
  • In the menu area, under the color selection circles, there’s a slide bar for Transparency. Click and drag that to the left to fade the text.

There you have it... How to add text to your pictures, using free tools. =) If you're interested in a tutorial on how to use Paint.net, email me.

So tell me, why do you put text on pictures?

Using Pictures - 1000 Words, Free

Blogging Tips and Tricks at Ordinary Lives

Using pictures in my blog posts is something I loooove doing, and something I've requested insisted on for other sites I own or manage.

Why?
  • Because pictures draw people into the post
  • Add interest to the post
  • Everyone loves pictures
  • And pictures are often worth about 1000 words
Besides, even grown ups like picture books! ;-)

Often I'm asked if I take all the pictures I post, and the answer is no,  I don't. Many of the pictures I use for devotionals are from sxc.hu, a great, free photo service for people like us who blog and want pictures to go with our posts. The pictures on the rest of my posts usually are mine--simply because I love taking pictures and using them here is a great way to use them. Before I started snapping so much, though, I used even more pictures from the free photo services.

SXC is a great site that I use a lot. You need to set up a free account and once you do that, then you can download and use. (Click any of the pictures to see them larger.)

Here's how to go about finding and downloading:
  • In the search box, type in a key word you want to search for.
  • Notice in the pink box--those pictures are NOT free. They're advertising for premium pictures on their sister site, iStockphotos. Unless you want to pay for pictures, ignore those.
  • Below the premium pix are the free ones.
  • To see an individual picture, click on it to go to that page. TIP: right click and open that page in it's own tab so you can still have your search page open.

When you find a picture you want to use or download:
  • Click the orange download button. A page will come up with a jumbo picture on it. 
  • Let it come up all the way then right click and Save As.
  • To give credit where credit is due and to make it so the photographers can easily find their pictures with a Google Alert, I save the files on my computer by using the photographer's file name for the picture and the photographer's sxc user name. So, on this example, the file name I use would be "Dahlia beauty by Gronvik".
Some pictures require photographer notification...

When an image says “Standard restrictions apply and ___ (photographer) must be notified when using the photo for any public work.” it means that you may use the photo on your blog, but that you need to use the sxc in-house email/pm system and let the photographer know you’re using it. Be sure to include your url. Usually it’s so they can visit and possibly add it to their portfolio but also to monitor that it’s not being claimed or abused.

Tip: Many times when there’s a photo I see that I want, even if I don’t know what
I’ll use it for, I’ll download the picture right then and tuck it into a folder just
for pictures I’m saving to use later. If I need to notify the photographer when
I use it, I’ll include “Notify” in the file name, followed by the picture name the
photographer gave it and the photographer’s sxc user name which will allow me to
find the picture and photographer easily in sxc when I use the photo.

You do NOT want to upload a picture that size to your blog.
  • It will take f.o.r.e.v.e.r to load on your page
  • It will gobble up the storage room on your site
Before using the picture on your blog, you need to resize it, which will be another post. BUT, if you want that info now, subscribers to my blog can email me at patterly {at}gmail{dot}com and I'll send you a pdf tutorial on how to resize pictures for your blog. I'll send it today so you don't have to wait a few weeks for the rest of this post. ;-)

So, that's where I find pictures to use on my blogs, when I don't use my own, and how I download them. This is only part 1 of this post with a couple more posts on pictures still to come.  

Have a How To post request? Leave a comment or email me!

So tell me, why do you like using (or seeing) pictures on blog posts?

Have you left a caption for this month's caption contest?

How to Increase an Article's Mileage, Pt 1

Blogging Tips and Tricks at Ordinary Lives

Today's tip is all about recycling your posts and increasing their mileage.

Faithwriters is where I got my writing start. When I joined the group I was scared, no that's not true. I was terrified. They welcomed me, encouraged me, nourished me and taught me oh-so many things. They also were part of what gave me the courage to step out of their safety zone and start blogging, which led to everything else I now do.

One of the cool services Faithwriters provides is the Free Articles for reprint section. It's a place where people who need articles for newsletters--online or in print--can go for a selection on many topics. The articles are free to use, they must simply credit the writer and and link to them, as well as to Faithwriters. It's a great service.

As a member of Faithwriters, I put a few articles into the Free Reprints. Okay, 48 to be exact but 2 of them are in twice, in different categories, so they're listed and counted twice. Those 48 articles have been "reprinted" over 4600 times and "printed" over 3500 times. True, they've been there, available for 3 1/2 years, but still, if I hadn't posted free article there those are hits I would've entirely missed. Even if they were only actually used a quarter of those times, it's still more than I would've had.

And you know what? Those 46 articles were things I wrote for either the Faithwriters Weekly Challenge (but that was only a few) and for my blog. That's great mileage!

Granted, I don't know who used them. I don't know where they were used. But over time my Google Alert has kicked back to me several links where one of these articles were used. They've shown up many times in online magazines, ezines, church websites and newsletters, Christian radio newsletter, and it's always a little thrill to find them.

On the business side of writing, these things help build my platform--and once I posted them in Faithwriters Free Reprints, I haven't touched them. LoL. I usually forget all about them until an alert comes in. Articles that are racking up great mileage AND that work for me. Can't argue about that!

Posting articles in the Free Reprints is as easy as entering the Faithwriters Weekly Challenge. Login and click on the link to Post your articles and manage writing.


So tell me, have you posted articles in the Faithwriters Free Articles or a different article service?

I'm celebrating, the blogging class I teach, Clearing the Blog Fog, is 25% off for October's class and there's a bonus tutorial I'm throwing in: How to Use Paint.net, which is the free photo manipulation tool I use to make headers, buttons and banners. Class is October 1 - 31 and it walks your through, step-by-step, setting up, maintaining and customizing your blog.

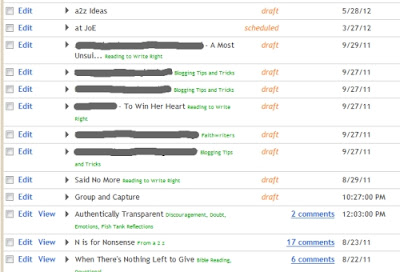
Group and Capture

Blogging Tips and Tricks at Ordinary Lives

Something that I've found that helps increase my productivity is grouping my work. I do my best to not write just one post. Instead, I write at least two, preferably three, while my mind is in that gear. For more about grouping, check out Time Managemet Ala Patty.

The next natural step in that equation for me is to capture my post ideas when they spring up--that means while I'm working on the first post, often another idea comes to mind. Rather than trust my memory (which never works any more!!) and rather than reach for a note card or post-it, now I immediately open a new post window and capture that idea before it flies the coop. Then, as I work, I can seamlessly flow between the posts, adding things as I think about them. Rather than go to CBD or Amazon three separate times, I'll go once and get the info I need for all three posts in one stop. Rather than look for pictures for one post, I'm looking for two or three.

It may take a few minutes longer to get one post done, but when it's done, I usually have another post well on the way, if not two additional posts under way. The extra 10 or 15 minutes I spend capturing ideas and jotting things in the post text box and pasting things in, save me an hour.

I like those margins!

The side benefit of capturing the idea on my dashboard is that I have fewer abandoned ideas floating around in my files. How many times have I started posts, worked on them but then when I had to restart my computer, neglected to bring them back up? Many, many times. And if they're out of sight, they're out of mind. On my dashboard, they're easy to spot and with the 'clippings' I drop in the post, as I think of them, it makes it that much easier to pick it up and finish the article so I can use it. It makes for much less wasted time and effort!

Tip: When I do this, one of the very first things I do is change the posting date! If I know when I want the article to post, I'll plug in that date, otherwise I set the date a month away or whatever the date is where I have other posts in a holding pattern.

I think of my dashboard as a staging area. It's not uncommon to have several projects in the works at any given time, and that gives me room to work on each, without crowding my desk or my brain. It frees me to forget things once they're captured.

Don't tell my friends--but some posts I'm writing directly in the post text box. Something I'm known for warning people away from because Blogger... burps ...every now and then and eats posts. But, if I "write in the box", I have a document open that I can paste my post copy into, for filing and safe keeping.

BUT, not all my post get written directly in the post text box. *shiver* The thought gives me the heebie-jeebies!! Blogger is a wonderful tool, but you need to keep your posts on file as Word documents. Too many things can go wrong online and things can be vaporized instantly. Keep your posts in your own files and keep them indexed.

So tell me, does working on a post spark ideas for other posts for you?

How and Why to Use Google Reader

Blogging Tips and Tricks at Ordinary Lives


Another handy tool that Google offers is Google Reader. (Last month I posted on Google Alerts.) It simplifies keeping track of all the blogs you follow, or want to follow. Google Reader offers you a place you can go to see all your favorite blogs in one place. Kind of like a one-stop shop. No, that's not it. More like a mall. All those stores (blogs) under one roof, letting you browse from one to another. No muss, no fuss. And they keep it up to date for you! In the large picture below, find the "All items (9)" on the left side of the picture. That tells me I have 9 new, unread blog posts in my reader.

This is one of those tools that I love to use, but I don't use as much as I should. On the other hand, Joanne uses it faithfully, and if you know Joanne, you know how faithful she is when it comes to visiting blogs.

Since it's such a useful time saver, let's work through how to use it.
How to access Google Reader:
  • Login to your Google account.
  • On the main Google page, click the drop down arrow for more.
  • From the drop down list, select Reader.

That will take you directly to your Google Reader. It's simply one of the services Google provides in the background, whether you use it or not. You'll see there are already blogs in there--Google put them there each time you clicked the Google Friend connect on a blog.

Adding blogs to your reader:
Following blogs adds them automatically to your Google Reader.
Another way to add a blog to your feed reader is to subscribe to the blog. Many people have a Subscribe option somewhere. Click that and select the "Add to Google" option.

If it makes a difference to you, this will allow you to follow a blog without joining the Friends of that site. Also, sometimes there isn't a Google friend widget, this gives you a way to add their feed to your reader, allowing you to keep up with their blog. 

Now, let's do something with your Google Reader (also known as a feed reader).


The really good news is that there's a way to organize the blogs in your reader.
Here's how to organize your Google reader:
  • First, under "Subscriptions" there on the left side, click the plus or minus nubbin to the left of "Blogs I'm following". You want to see the list of blogs in your reader. 
  • Once that list is showing, click the arrow to the right of one of the blog names. 
  • A drop down list will appear.
  • Click the "New folder" option and type in the name for a folder.
  • Click Okay and that blog will be put into that new folder.
  • Make as many new folders as you'd like.
  • If you change your mind about which folder you'd like a blog in, click the arrow for the drop down menu and check or uncheck the folders of your choice.
And there you have it.
Google Reader can streamline your blog reading and save you time.

And because I'm celebrating, the blogging class I teach, Clearing the Blog Fog, is 25% off for October's class and there's a bonus tutorial I'm throwing in: How to Use Paint.net, which is the free photo manipulation tool I use to make headers, buttons and banners. Class is October 1 - 31 and it walks your through, step-by-step, setting up, maintaining and customizing your blog.

So tell me, is it easier for you to follow blogs on Facebook than it is off of Facebook? 

How to Set Up Google Alerts


Blogging Tips and Tricks at Ordinary Lives

From time to time I'll be posting blogging tips and tricks. Just little things I've learned along the way. There's a quick link to them in the menu above, under the Blogging Stuff tab. ;-) To get us started, here's a question I'm often asked, so I thought I'd post it. It's one of those tools I use, and it can be encouraging! Unless of course the other person or people with your name is into some...nefarious things. LoL

Google Alerts are useful as a writer to find who's mentioning you, who's using one of your articles (Faithwriters has a Free Reprint section, which is really great for writers and those looking for free articles to use in newsletters and such), and someplace you might've submitted an article to and forgotten about (it happens quite easily when you have a memory like mine!). Have a tagline? Set up an alert for that too!

As a reader, Google Alerts are handy if you enter book giveaways--or any giveaways for that matter. If you win, there's a good chance the post and link will land in your inbox so you can claim your prize. And that's always good!  ;-)


Of  course, you can set Google Alerts for anything and everything you want, making it so you don't miss those things you're really interested in--although you might occasionally be a little to the party.

Here's how you set up a Google Alert:
  • Sign in to Google.
  • In the upper left corner click the drop down menu for More.
  • Select Even More.
  • In the the Specialized Search section select Alerts (look for the gold bell).
  • Type your name in the box inside quotation marks
  • Make your selections as far as type, frequency and email addy

That's it! Set up two alerts—with quote marks and without. You can always edit your alerts or delete them. It's a great tool! You can always edit or delete your Alerts by going into the Alerts area of Google and clicking "Manage your alerts".

So tell me, what do you use Google Alerts for?

Time Management ala Patty

Since I get this question fairly often, I thought I'd answer here...
How do you keep up with everything you do?

(Must read this with a frazzled voice!!) First, please understand that I don’t keep up with everything. I really don’t. =( My house is perpetually messy—but with 7 of us still here I settle for that excuse. My kids are to the ages where my mom-job is much less constant hands-on, meaning it’s more supervising. My youngest will be 10 next month and my oldest is 18, so although things are crazy, it’s a different crazy than it used to be. Even the homeschooling is down to routine. I have lesson assignments from when the older kids went through, and I simply recycle them for the younger two. *eye roll*

That said, here's how I juggle the things I do:
Blog commenting. I no longer do a lot of commenting on blogs. While Joanne faithfully uses her Google reader for keeping up, that tool gives me nightmares, so I utilize the email subscriptions people offer. Posts arrive in my inbox, I skim them and if they catch my attention, I stop by and leave a comment. There are a few sites I've resolved to “be present” on and I comment a few times a week. Key word in that sentence: FEW. It's not enough, but I'm gradually getting better again.

Spreadsheets. I have spreadsheets to keep my sanity, and I use them. Religiously. In my master spreadsheet I have 11 tabs. And that's not anything for my WIPs. This set of sheets contain an index of all my writing, broken down into a couple categories for:
Fiction (short stories), Devotionals, and Marriage.
(I index my writing so I have easy access to it and can recycle my posts.) There are tabs for posting schedules of the 4 sites I either own or co-own, and for the online class I teach.

This spreadsheet stays in my tray and I access it several times a day. At least. I also send it to the private yahoo group I created to act as a back-up site because if I lose that sheet, I'm peanut butter.

Aside from that spreadsheet, the thing that helps me the most is how I chunk and group.

Chunks of time work best for me—granted, that chunk of time may be divided into 5 sessions throughout the day as I oversee and direct things here at home, but usually I can string enough bits of time together to create a chunk.

Grouping turned out to be a life saver for me! I write monthly for At the Well, the Internet Cafe, and Jewels of Encouragement, and bi-monthly for The Barn Door. That's a minimum of 5 posts a month, plus any guest posting I might do. I felt like my head was constantly in a noose. Not a warm fuzzy feeling at all. One day, working on an At the Well post, I had an idea for another post for them (they assign the topic each month) so I checked my calendar and saw it would fit for a different month. I took about a day-and-a-half and put together six months of posts for that site. Then I listed the months I had yet to do for this calendar year, jotted down my ideas for those posts and moved on to my next group. By the end of the week I had not only pitched that noose out the window, but I had accomplished a huge amount. Last weekend, rather than putting up one Jewels of Encouragement post, I did two. I would've done more but I had to run out the door to church.

While my mind is focused on a particular site and their unique audience, I do a minimum of two posts at a time, preferably more. Then I can let my mind move on to another area.

The same thing with the non-blog things—I group them together. I'll take a day or two and update lessons or work on the scheduling and interviews at The Book Loft or doing all the little odds and ends at the sites. It helps save my sanity.

Relaxing time is spent sorting pictures, resizing them, adding watermarks and uploading them, or I'll work on new blog designs or hunt for things online. The only TV my family watches are movies and if I've seen the movie, I carry my computer to my chair and work on things I don't need concentration for. Occasionally I crash, doing nothing, but not often.

This is simply what's working for me at the moment.

So tell me, what are some tricks that help save your sanity?
Blog Widget by LinkWithin

  © Blogger template Simple n' Sweet by Ourblogtemplates.com 2009. Design expanded and personalized by PattyWysong.com 2011.

Back to TOP